Integrating Apache CloudStack 4.19 into your VMware vSphere 8 environment
After some trial and error, I managed to get Apache CloudStack 4.19 running with my VMware vSphere 8 environment.
The main lessons I learned installing Apache CloudStack in my vSphere VMware home lab are,
- Build the Apache CloudStack Management Server on the same VM Network as the vCenter Server.
- Use an ESXi host with no running virtual machines. The existing VMware vSphere virtual machines will need to follow a migration procedure for them to run in the Apache CloudStack environment.
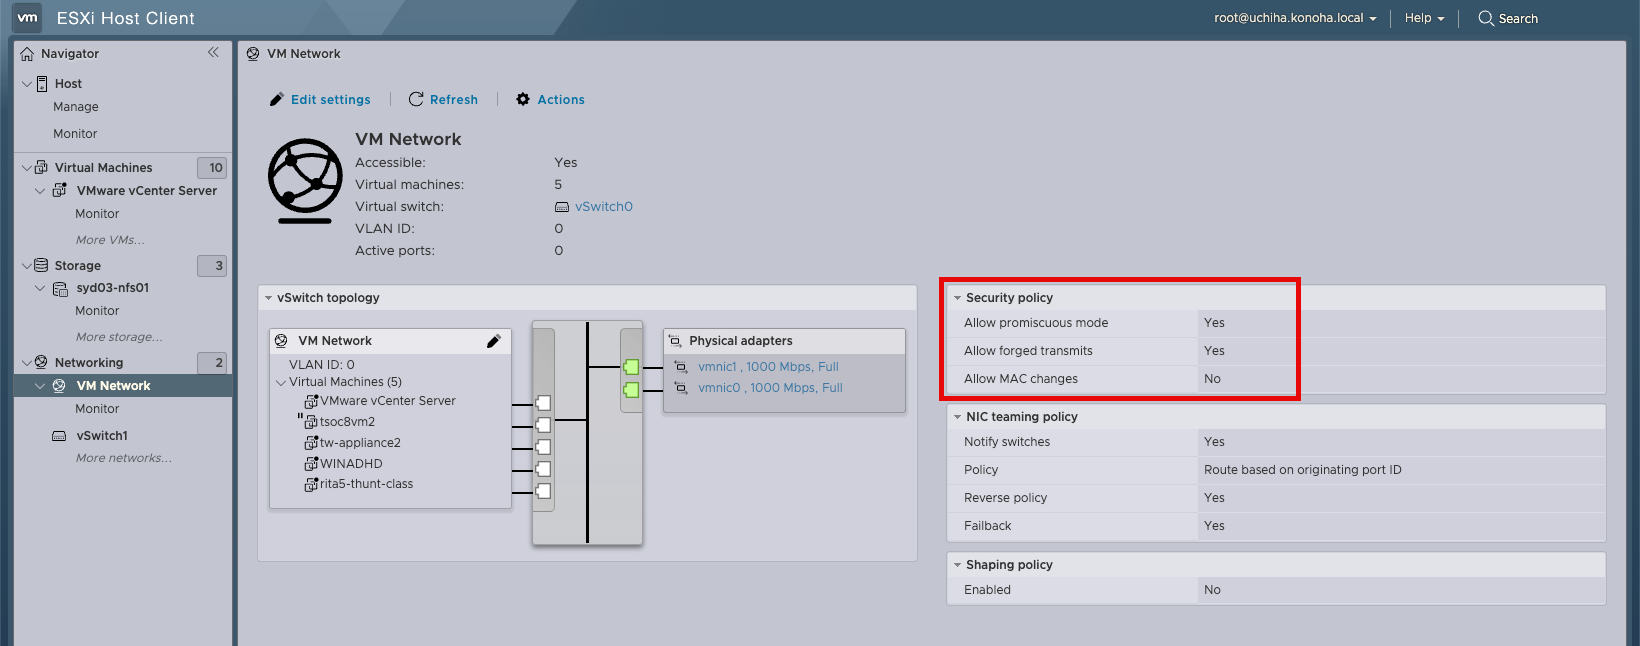
- Ensure the vSwitch has the following security values set to Yes,
* Allow promiscuous mode to Yes
* Allow forged transmits to Yes
Now that is out the way, let's start with the integration work.
Task Duration - 30 min
Step 1
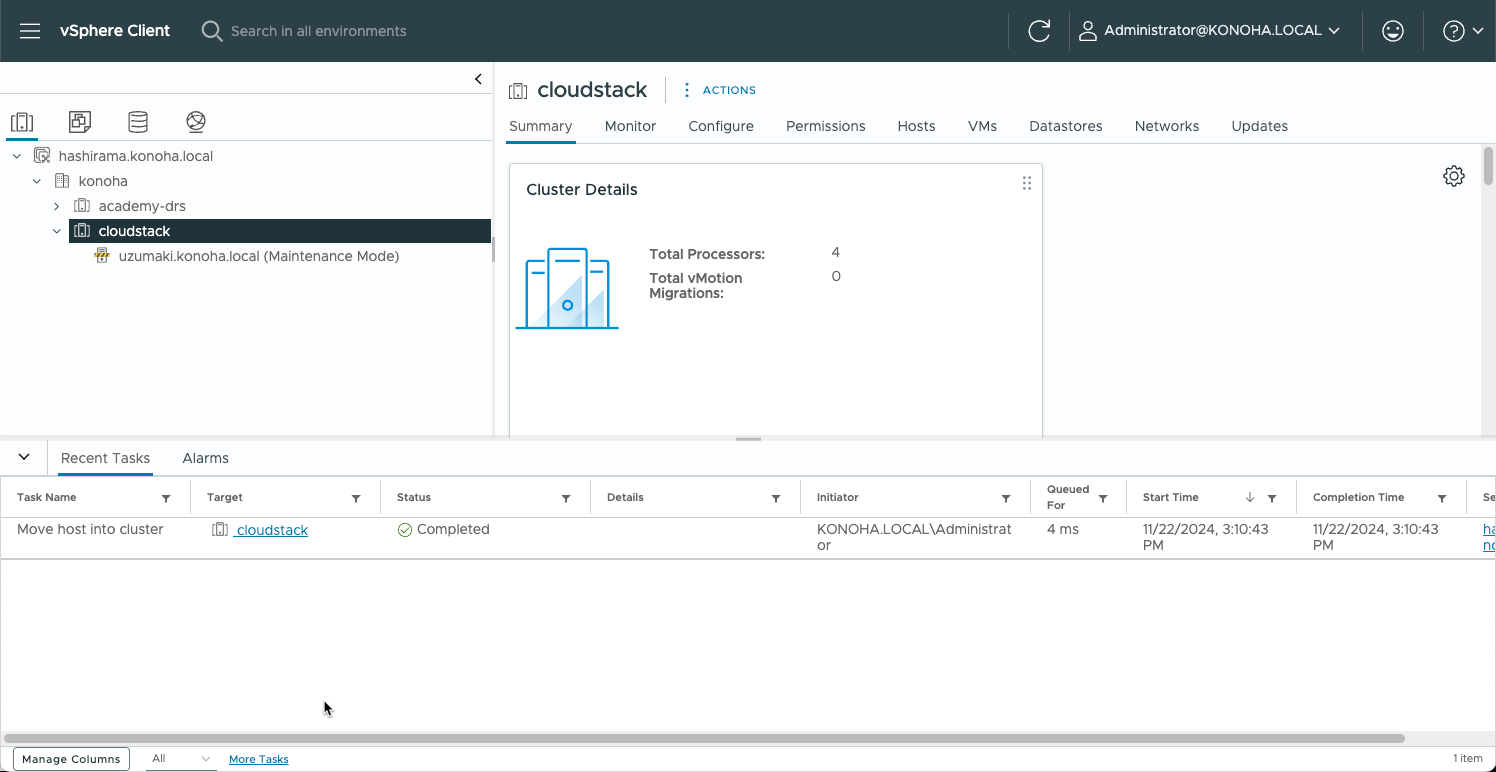
Logon to your vCenter Server and create a basic cluster. In my lab, I created a cluster called cloudstack with no DRS or HA features enabled.

Step 2
Move an empty ESXi host into the cluster.
NOTE: The ESXi host will need to be put into Maintenance Mode before it can be moved around different clusters.
Step 3
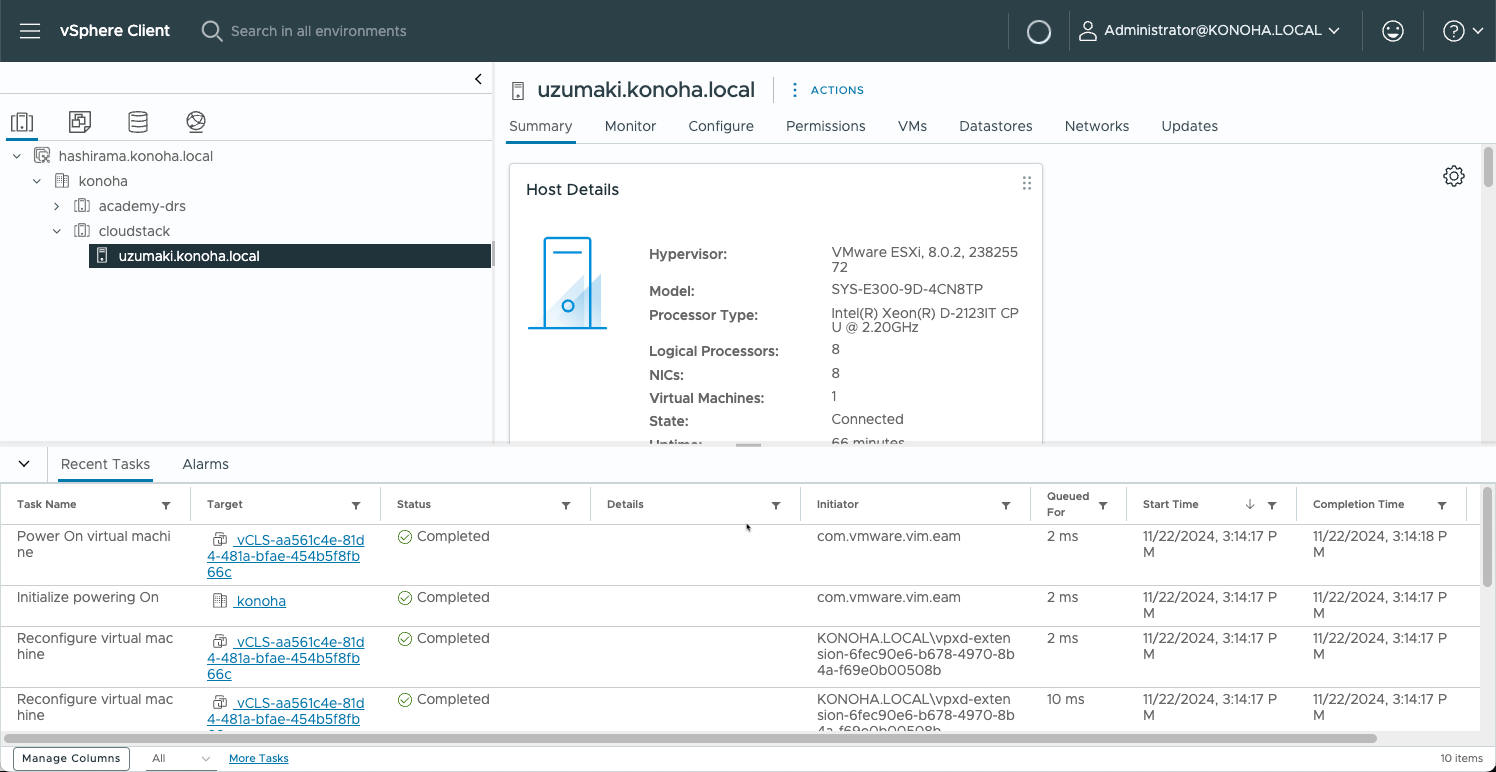
Exit Maintenace Mode on the ESXi host.
Step 4
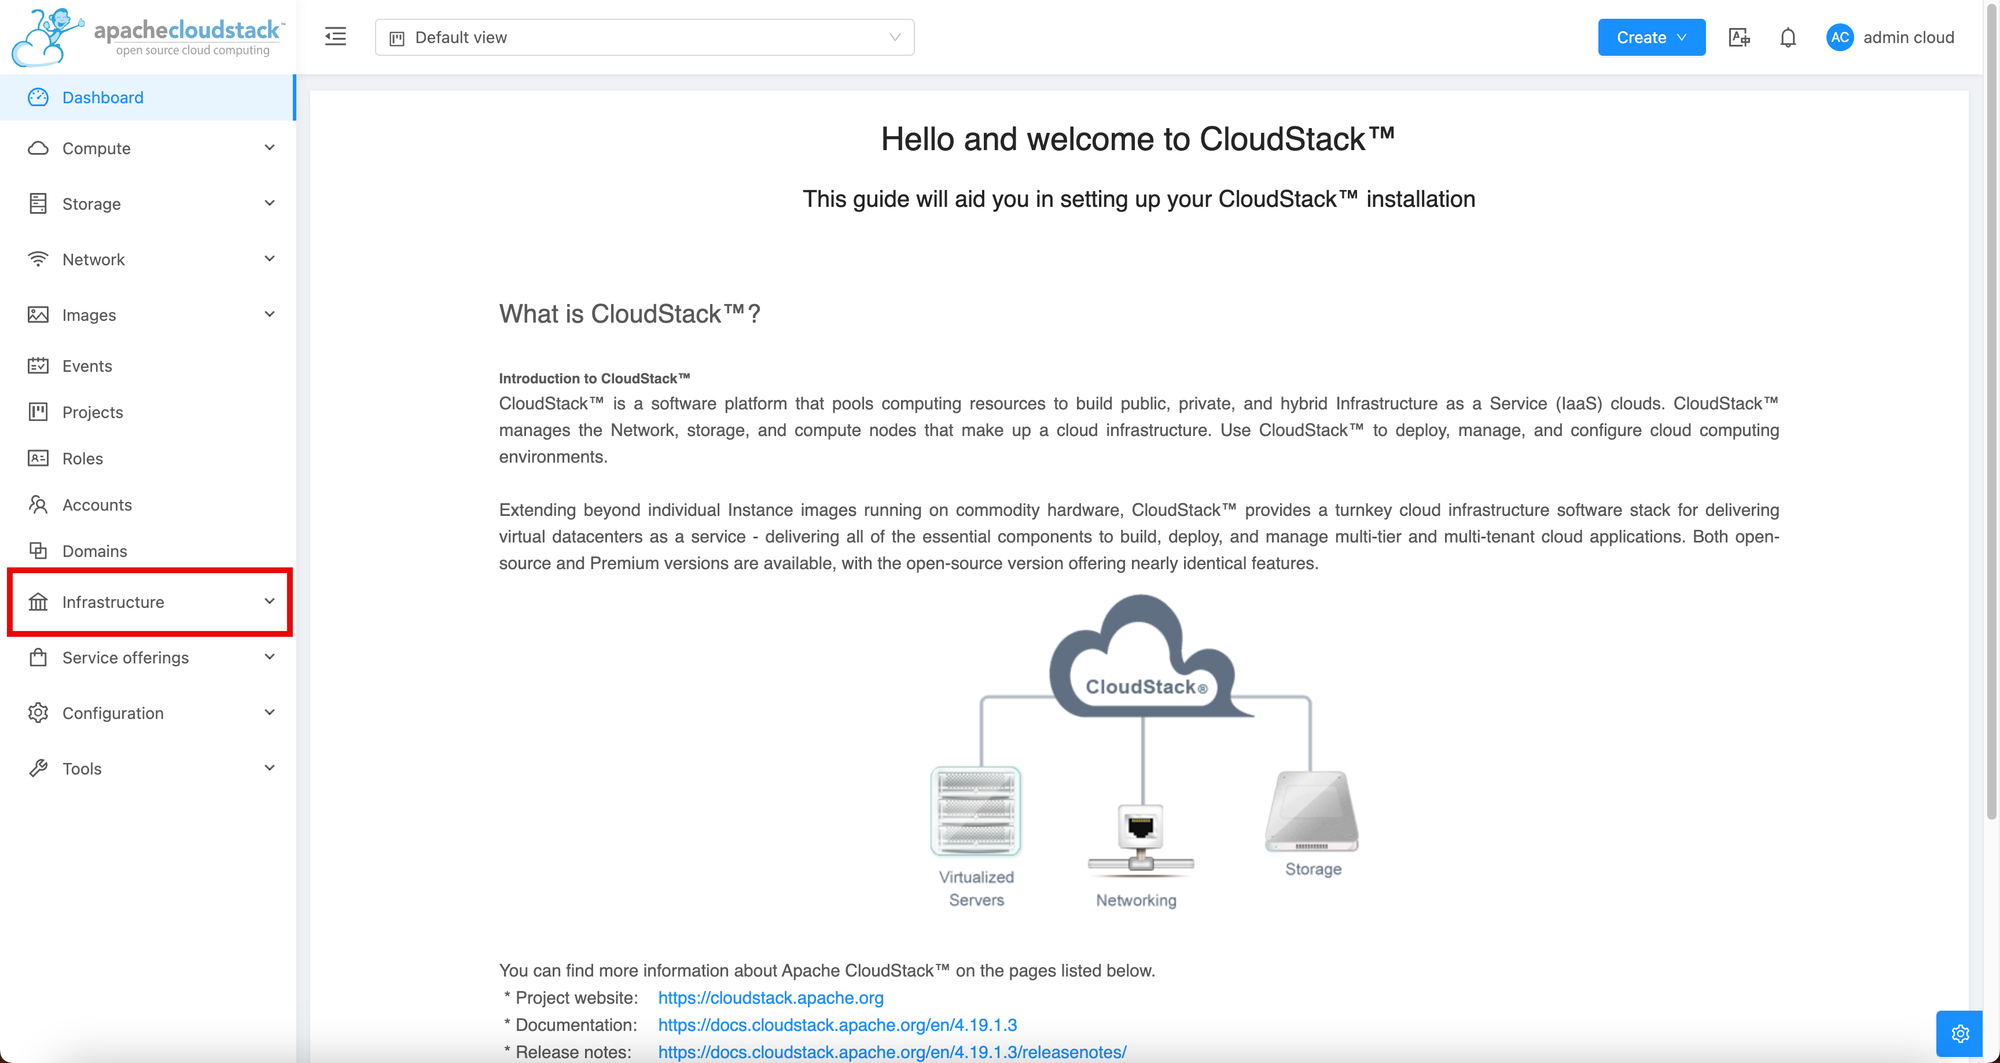
Logon to the Apache CloudStack Management Server.

Step 5
On the CloudStack welcome screen, locate the Infrastructure and click the expand arrow. Then click Zones.
Step 6
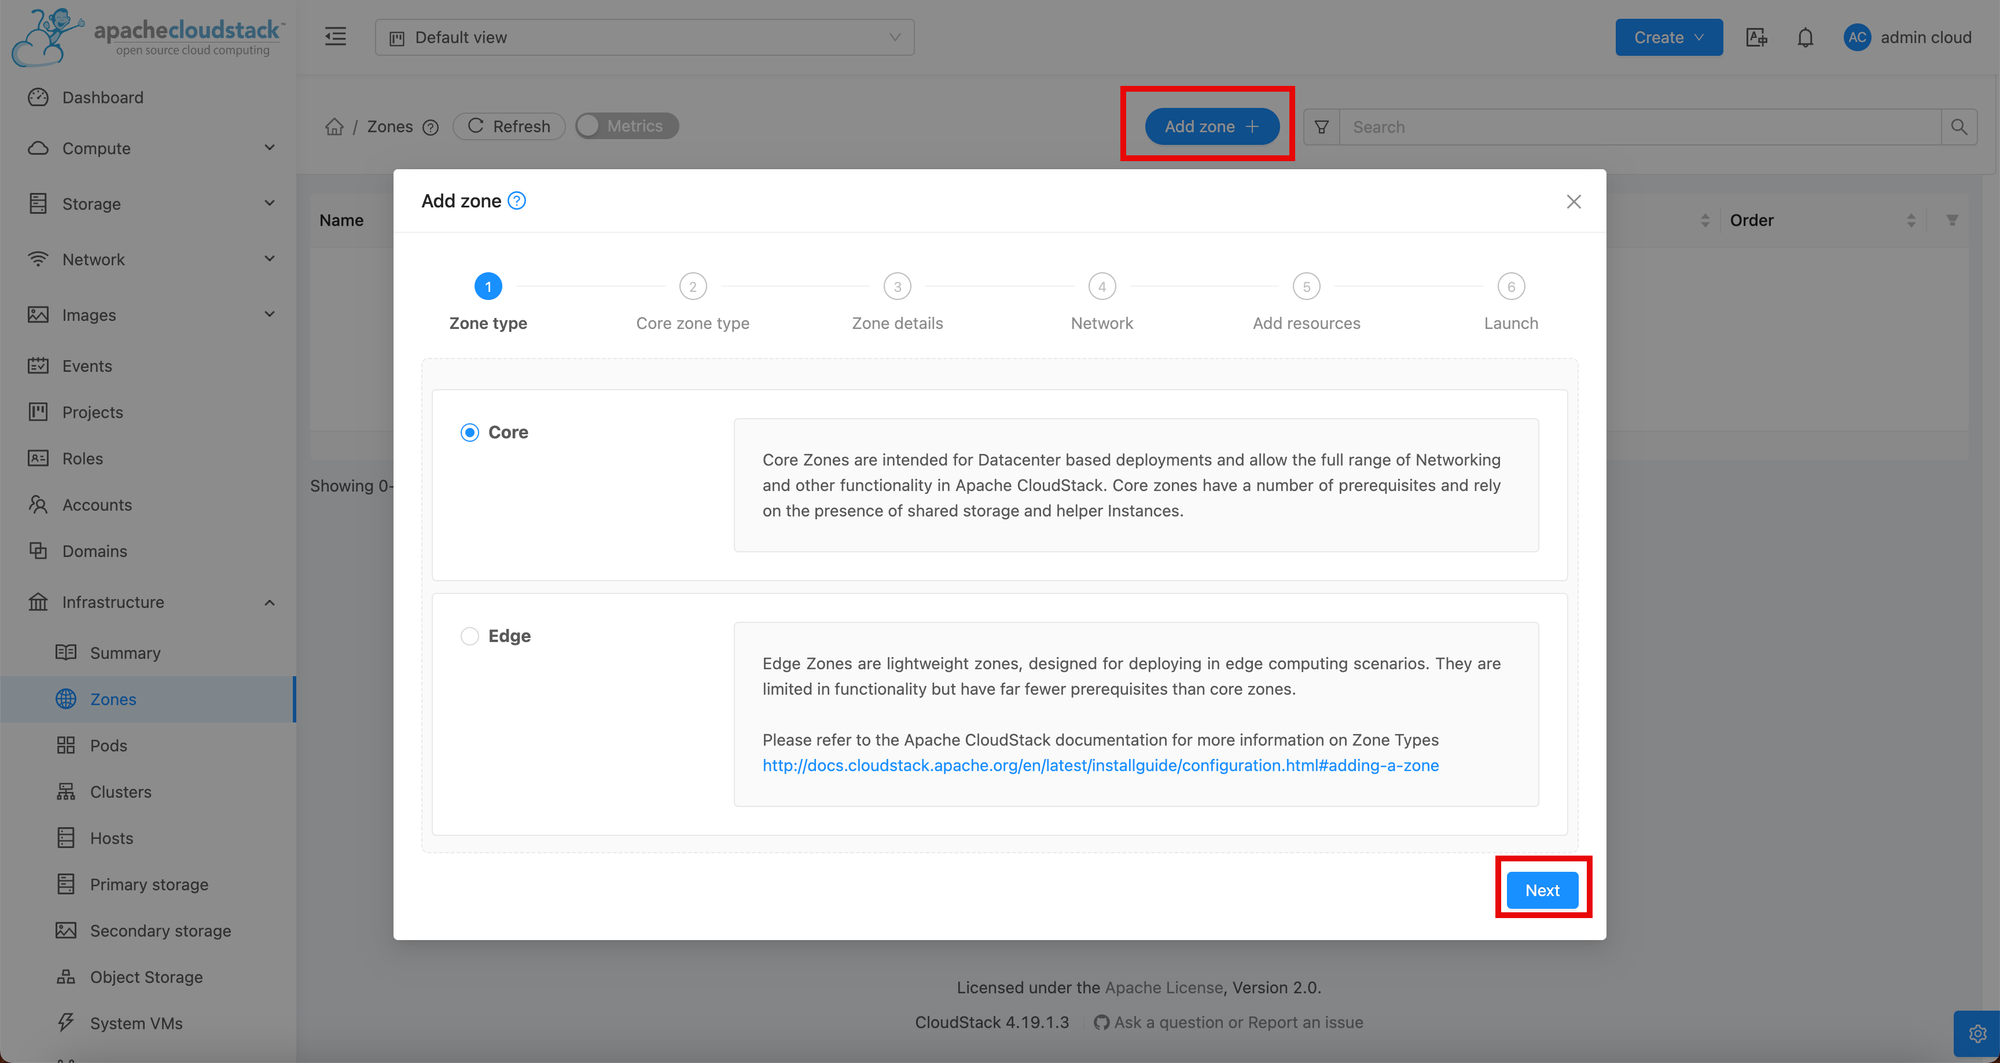
On the Zone menu, click Add zone. Confirm the Zone Type then click Next.
I chose Core for my setup.
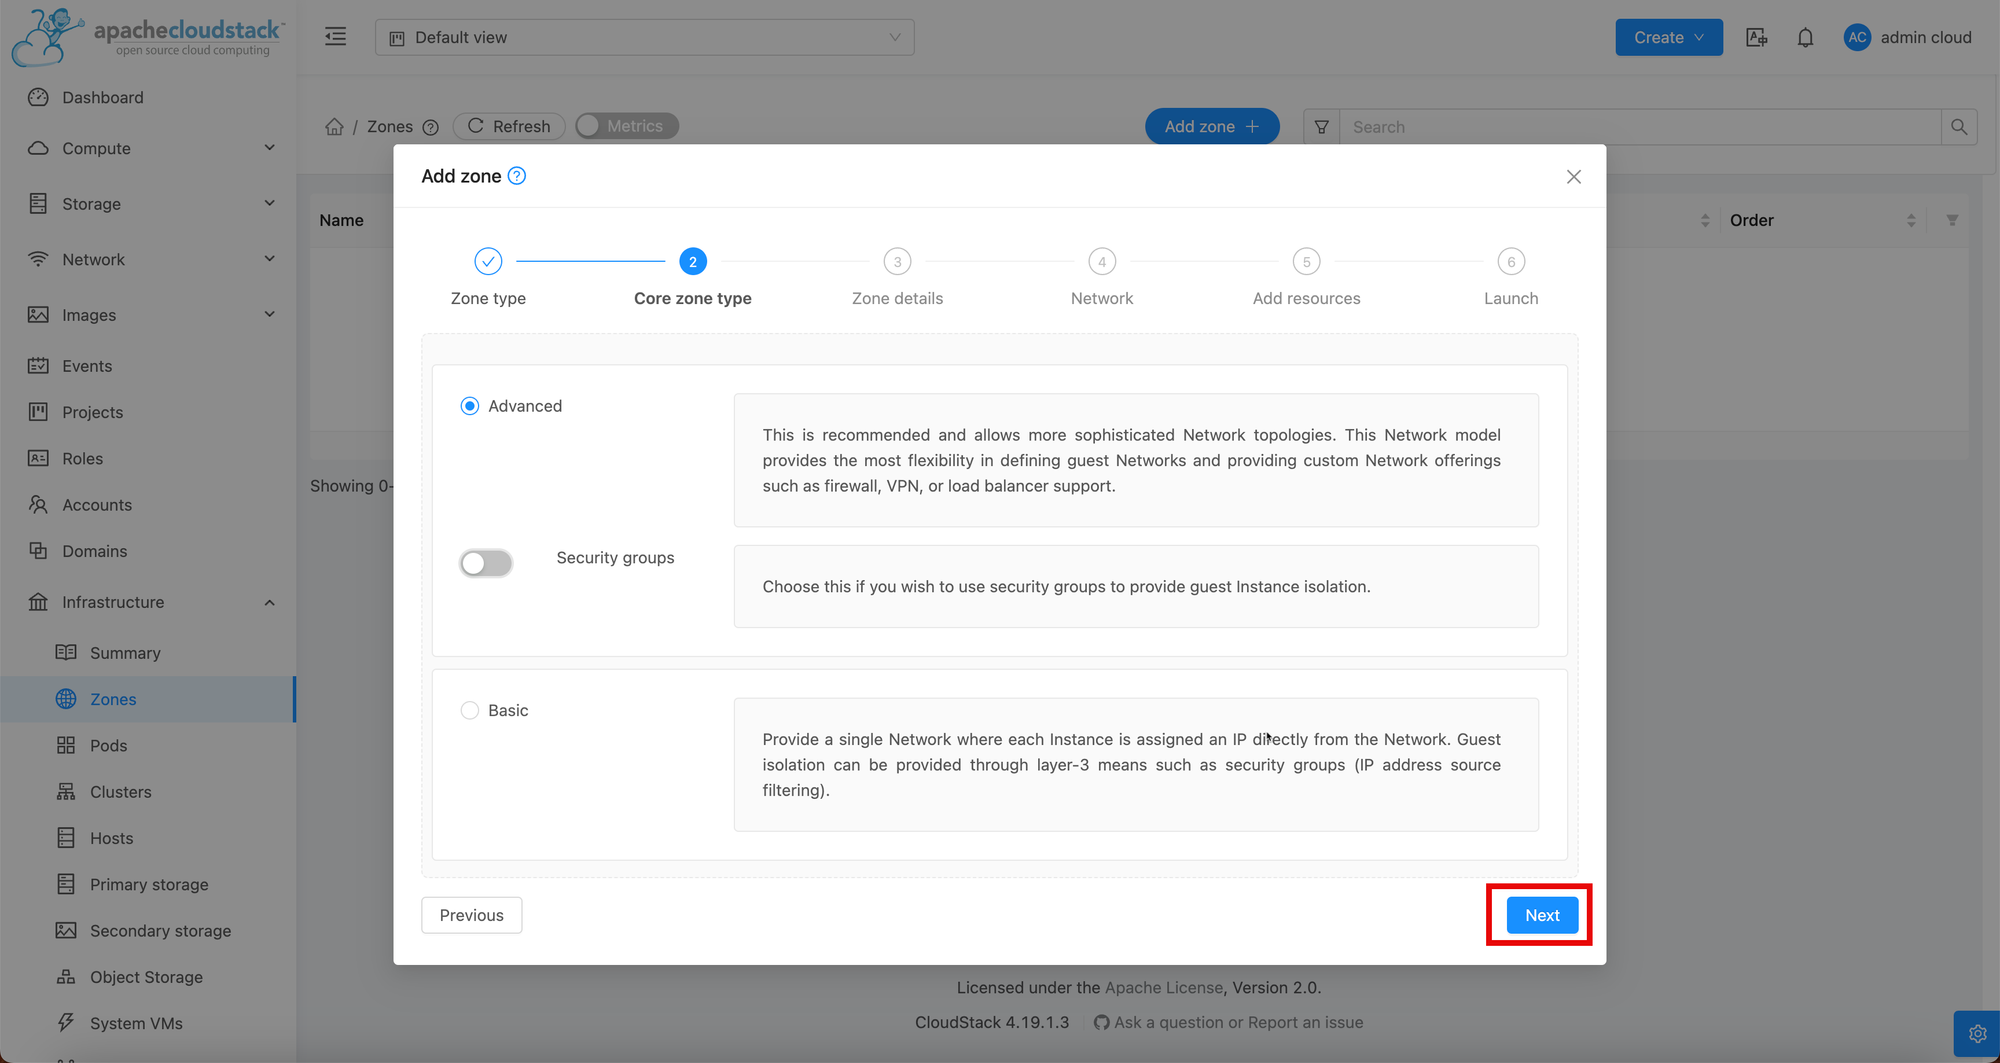
Step 7
On the Core zone type, select Advanced then click Next.
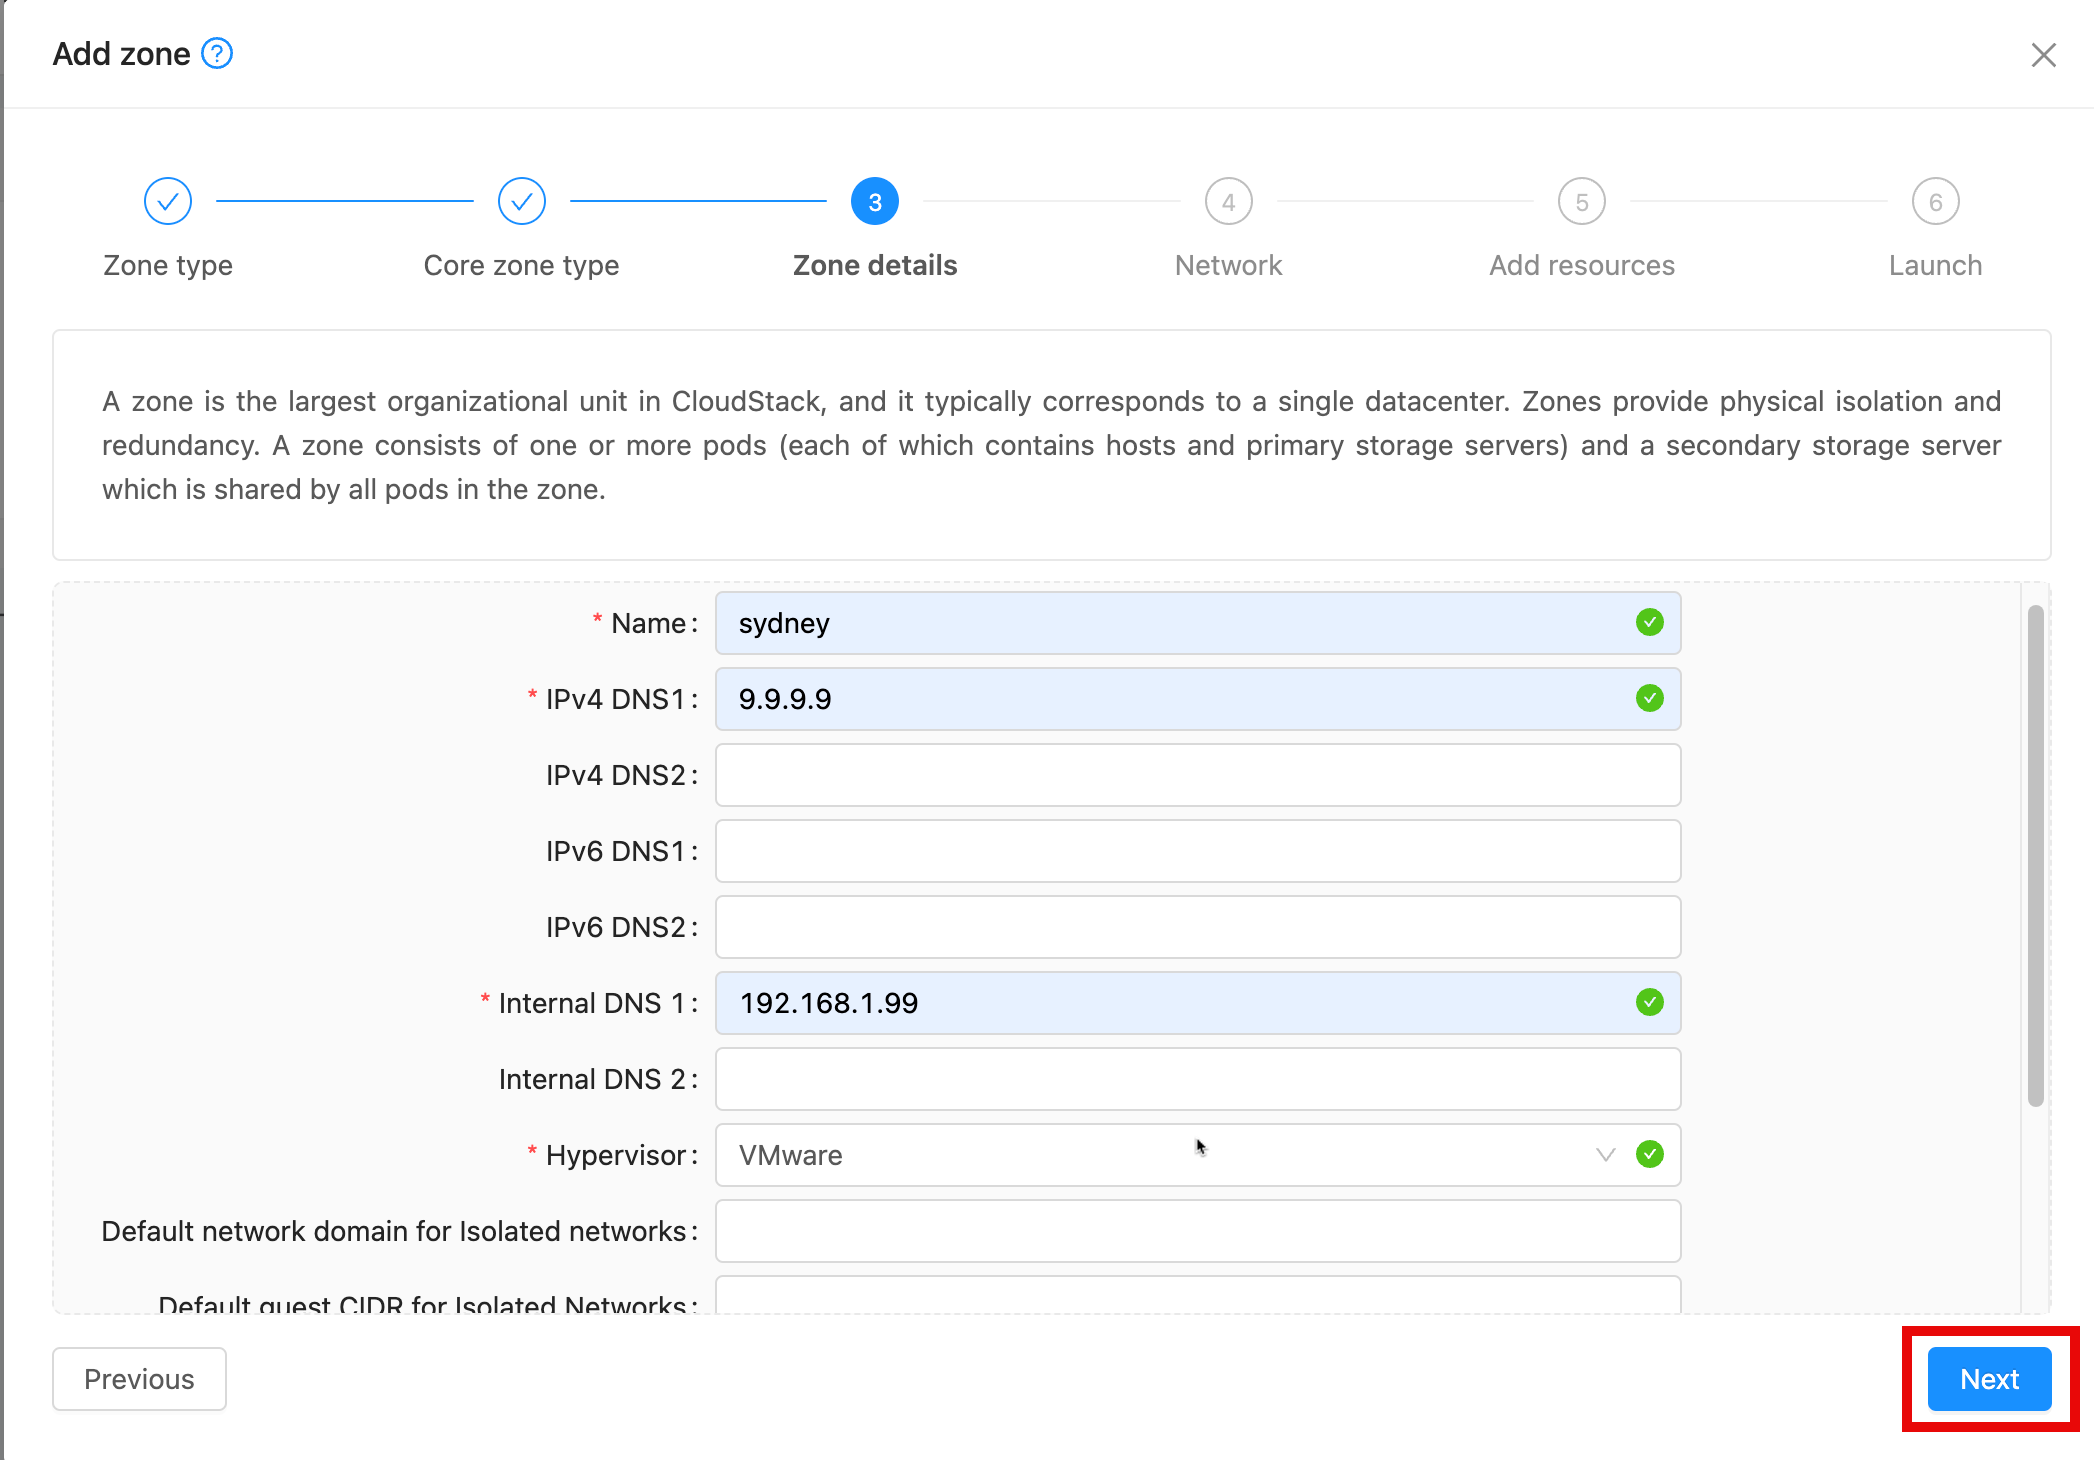
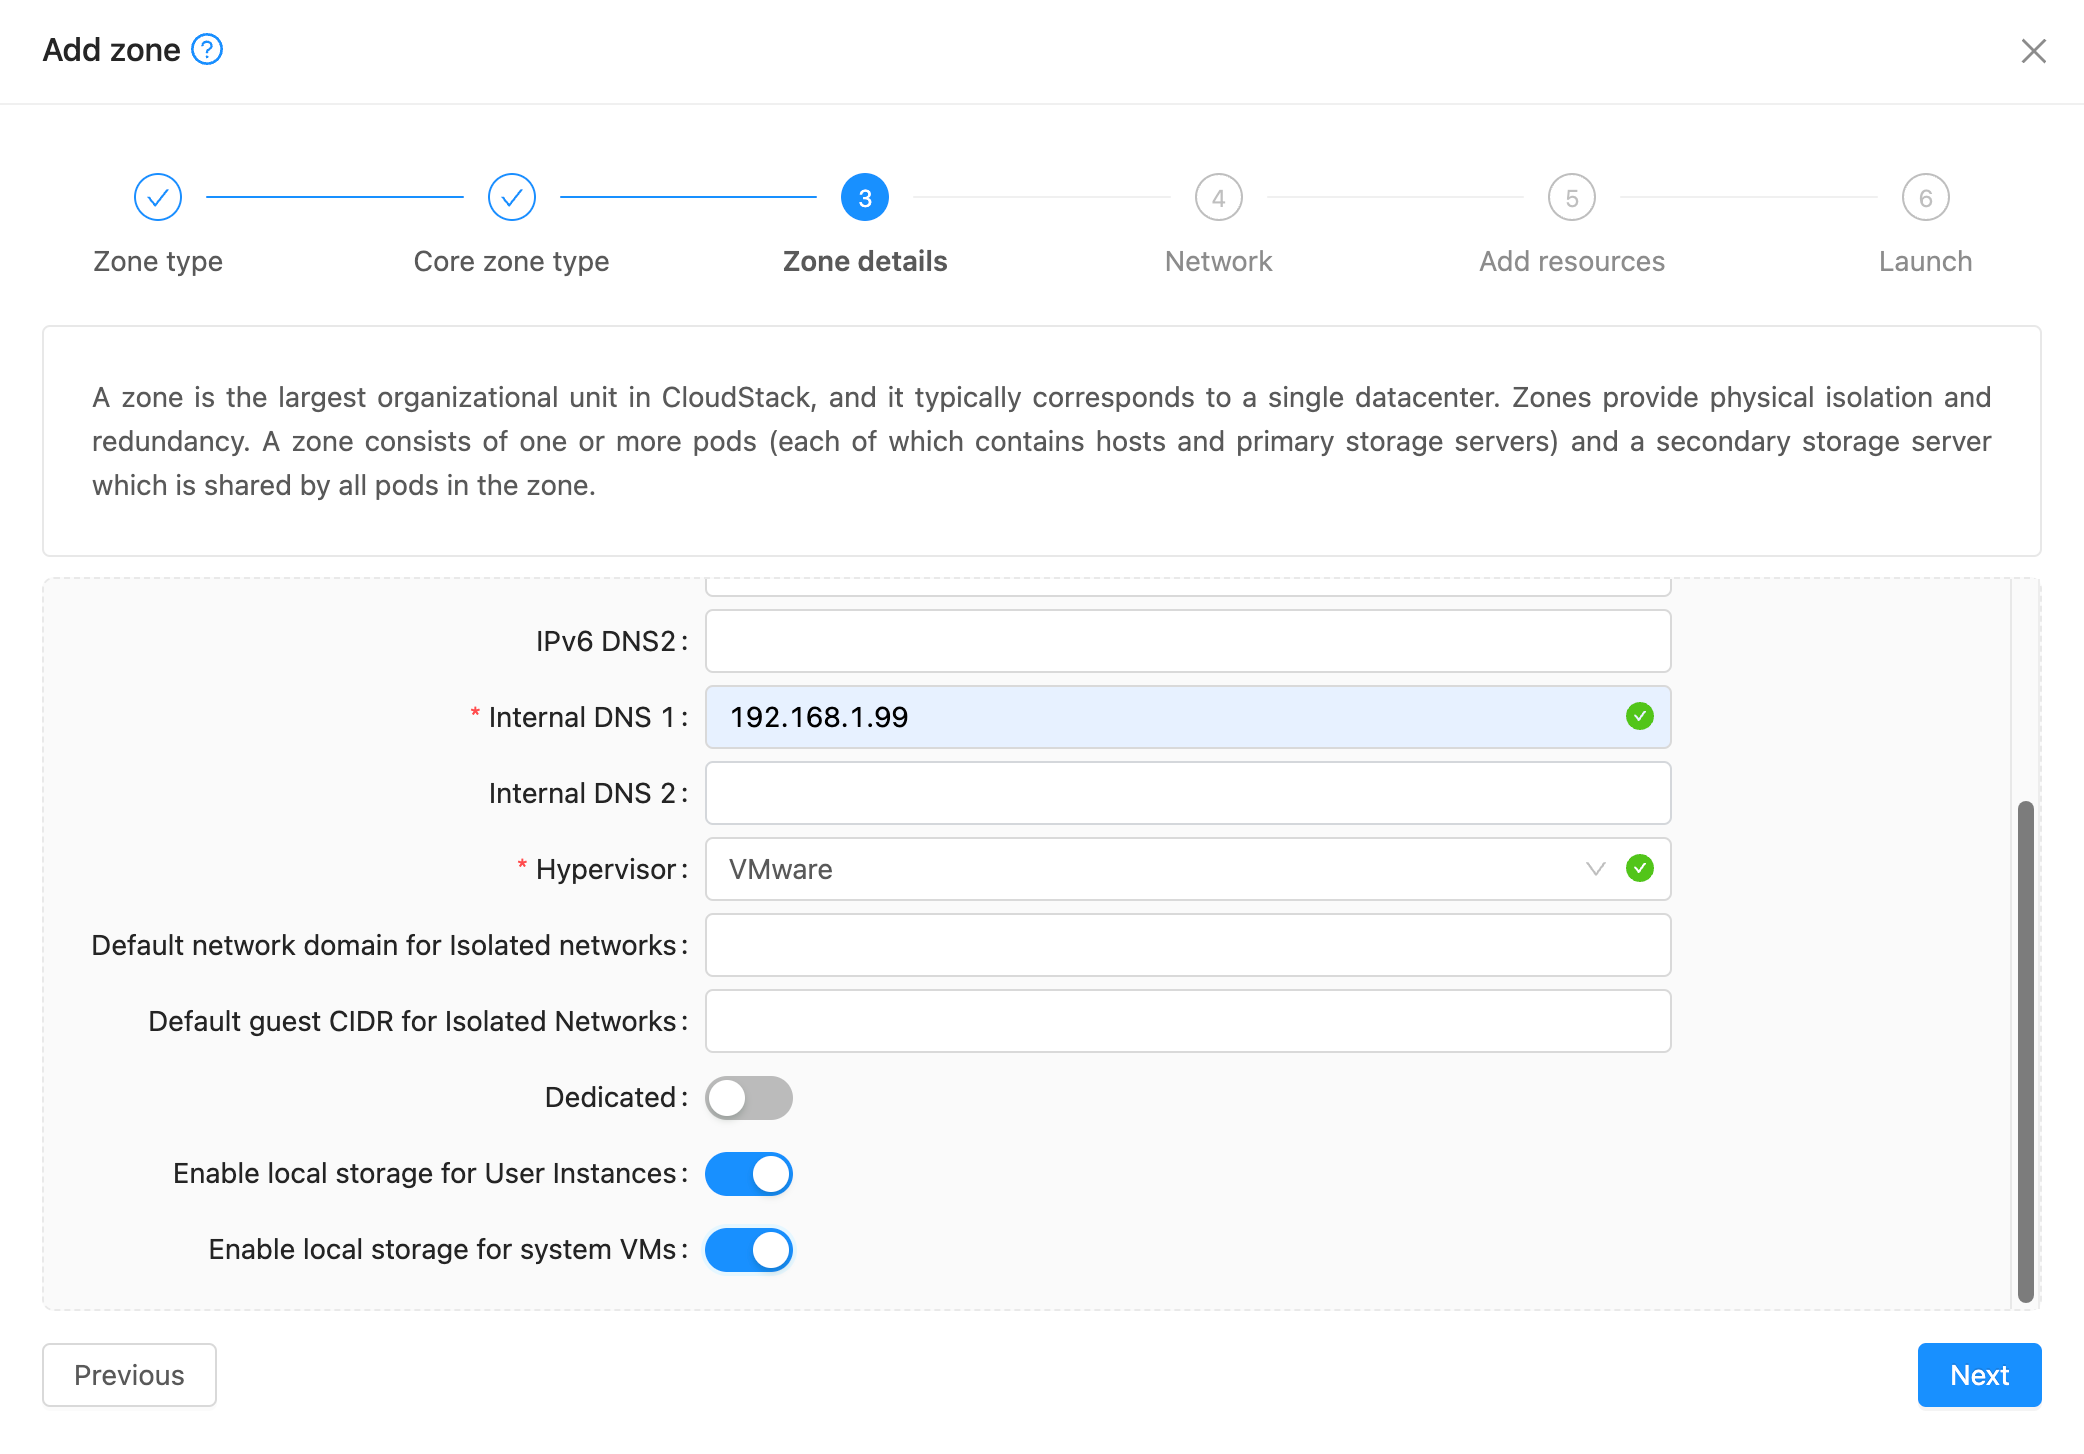
Step 8
On the Zone details form, fill in the fields as required. I used a public DNS from Quad9 and used my lab firewall as the internal DNS server. I also chose VMware as the Hypervisor. After all the values have been filled in, click Next.
Step 9
I am configuring a very basic network setup in my environment using separate VLANs for Management, Public and Guest Networks.
Once you have completed entering the values for your Network click Next.
NOTE: Network setup is quite a big topic to cover in Apache CloudStack. I suggest using the Apache CloudStack Documentation site about networking. Another good reference is looking up blogs from Shape Blue.

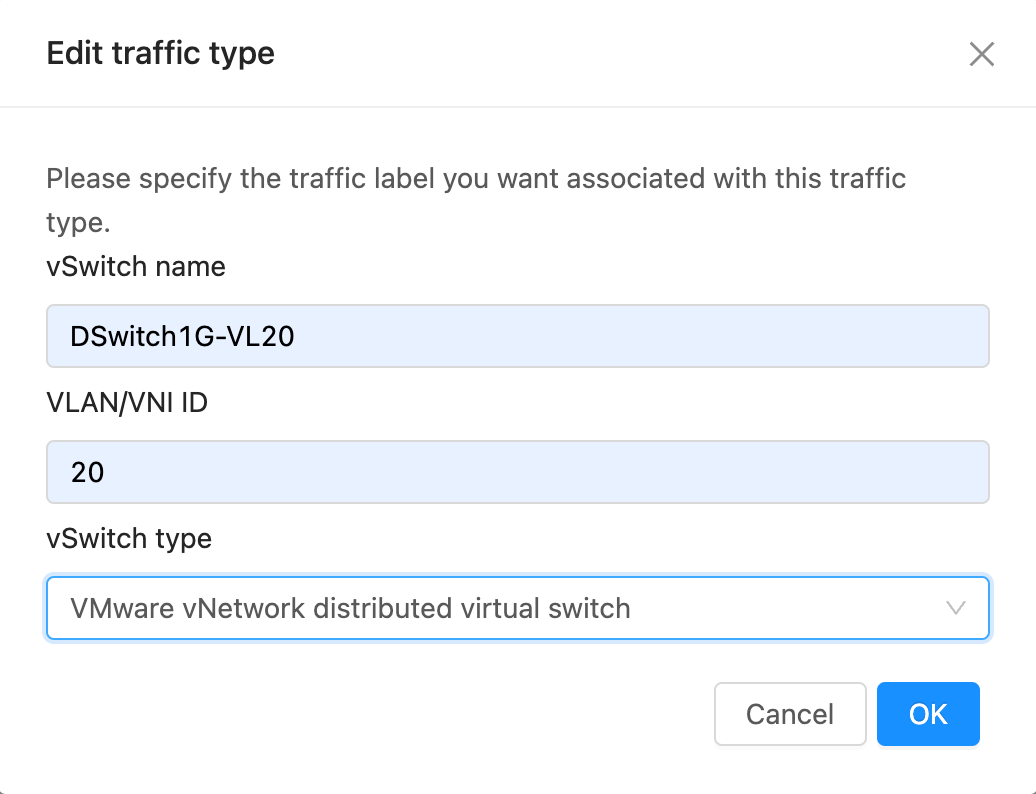
Management Network setting,
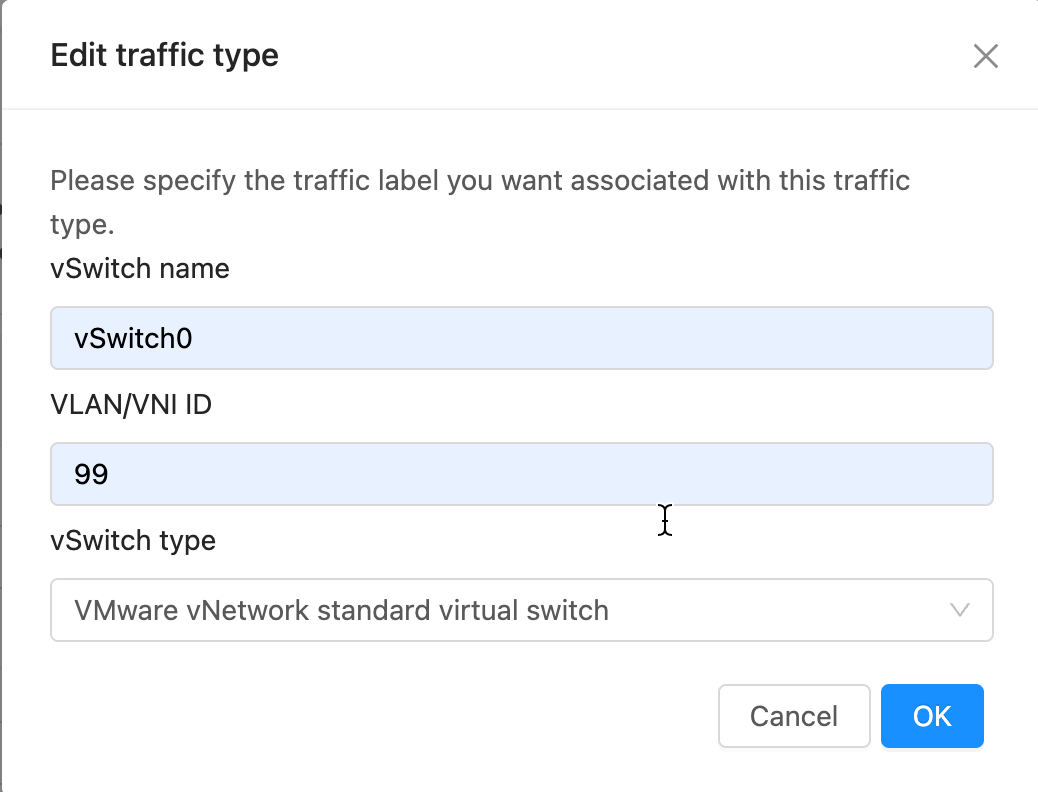
Public Network Setting,

Guest Network Setting,
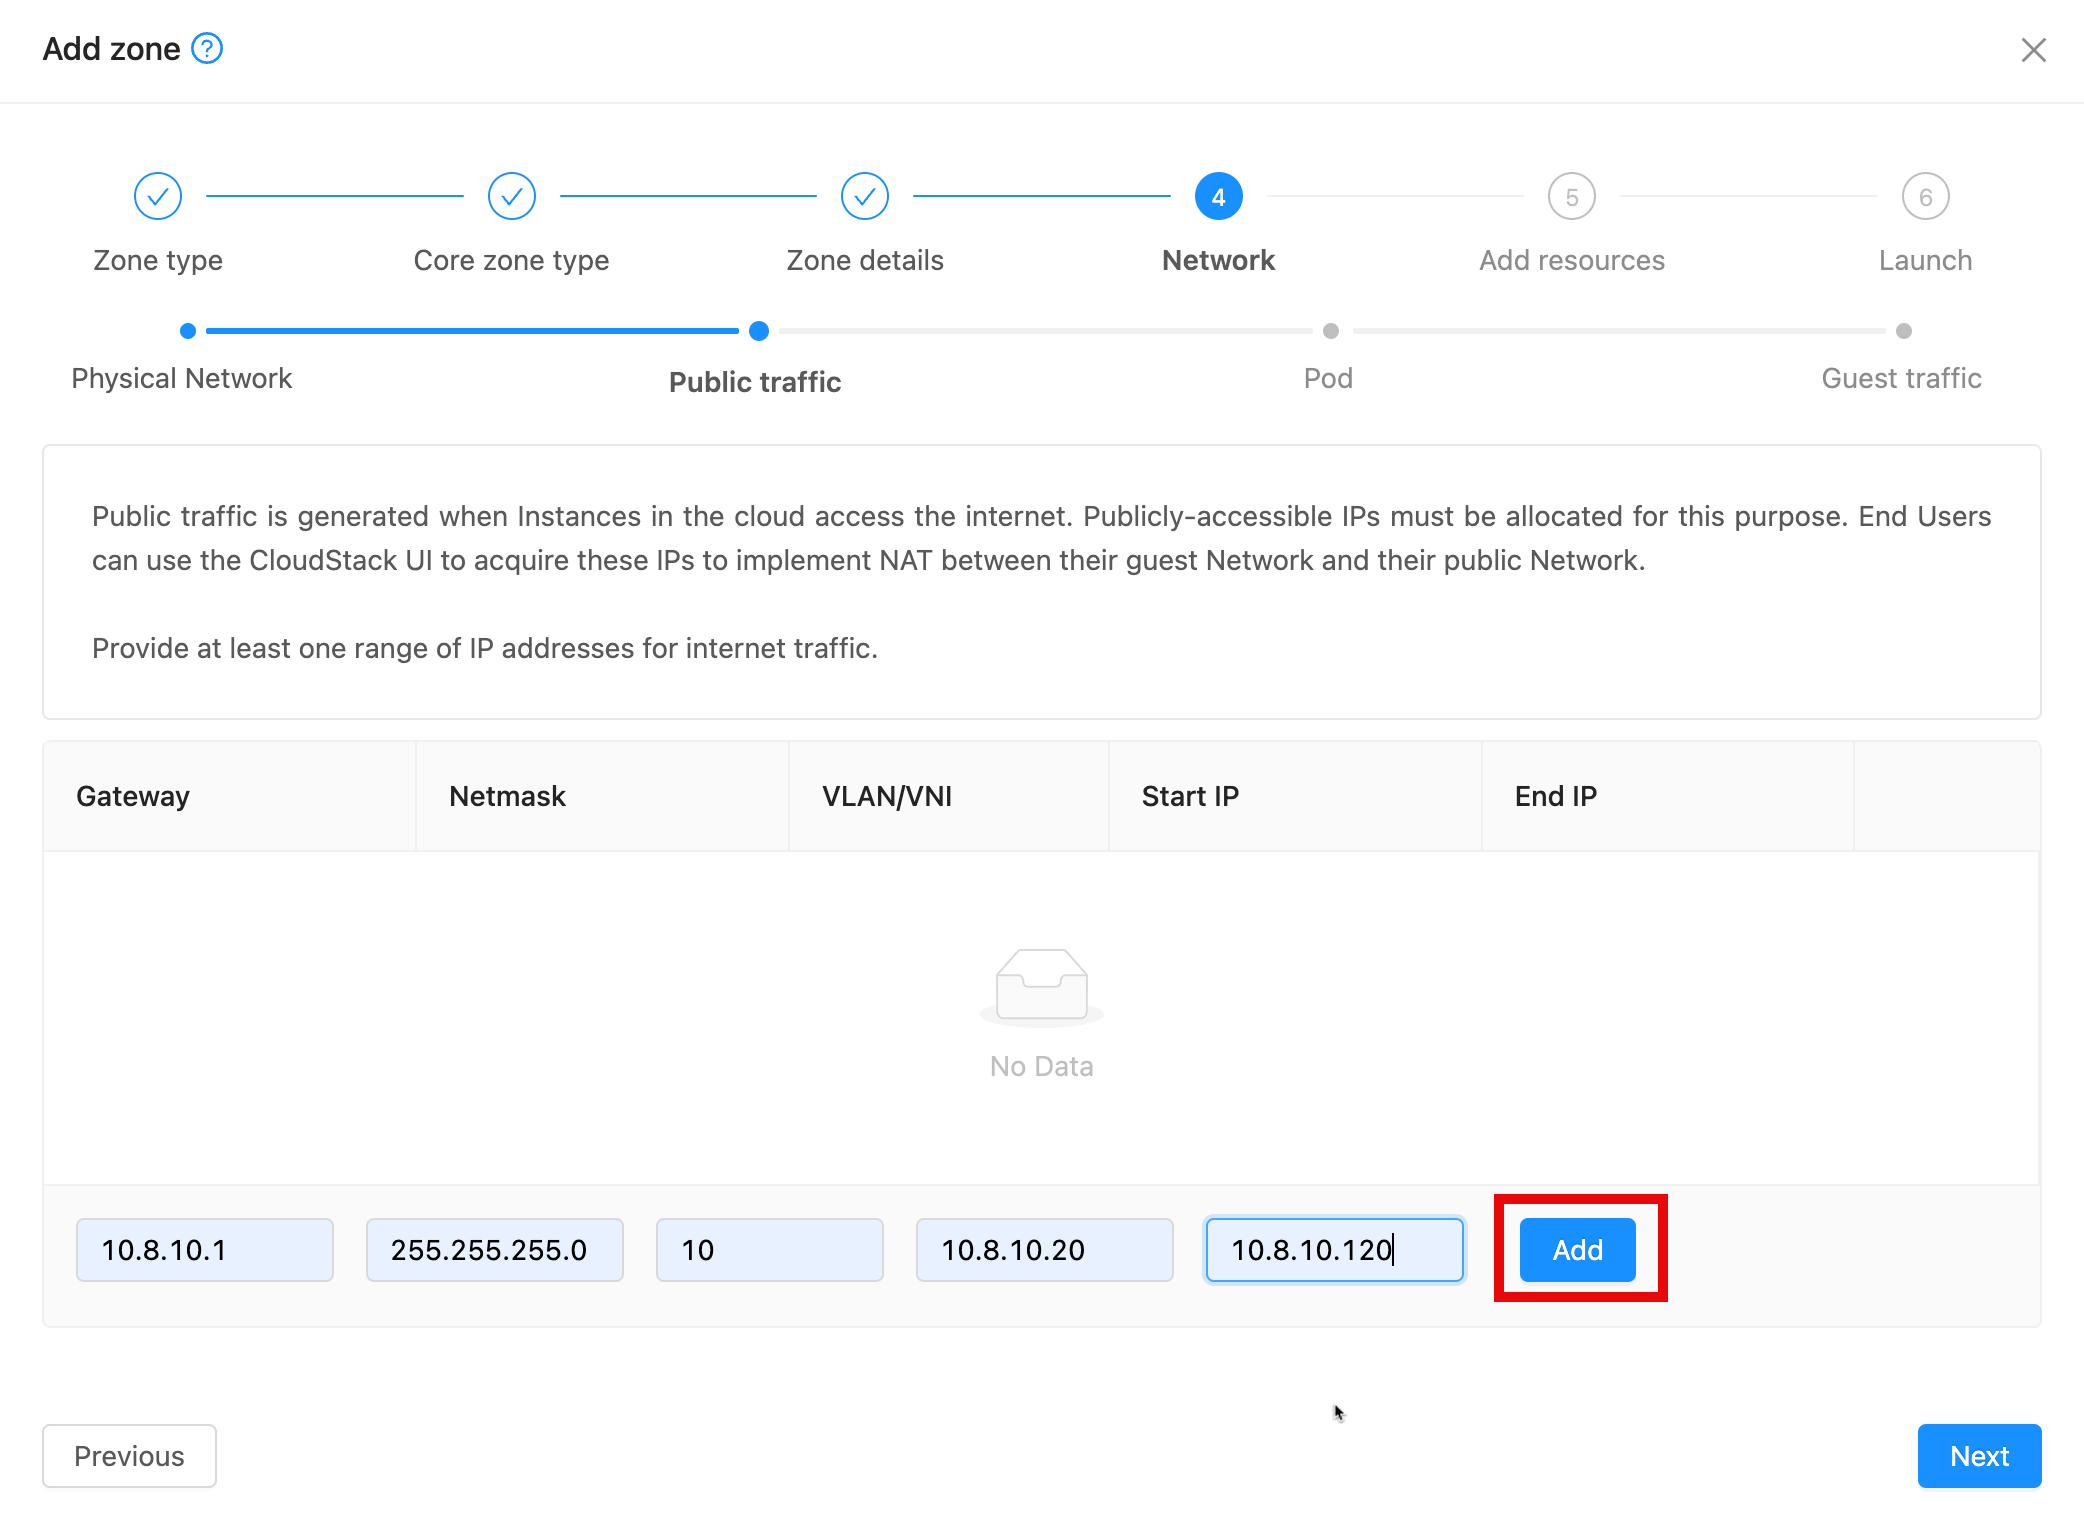
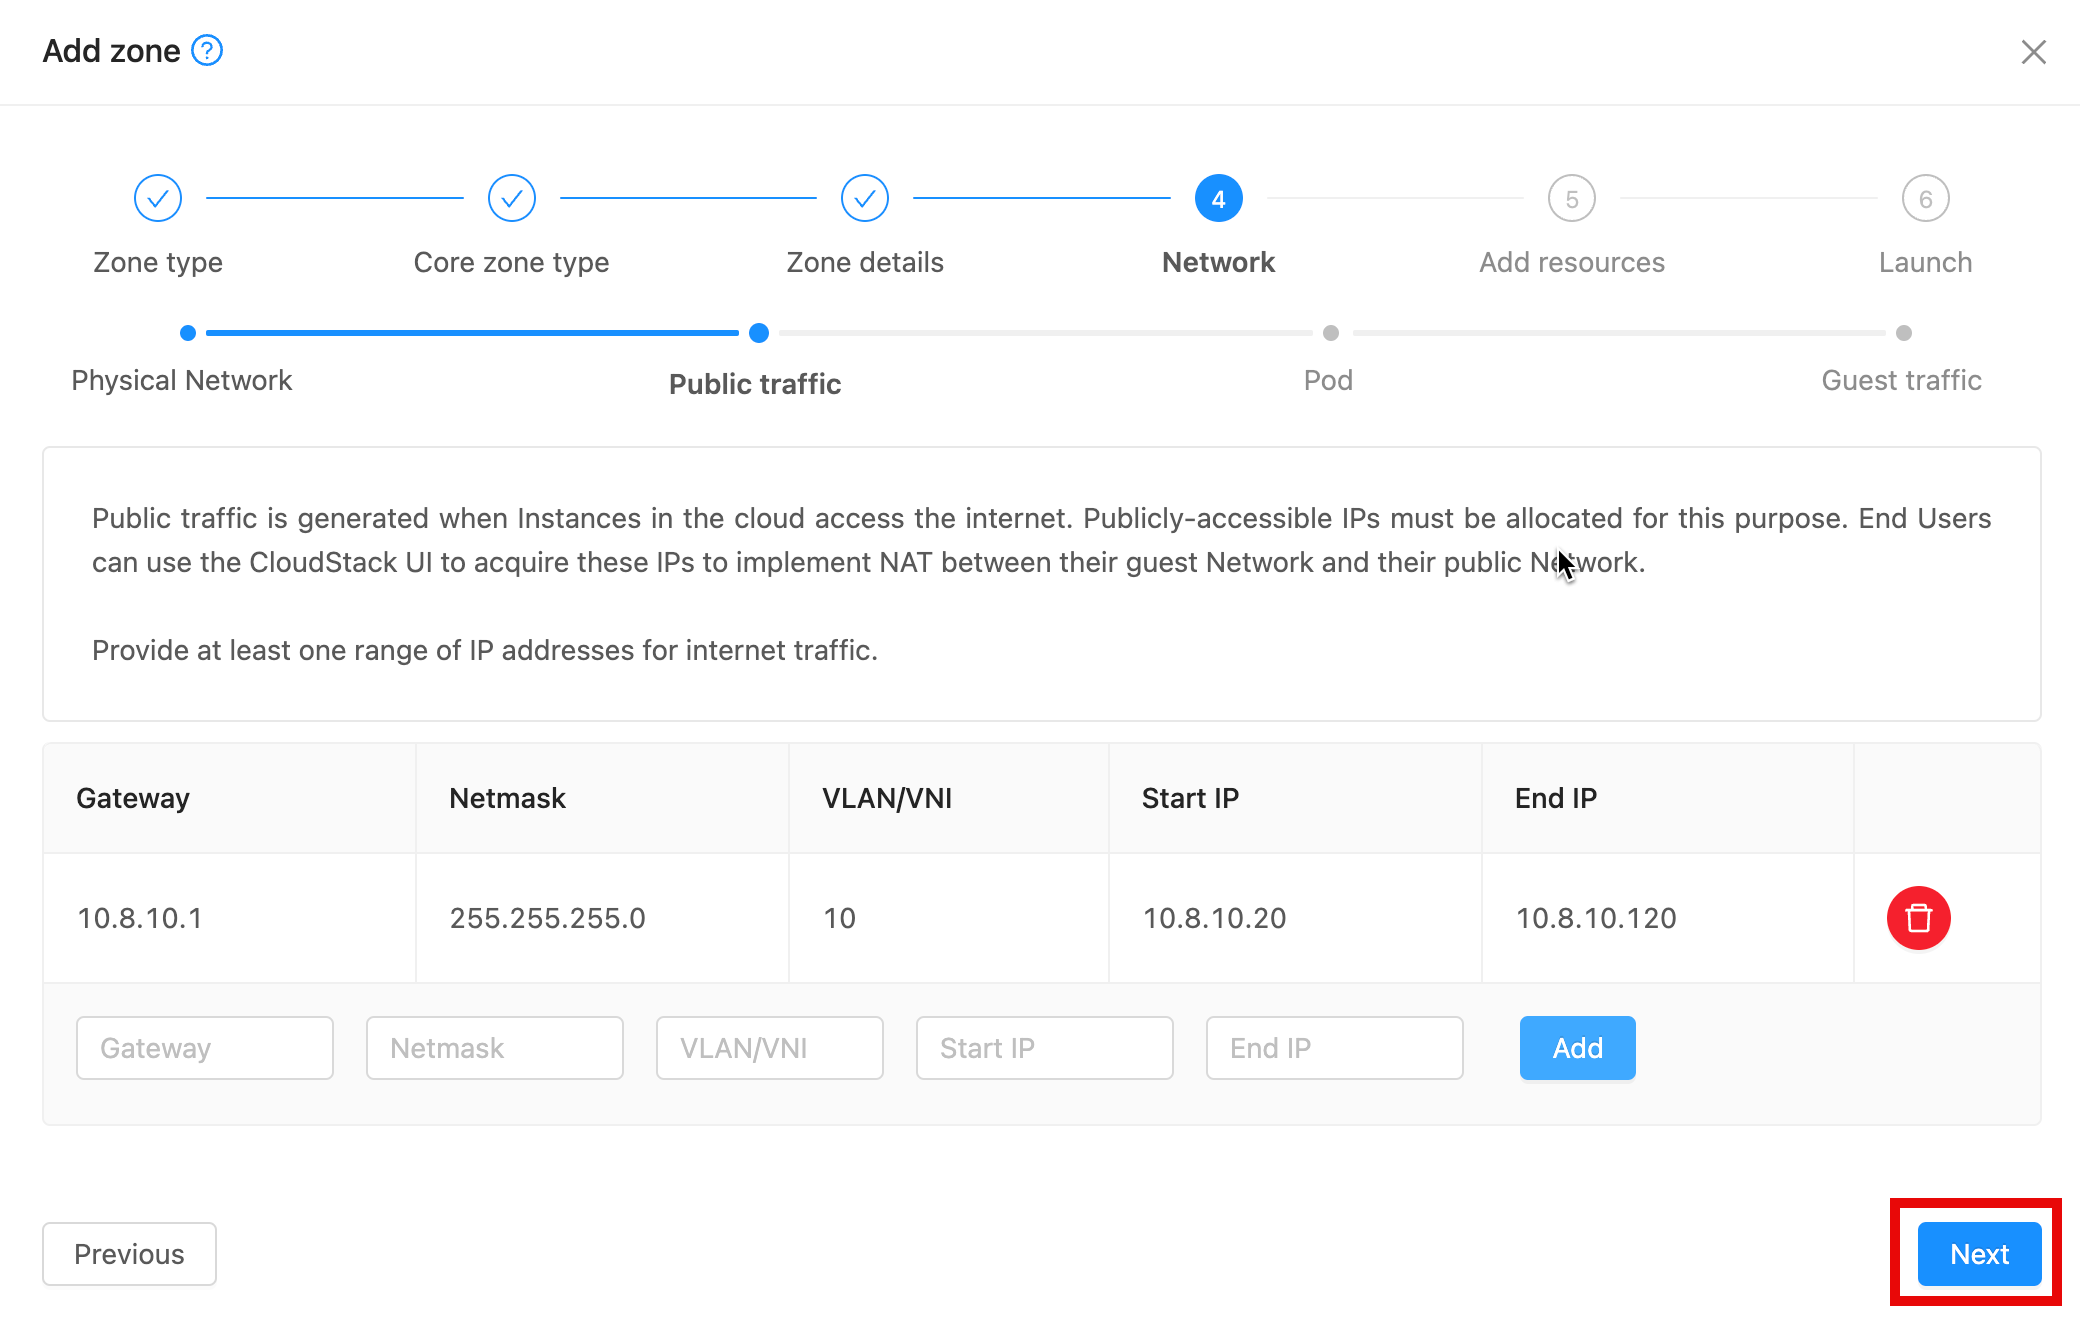
Step 10
Fill in and Add the Public network details, then click Next.
Step 11
Fill in the Pod details, then click Next.

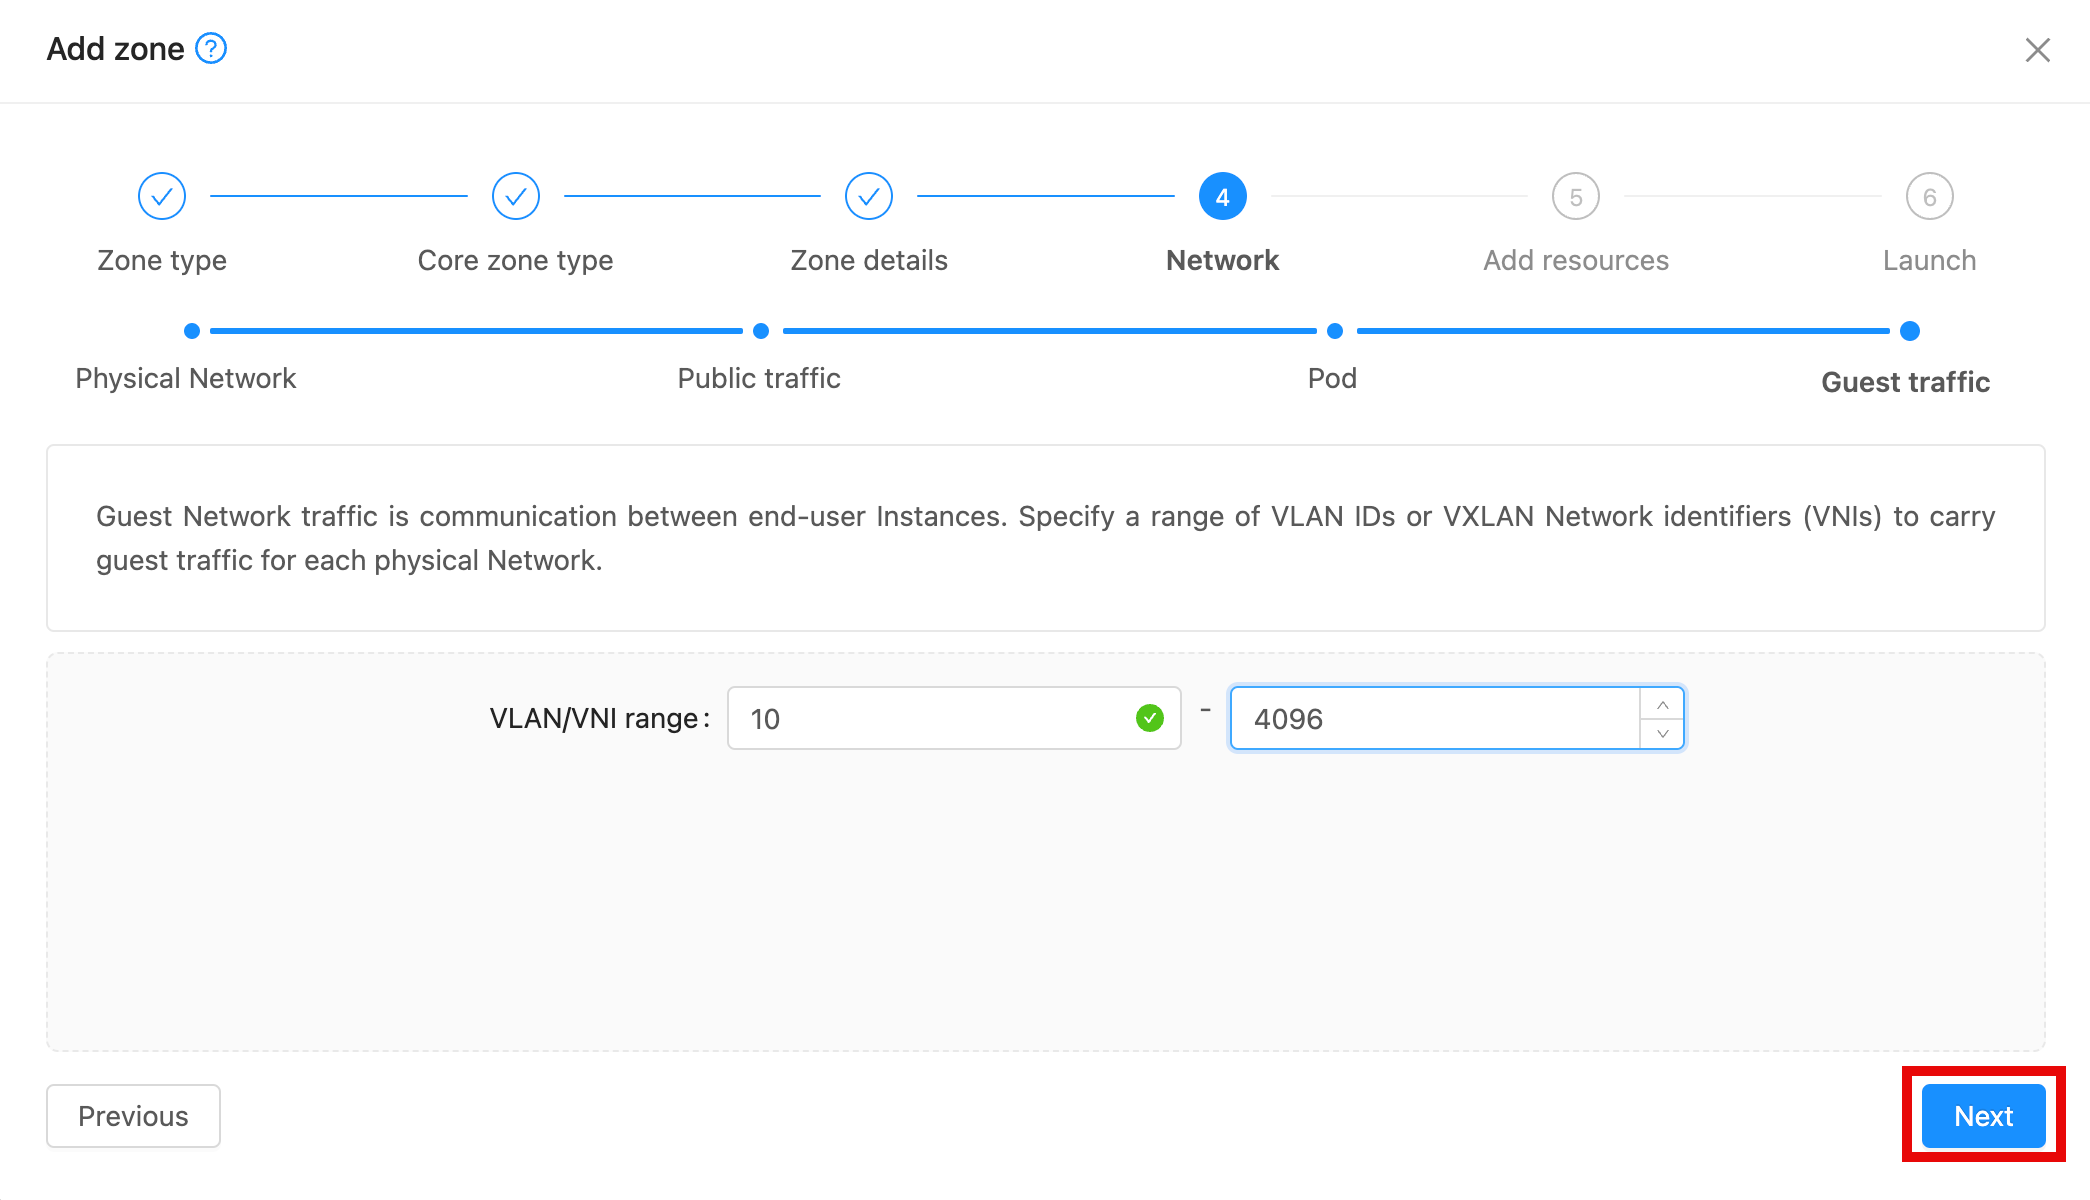
Step 12
Fill in the VLAN details then click Next.
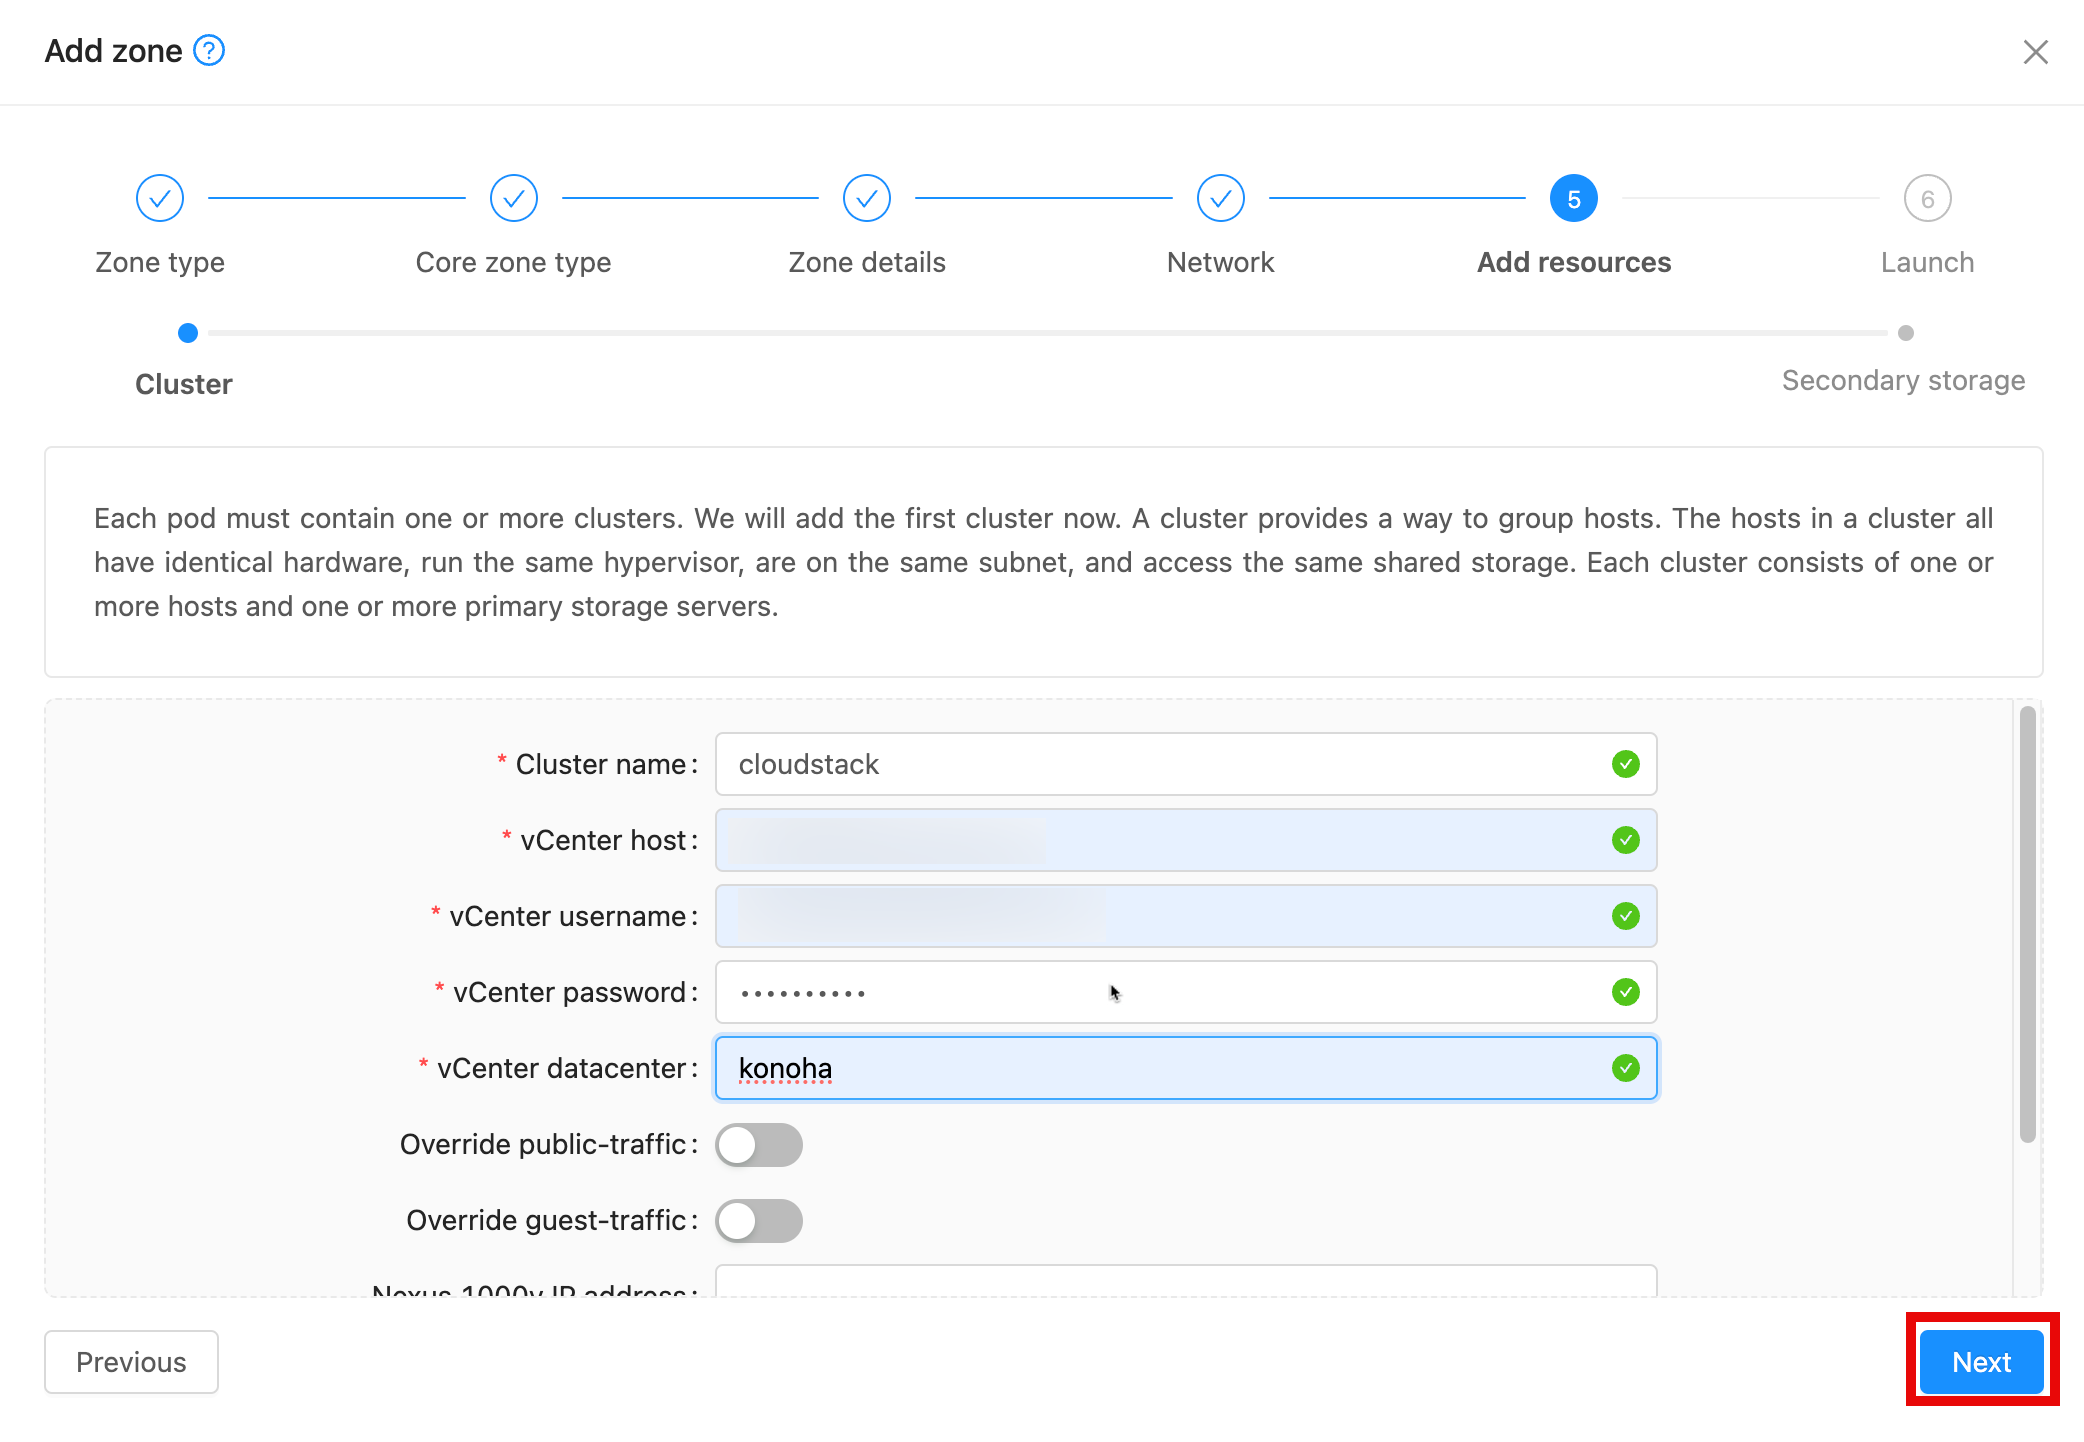
Step 13
Fill in the VMware Hypervisor cluster details then click Next.
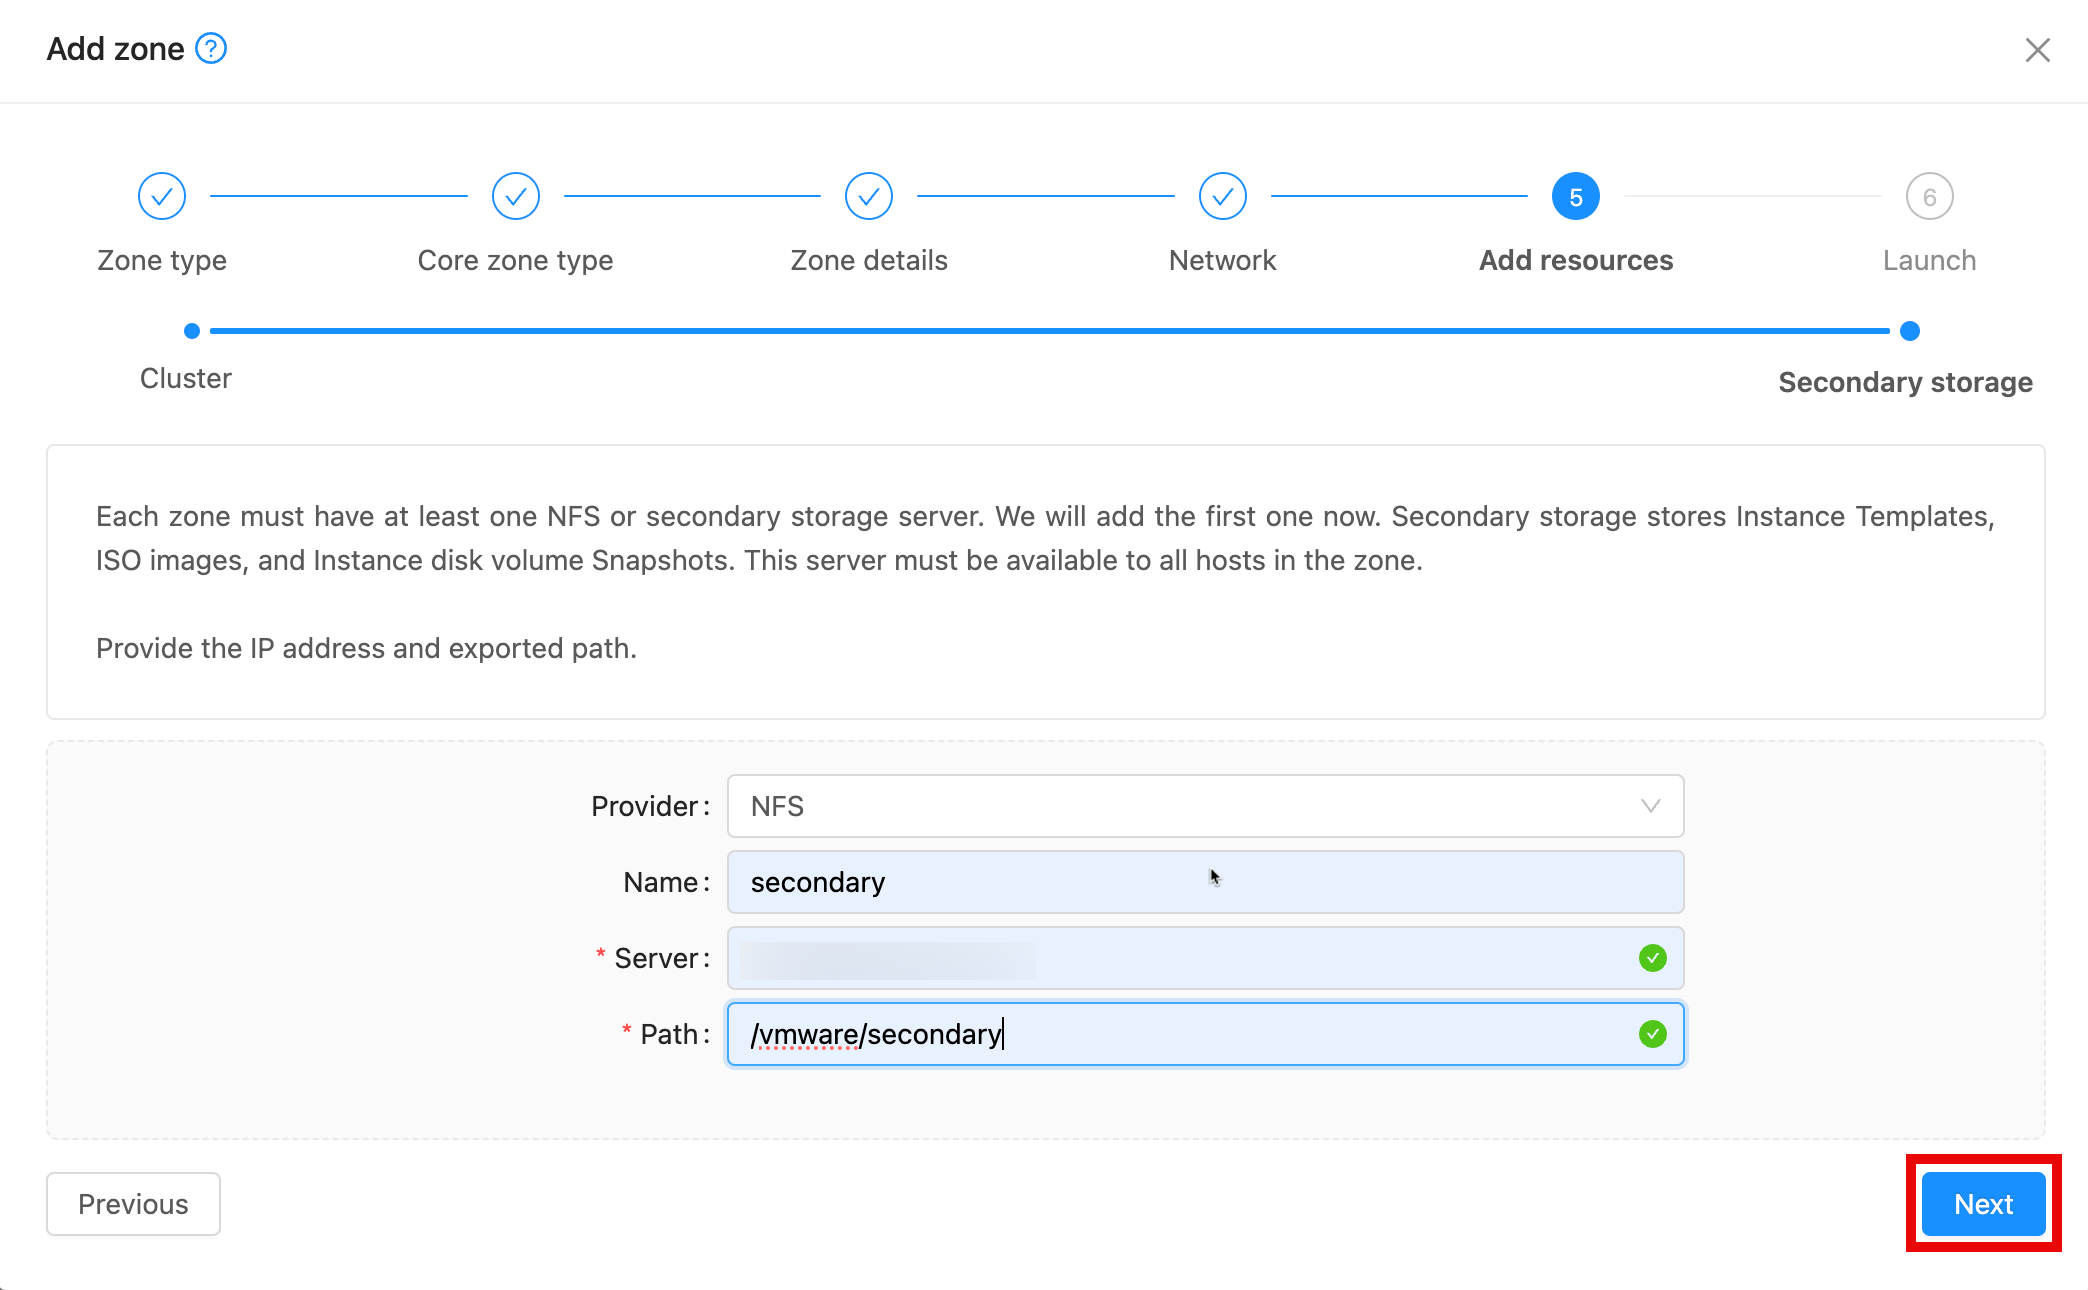
Step 14
Fill in the storage details then click Next.
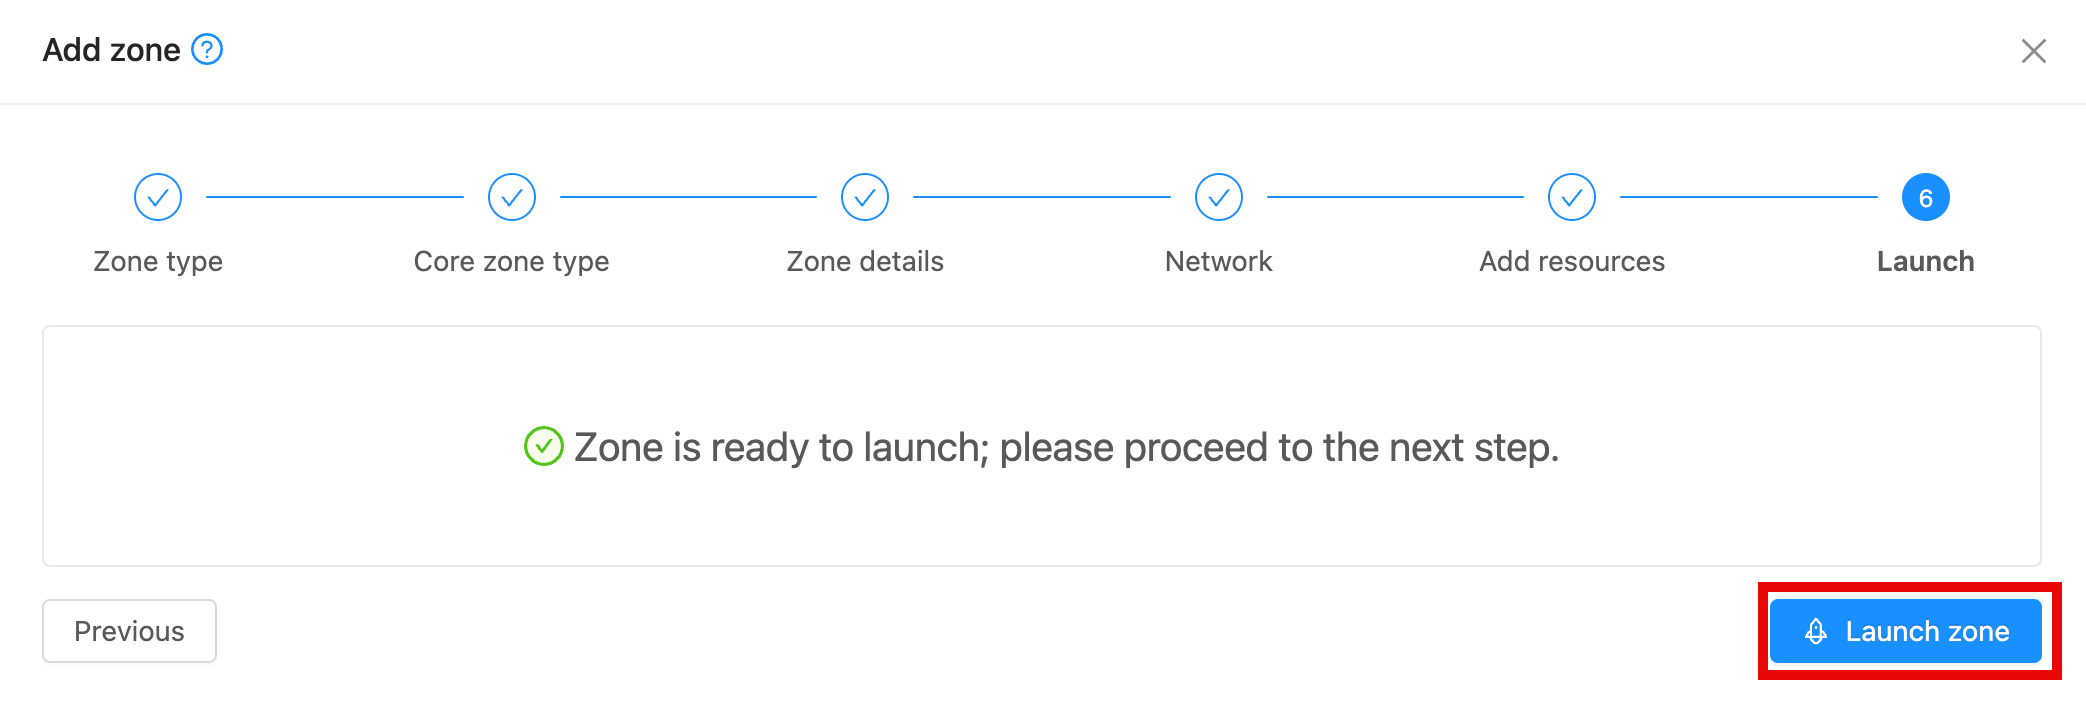
Step 15
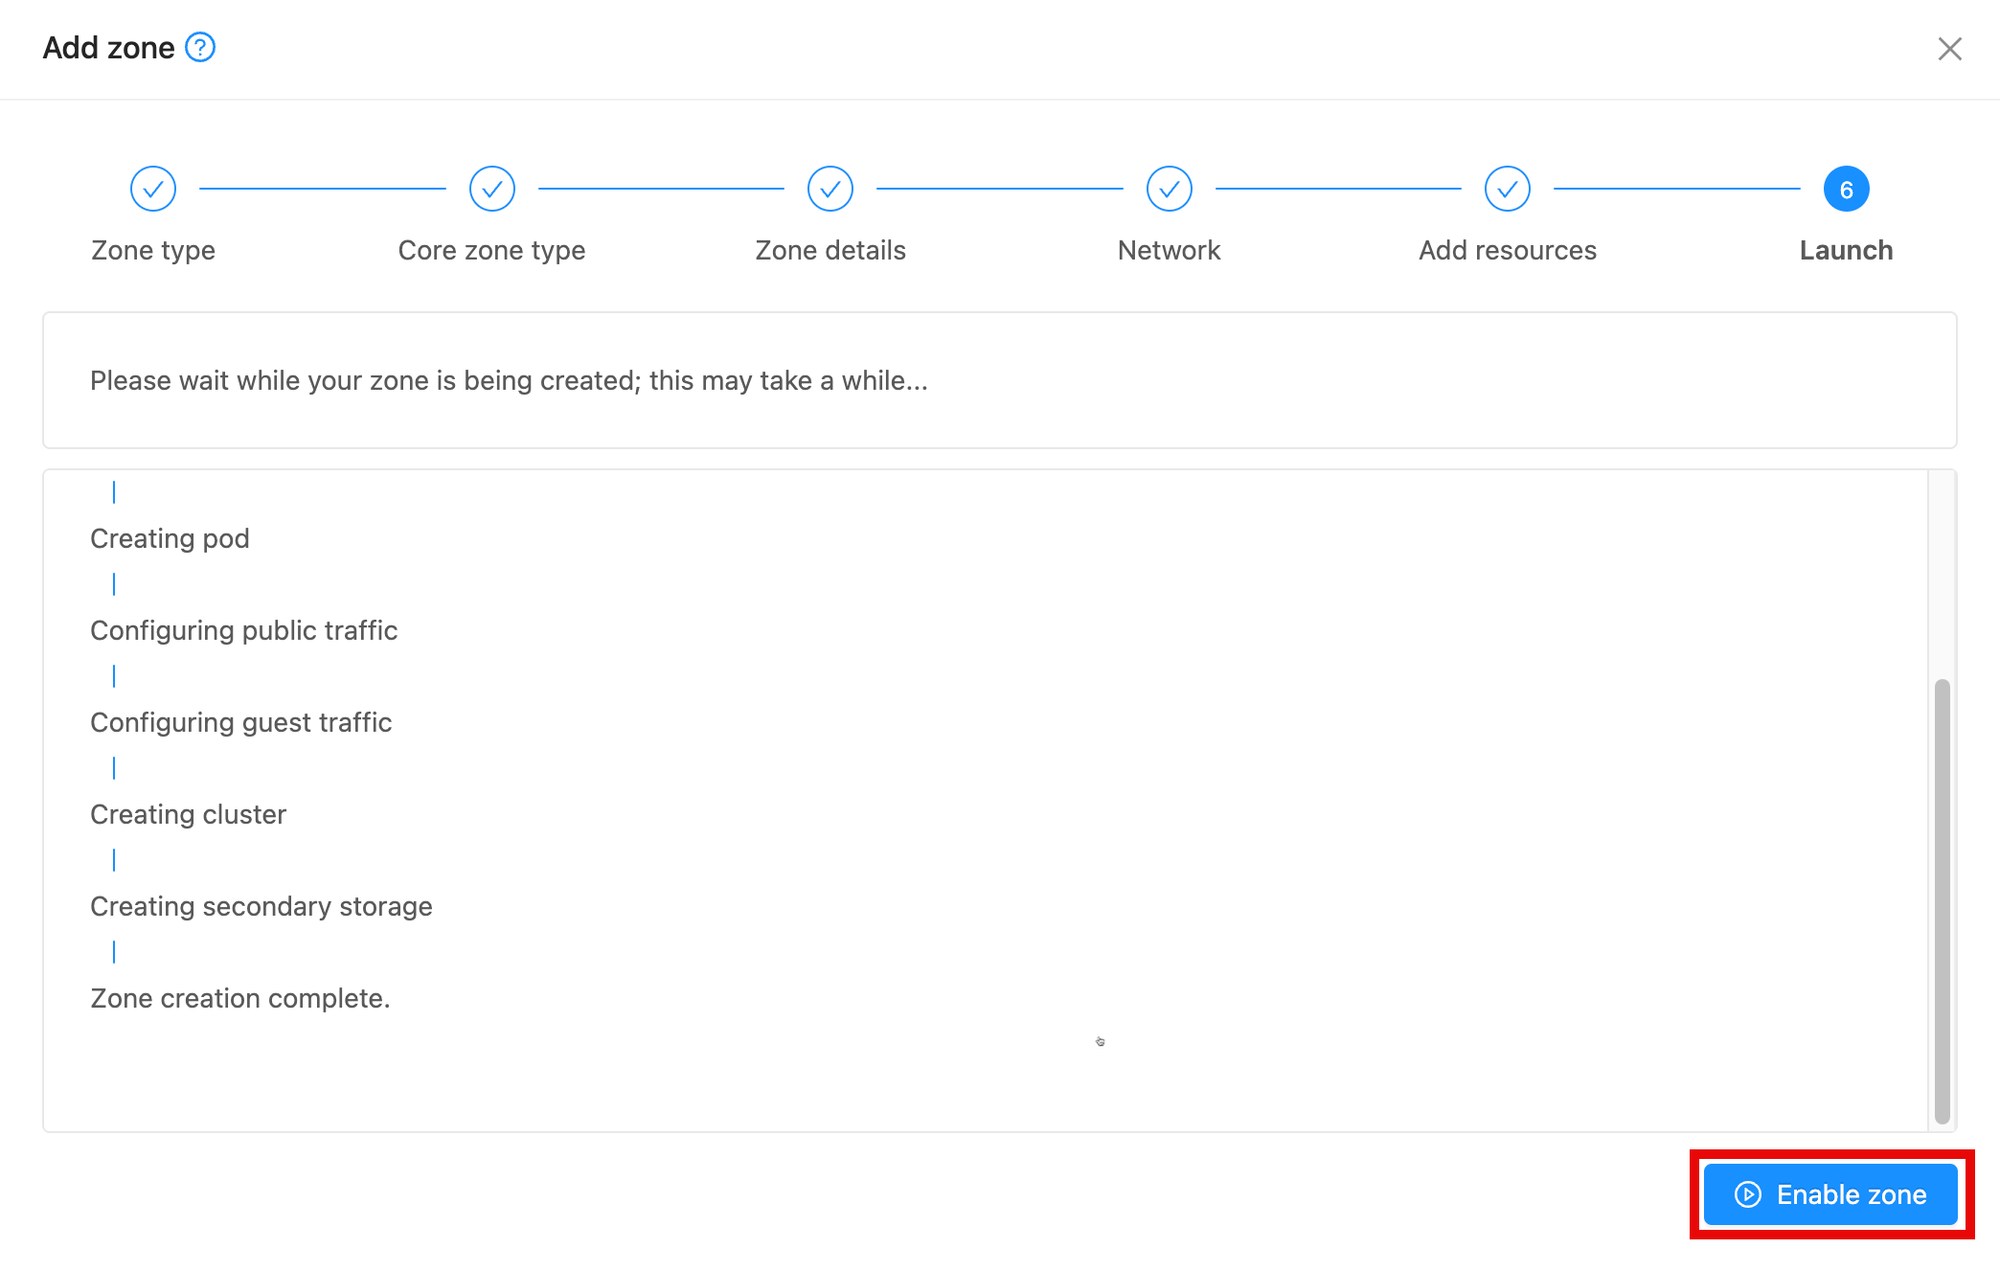
Launch the Zone by clicking Launch zone.
Step 16
Zone creation is complete. Click Enable zone.
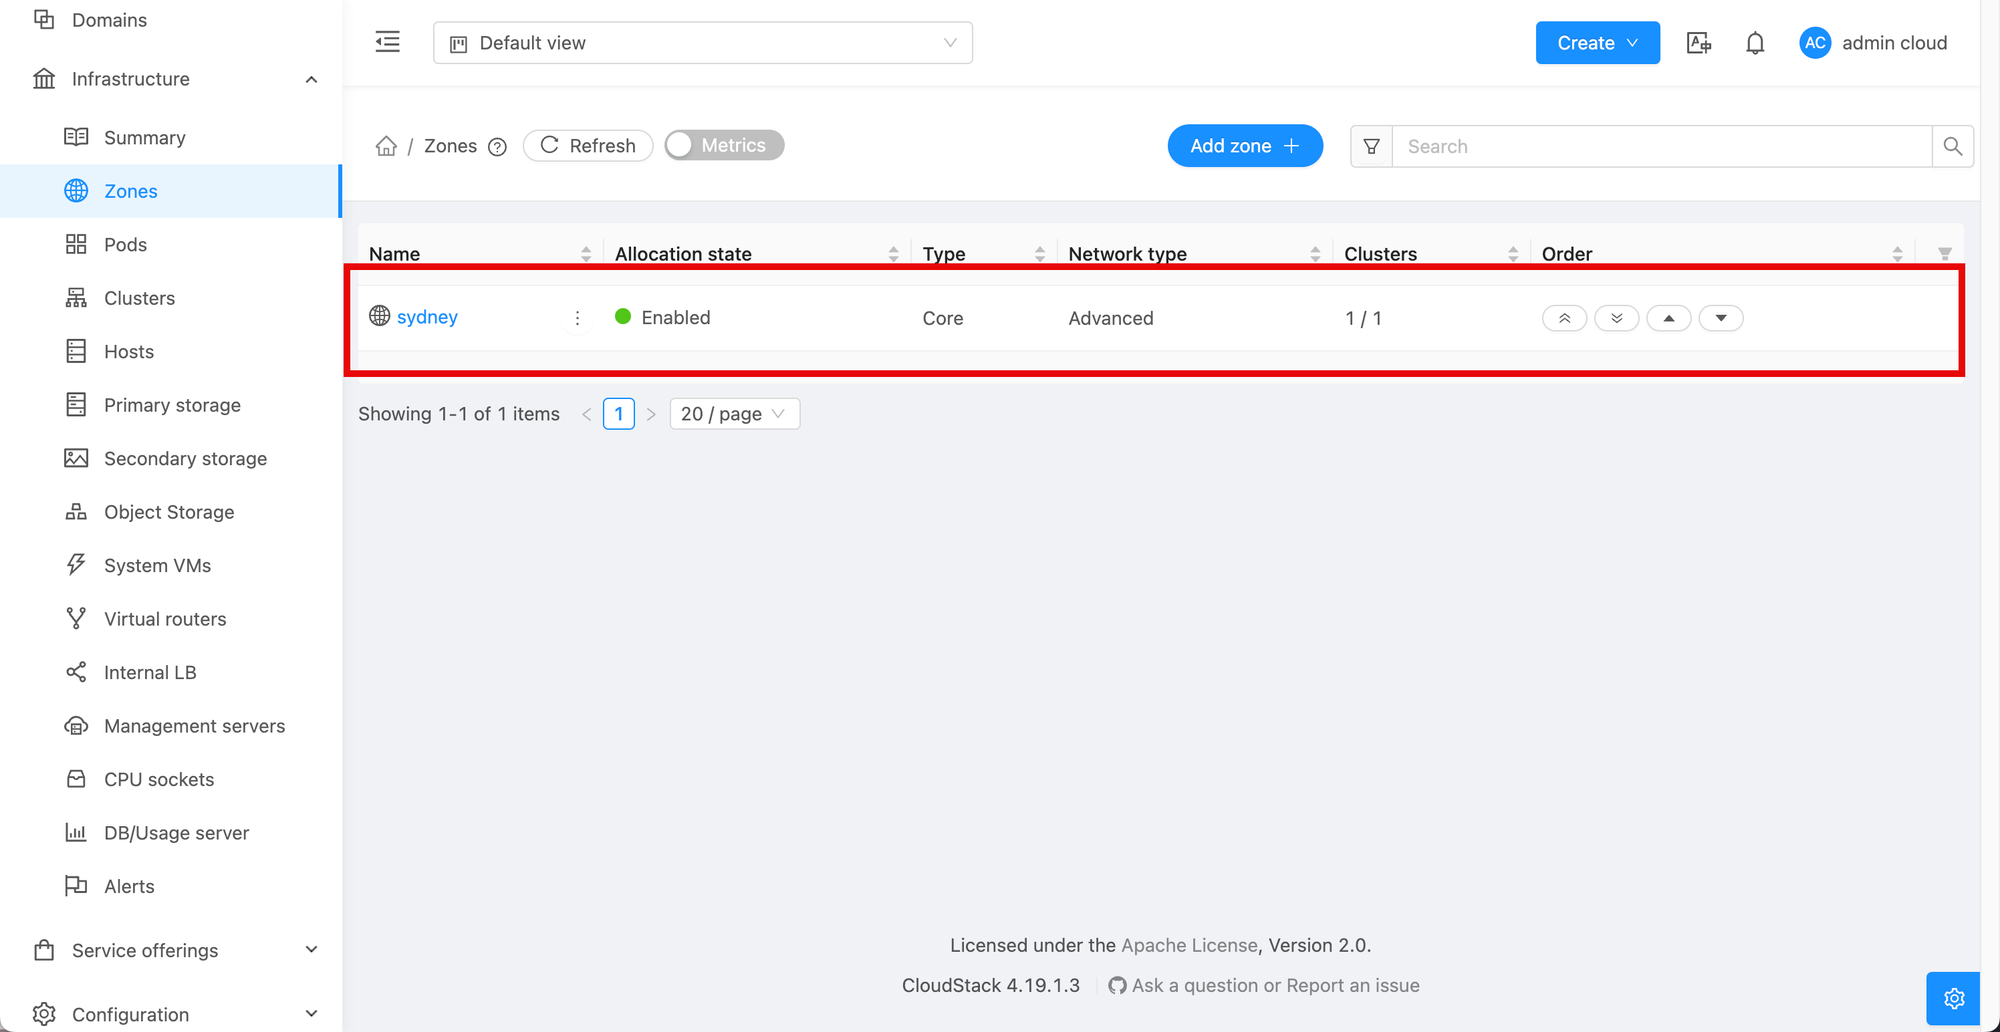
Step 17
The Apache CloudStack zone is now ready for use.
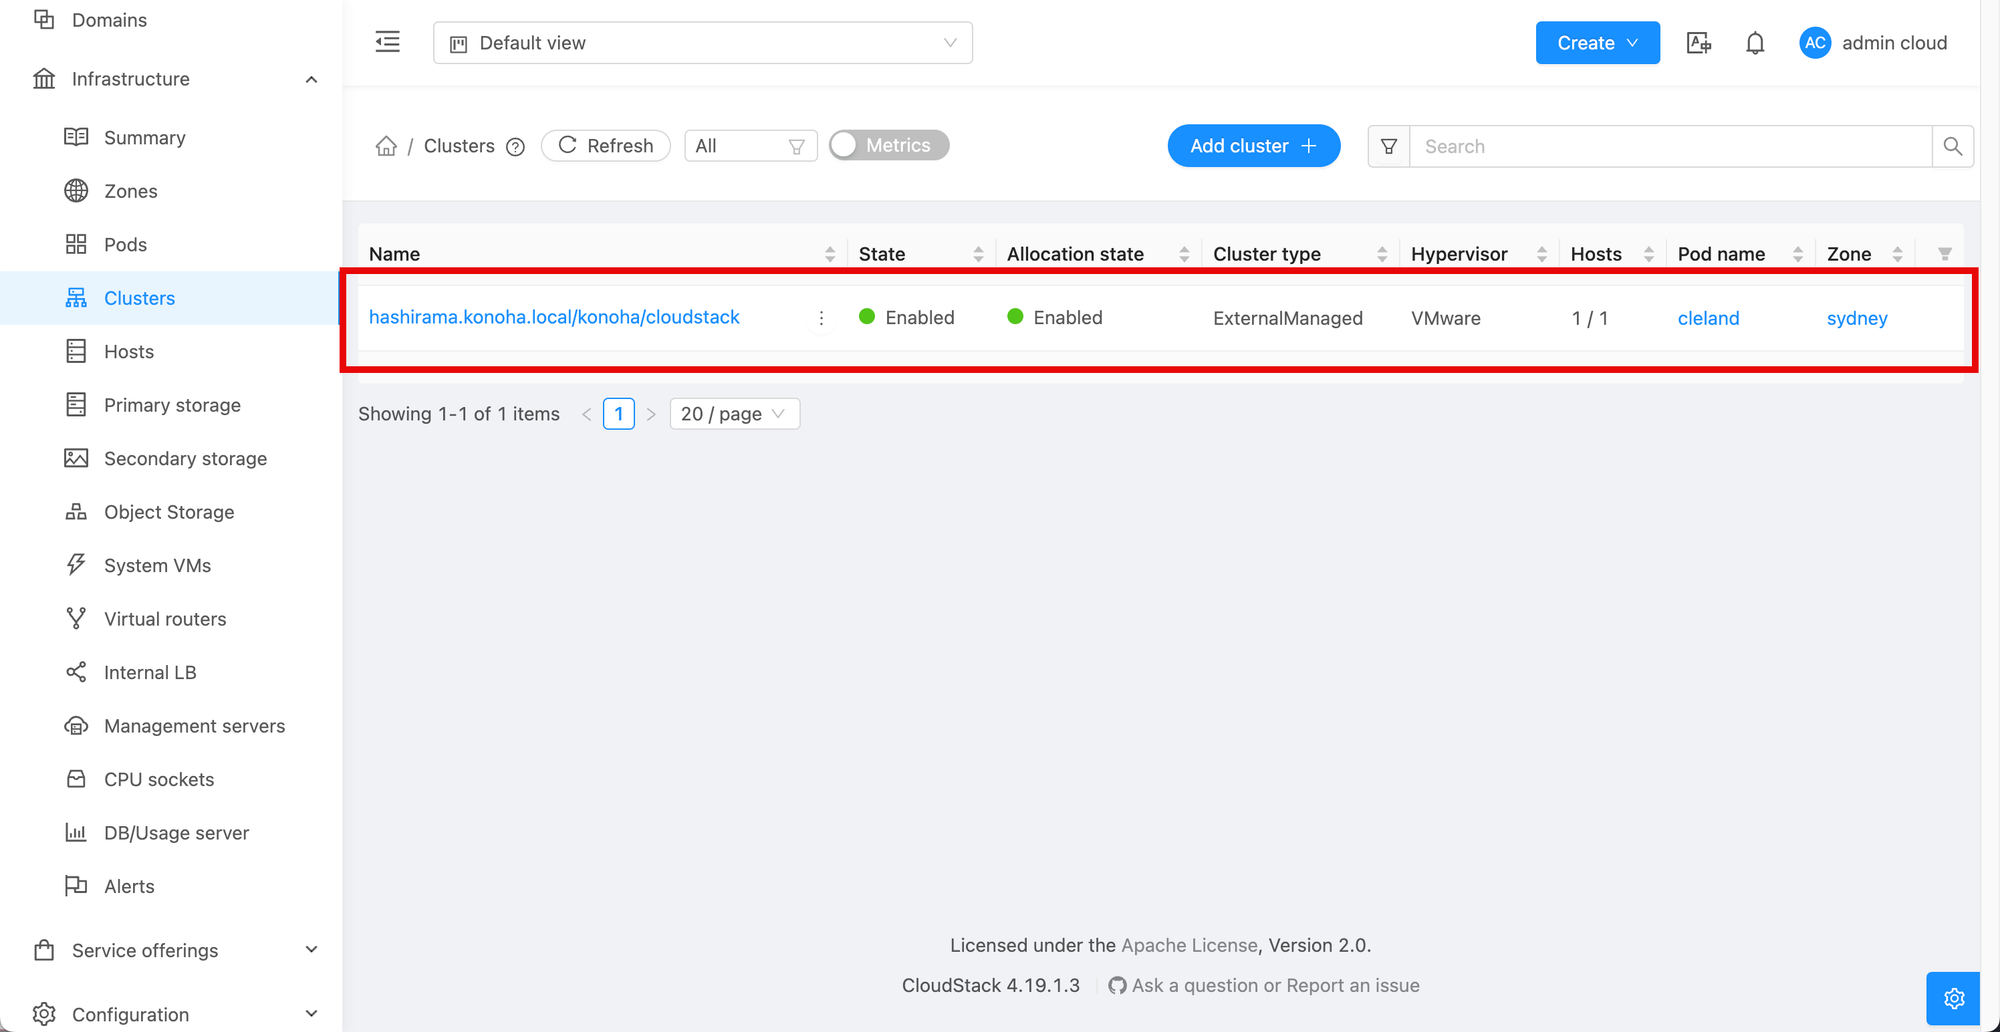
The VMware cluster is now available.
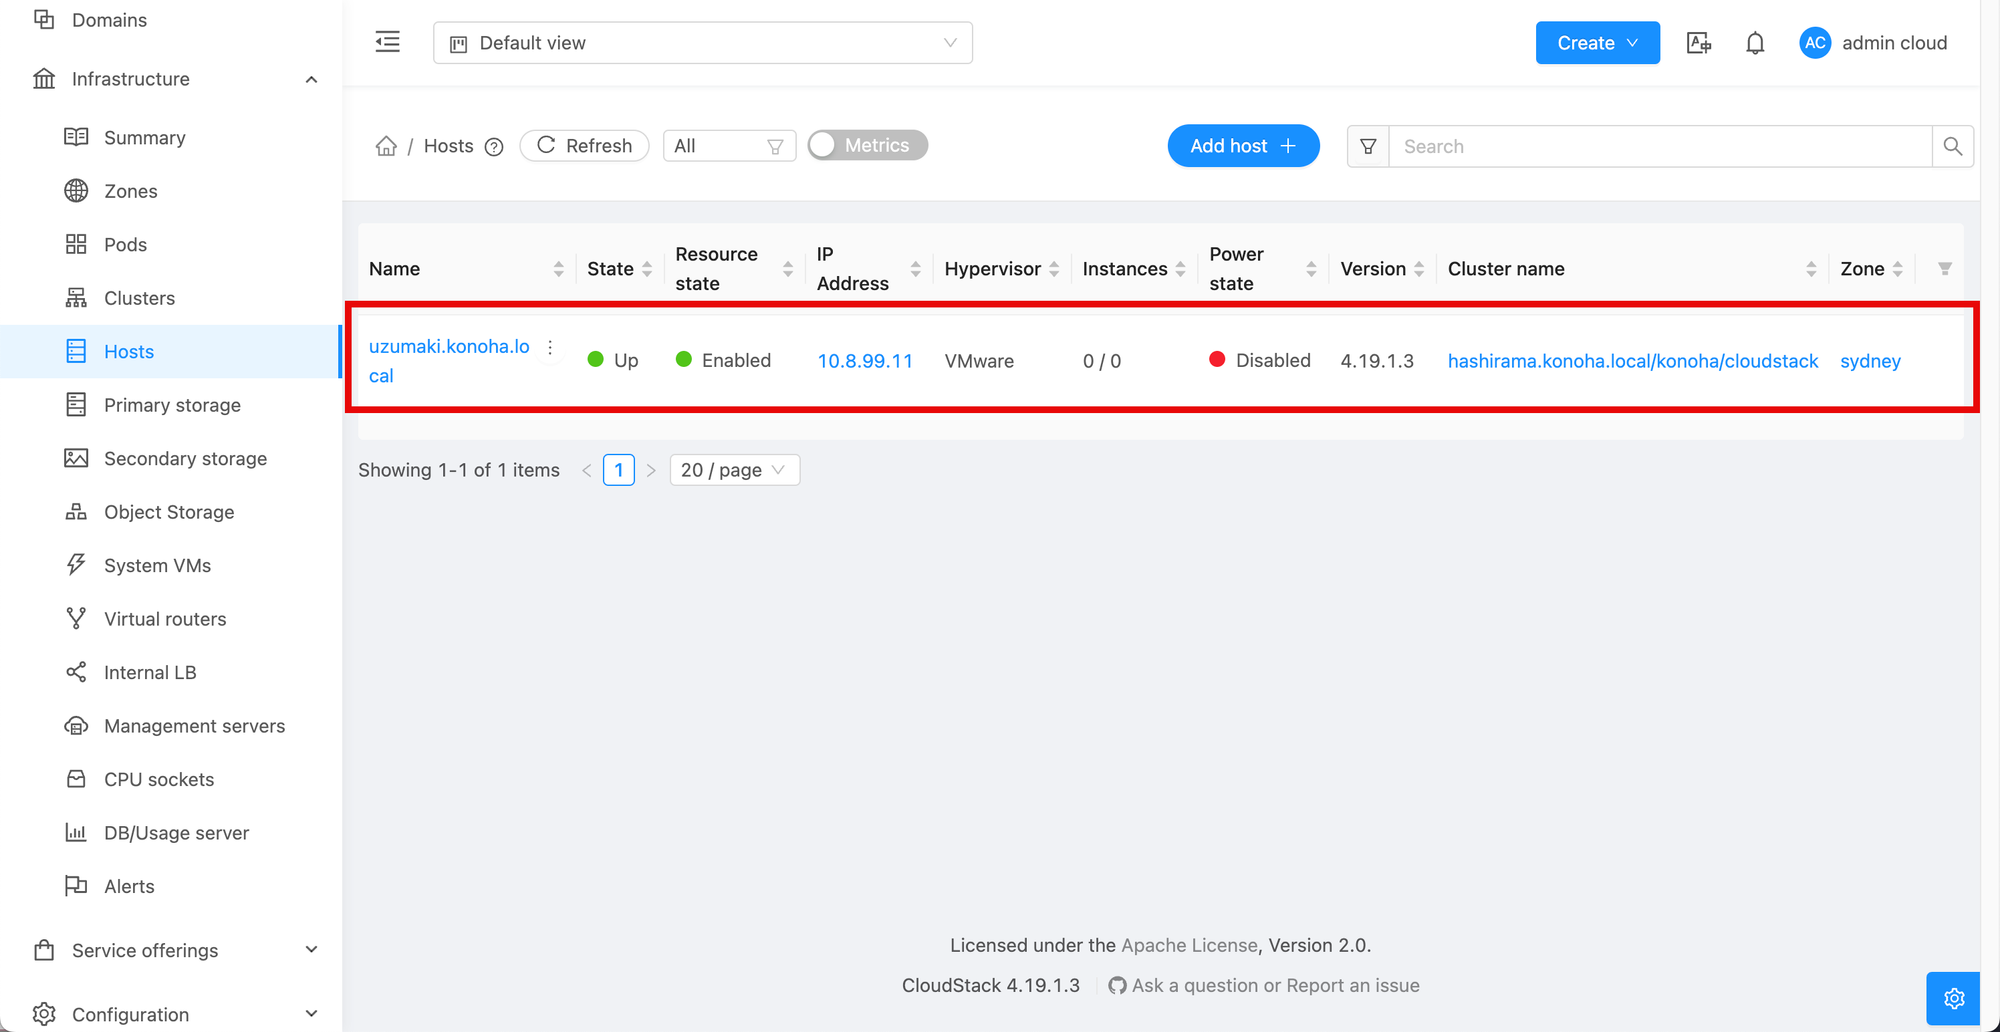
The ESXi host is also available for use.
The local VMFS disks are also visible.

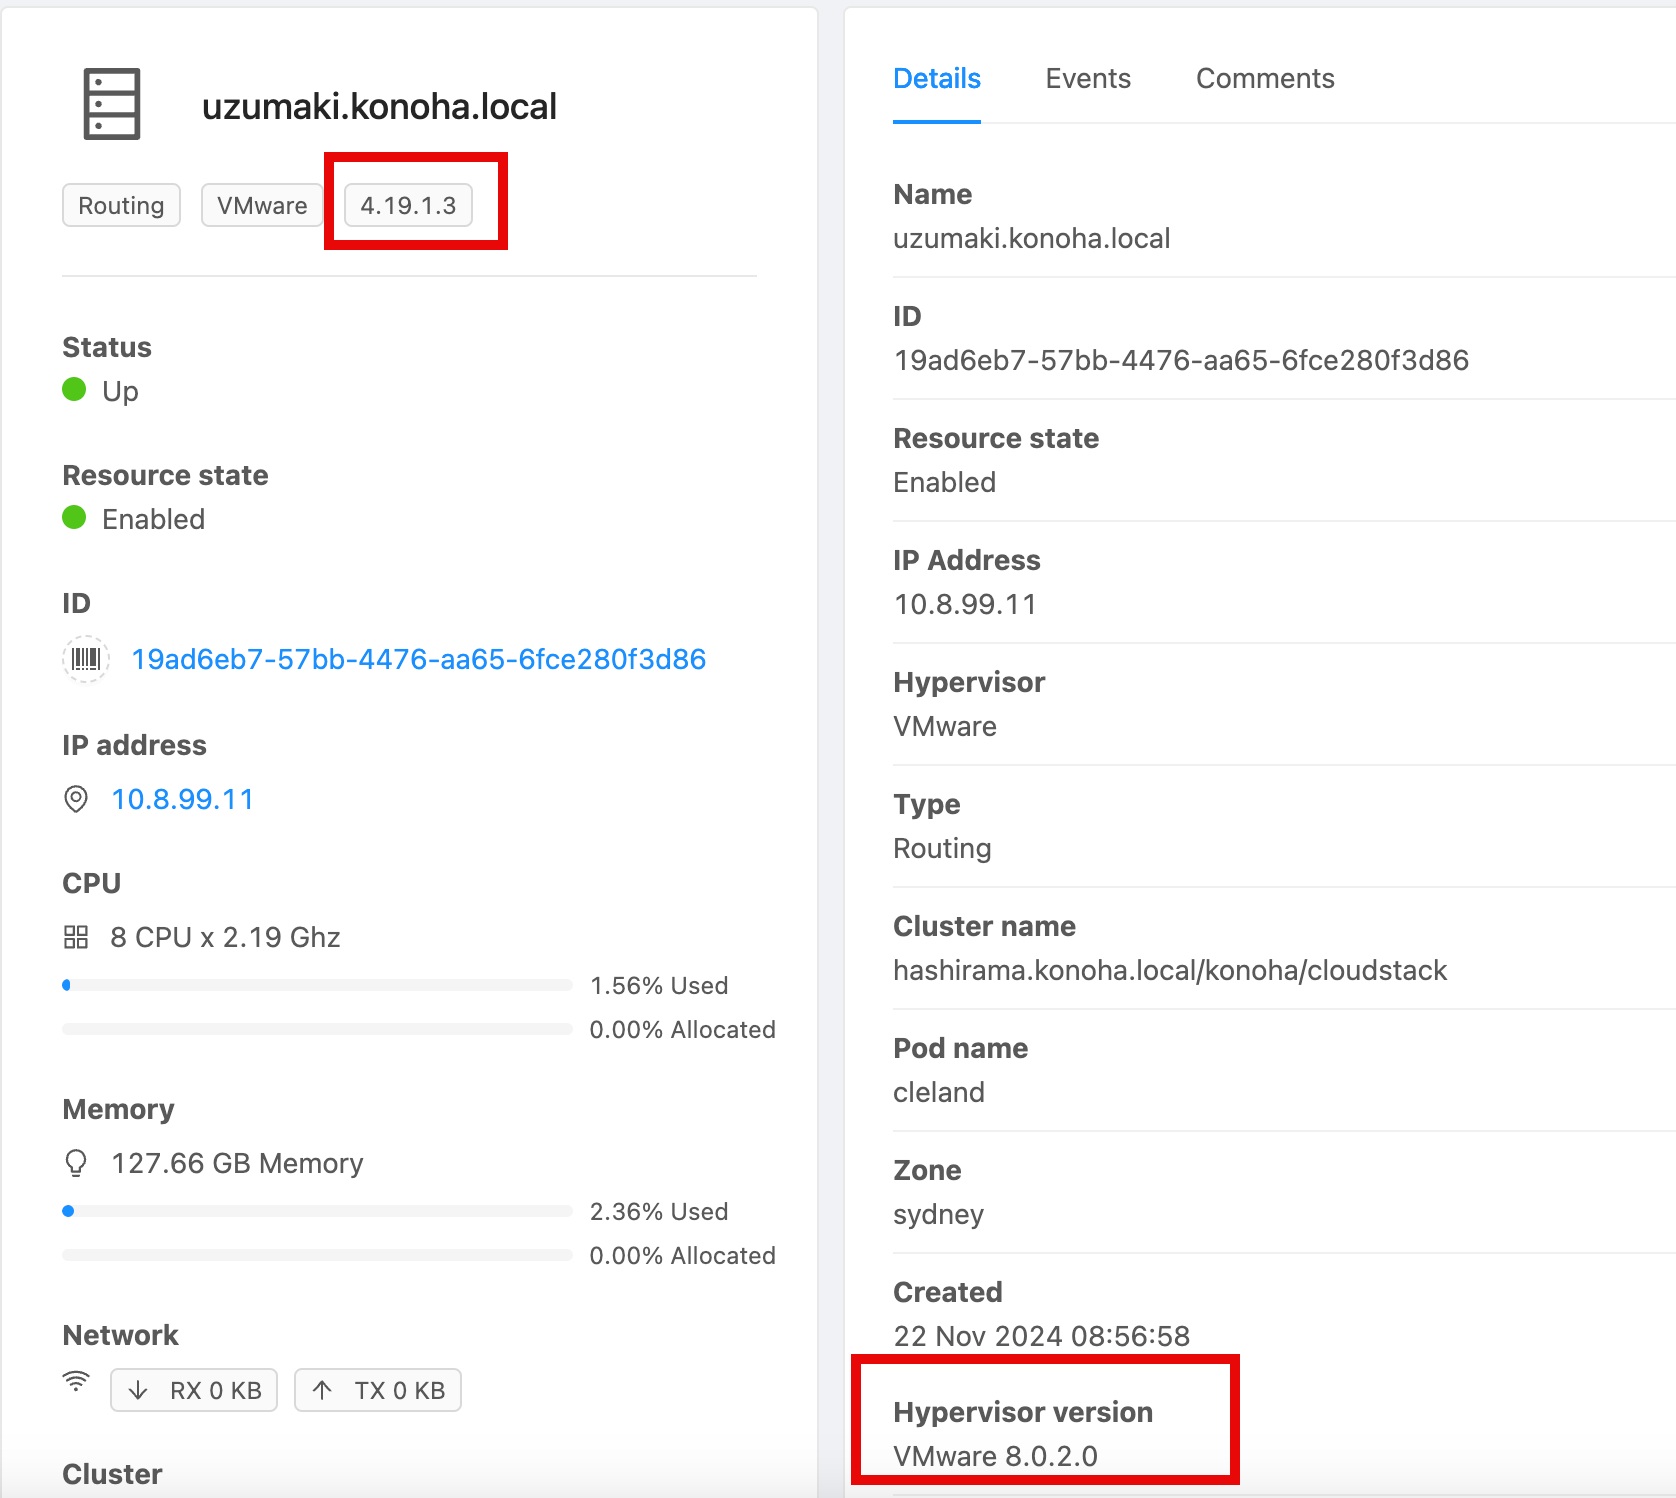
This is the just to confirm that the VMware environment I am using in my lab is version 8.0.2.0. The Apache CloudStack is version 4.19.1.3
Feel free to subscribe and provide comments and spread the word.


