Provision a Red Hat Linux Server on VMware vSphere 8 using a Template

I originally wrote a procedure to create templates in VMware vSphere using Hashicorp Packer. I then got side tracked and started building on IBM Cloud for other projects.
I have decided to now look at building Apache CloudStack in my home lab to help me learn more Ansible automation with cloud infrastructures without breaking my bank account.
I realise that I needed to start building a Red Hat Enterprise Linux Server as noted from the Apache CloudStack documentation site. The requirements for the management server can be found here.
Task Duration - 5 mins
Step 1
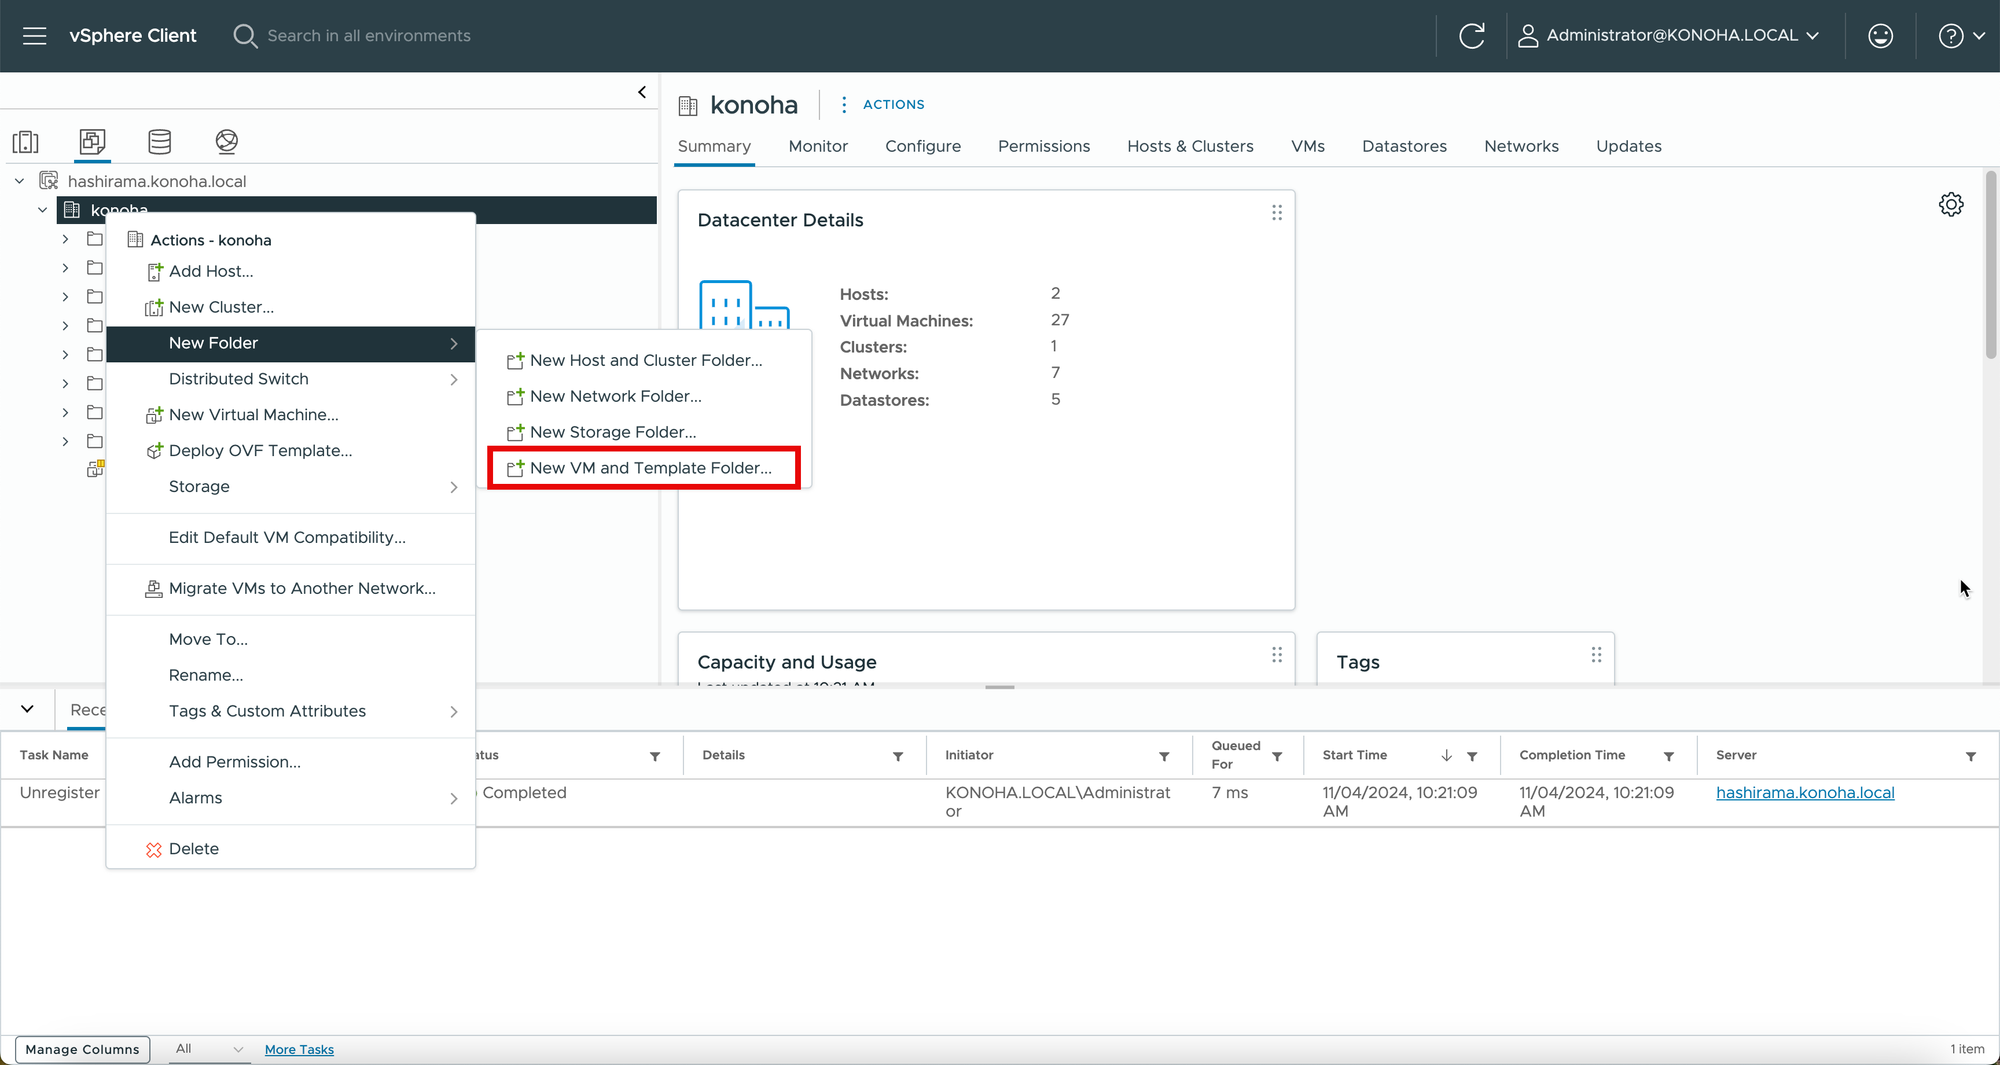
I am being pedantic here so I am creating a VM folder to group virtual machines I will be provisioning for CloudStack.
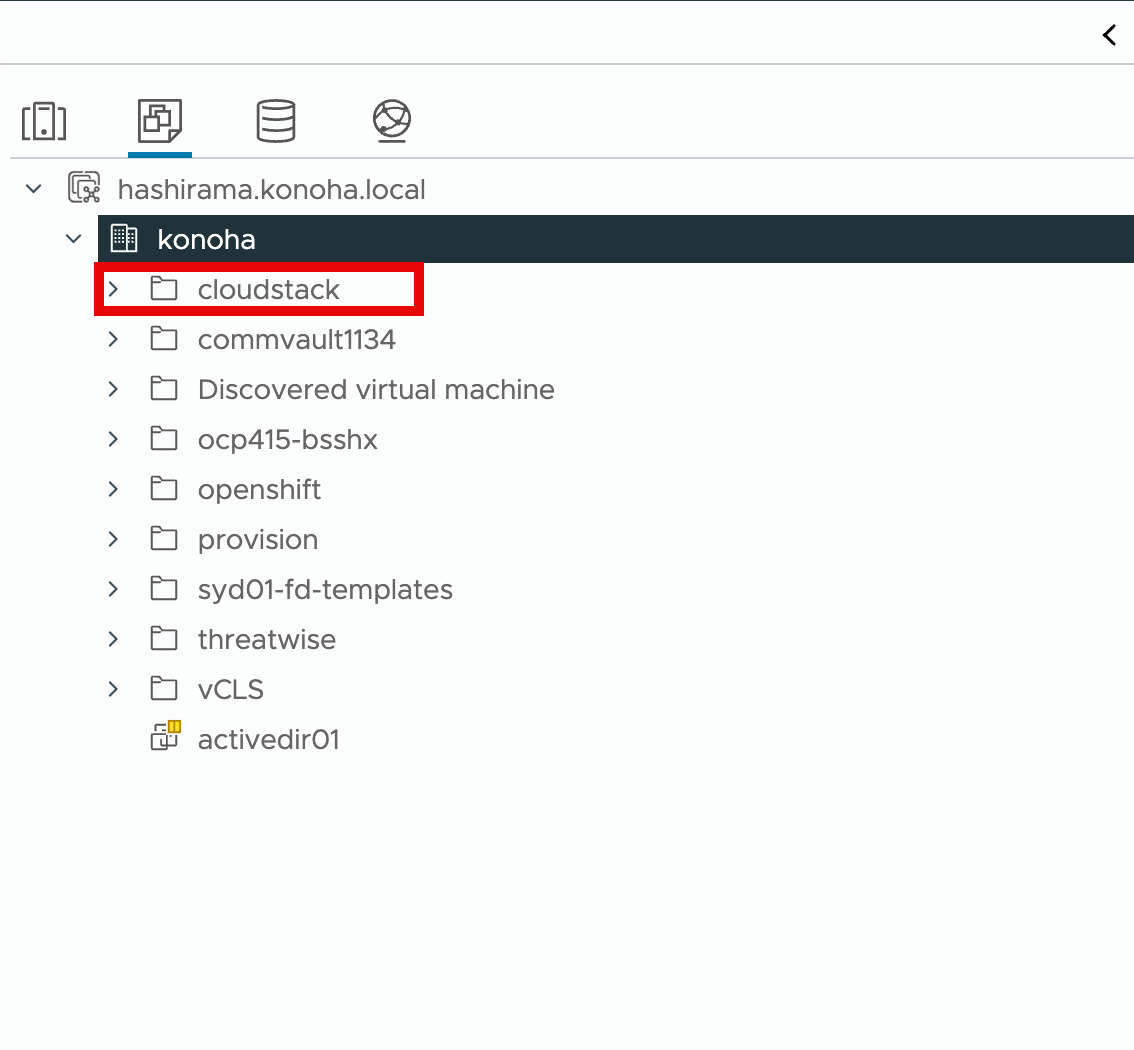
Logon to vCenter and create a folder called cloudstack.

Step 2
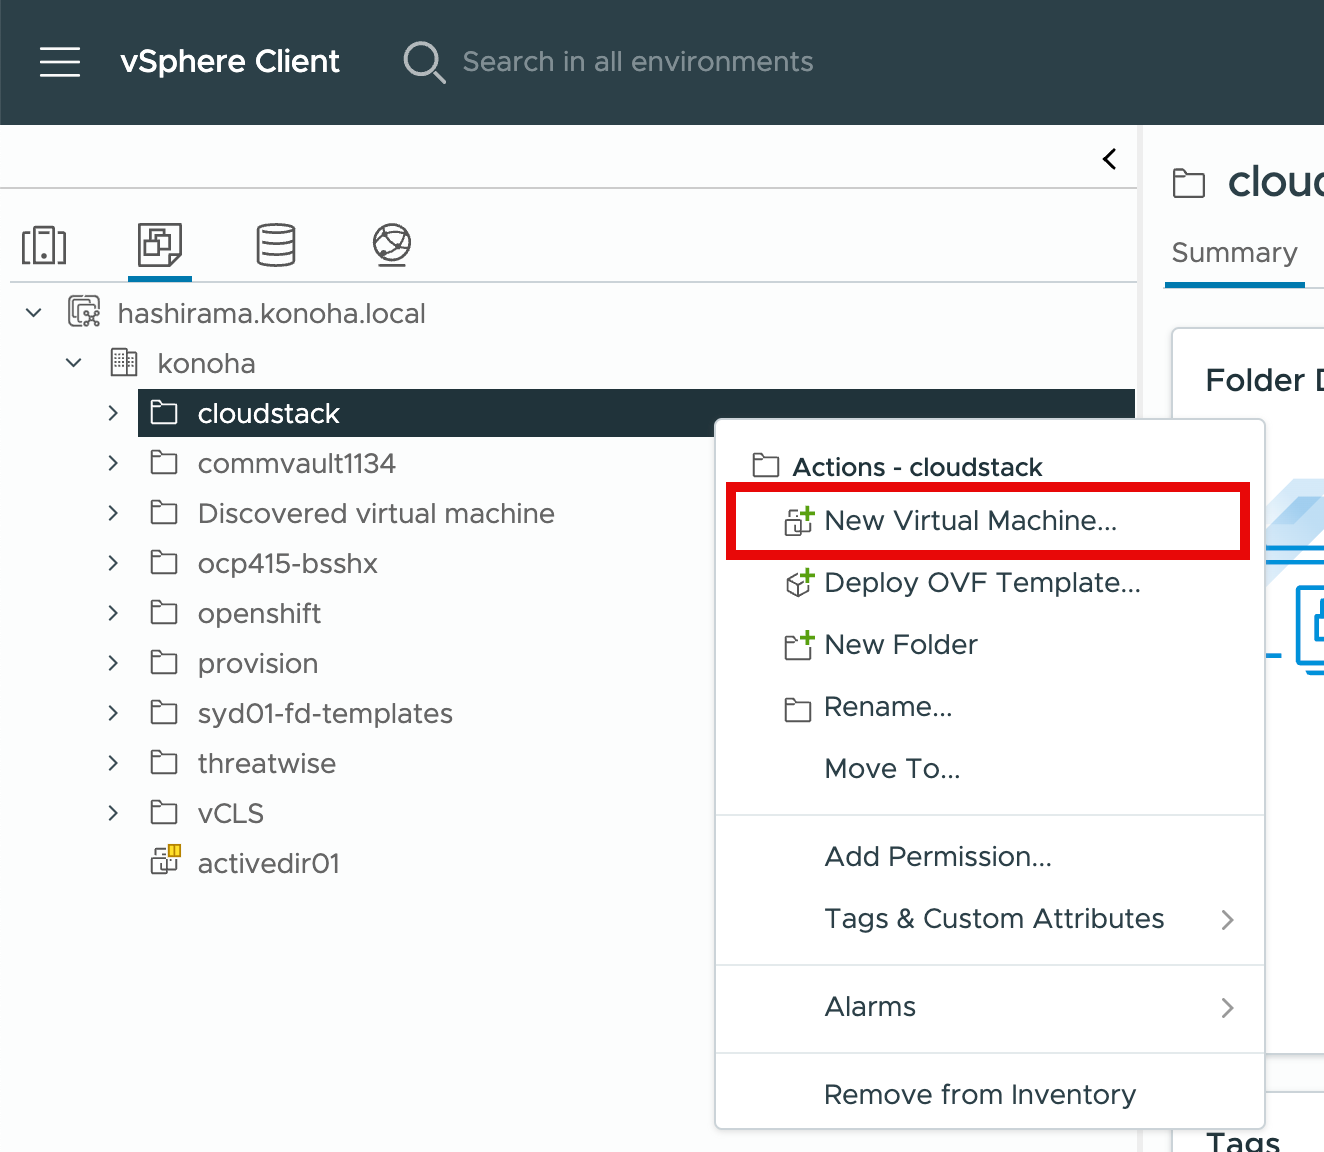
Provision the cloudstack management VM.
Click and select then right click the cloudstack folder. Click New Virtual Machine.
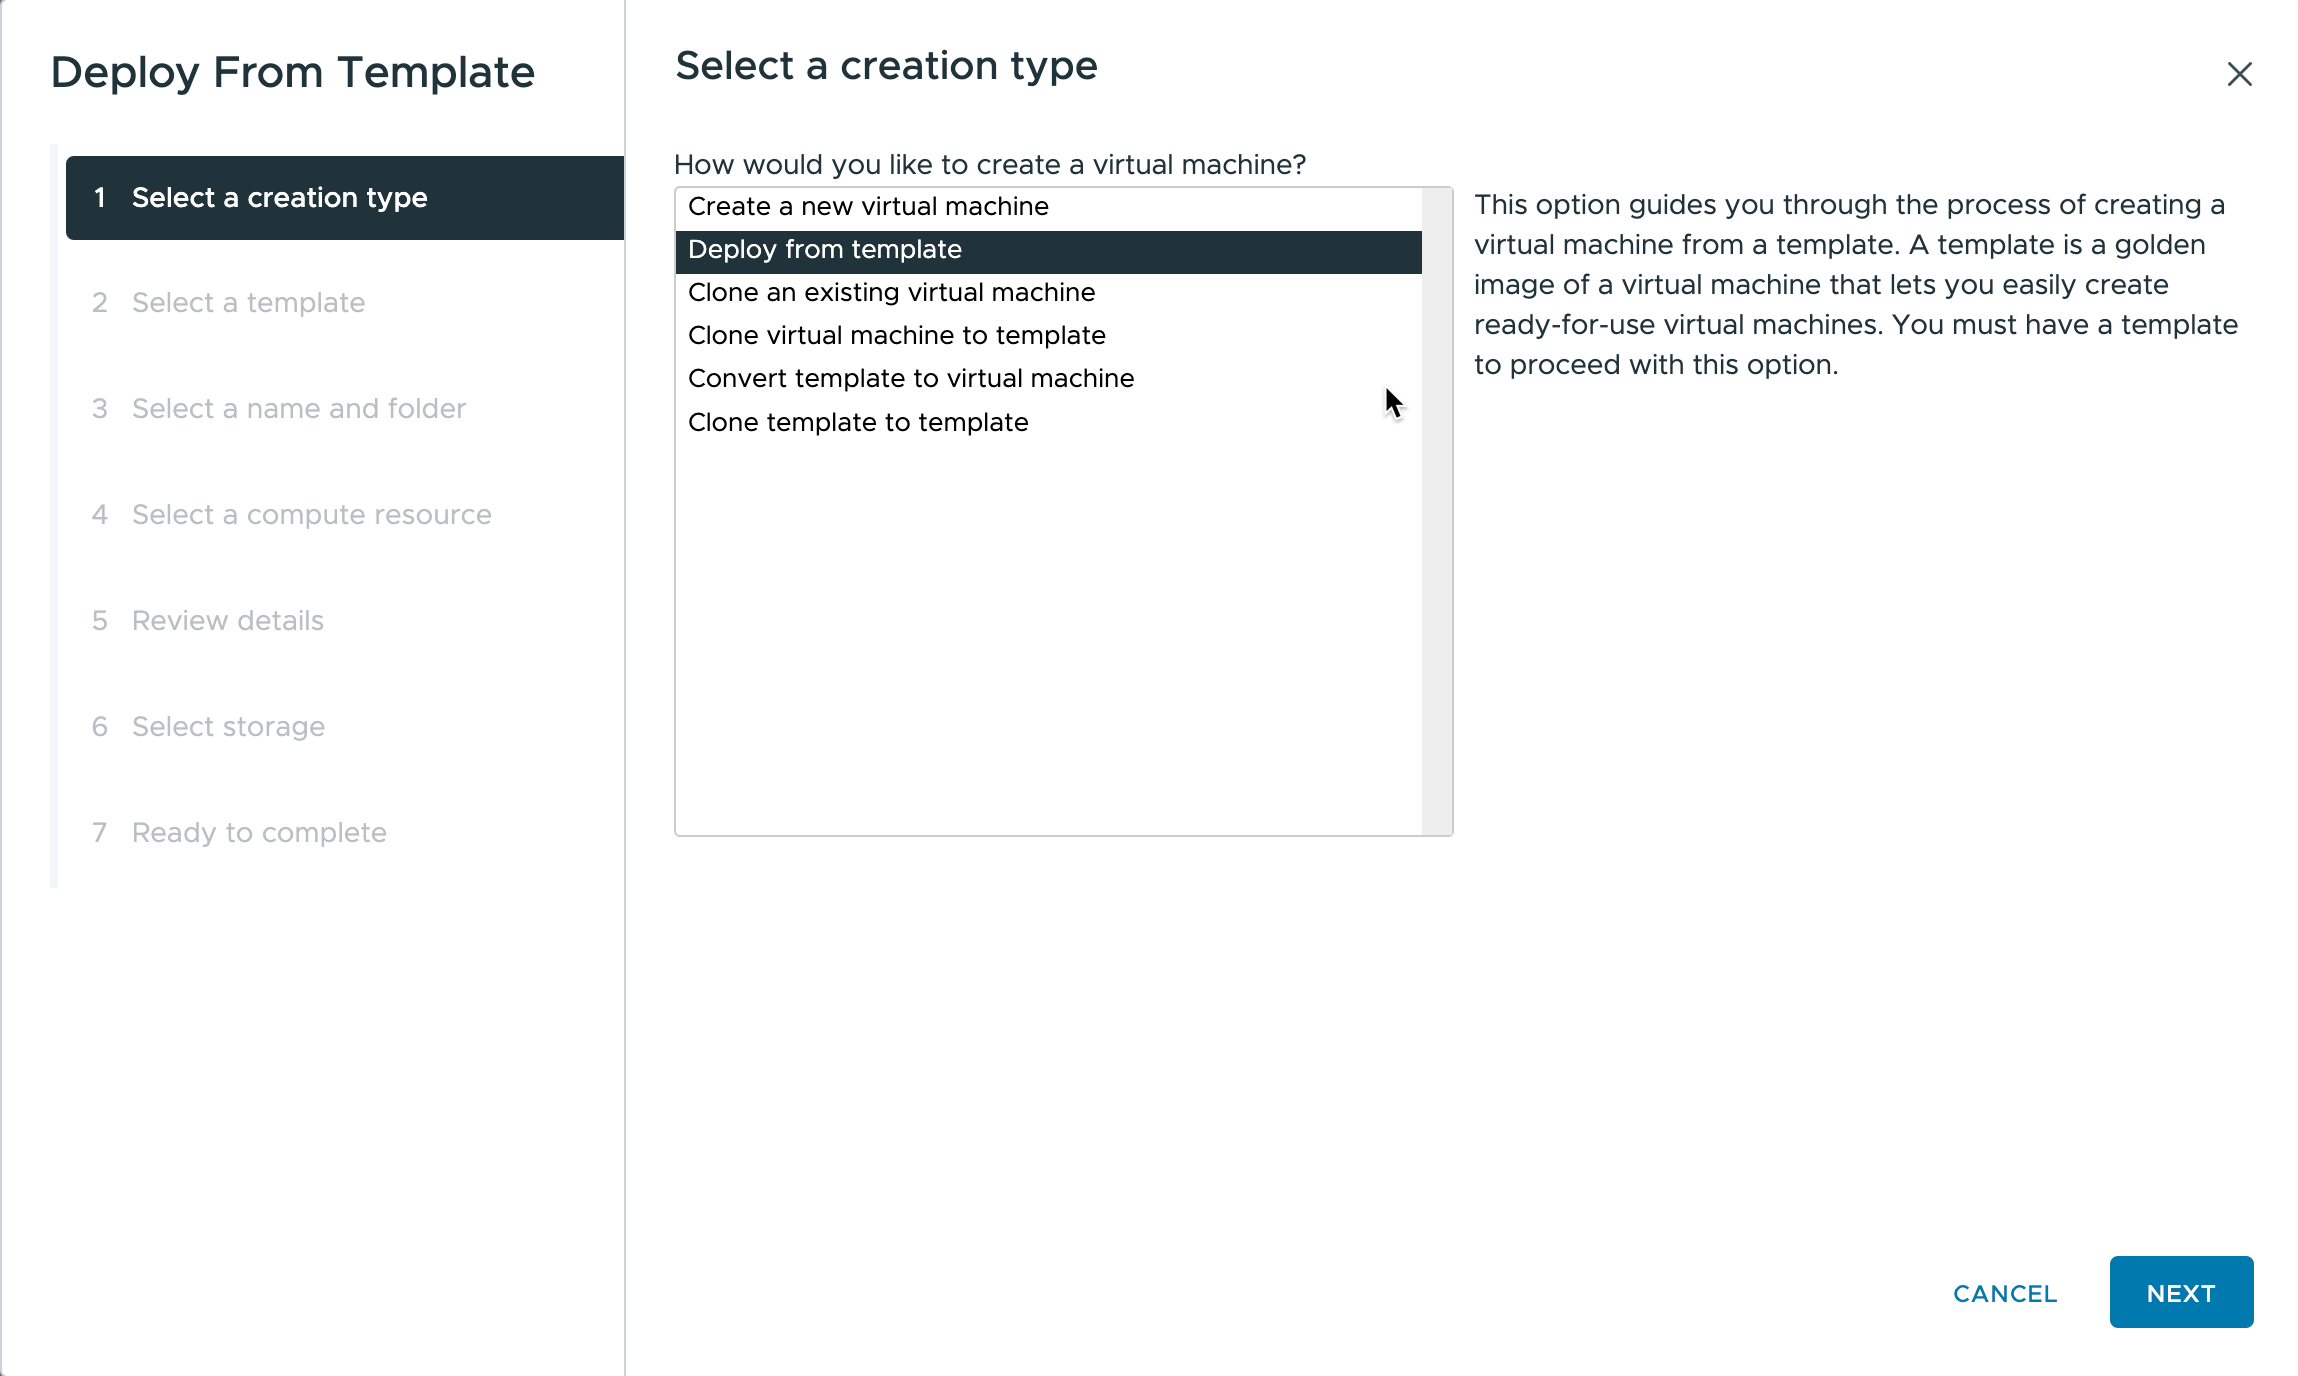
Step 3
From the Select creation type form, select "Deploy from template". Click Next.
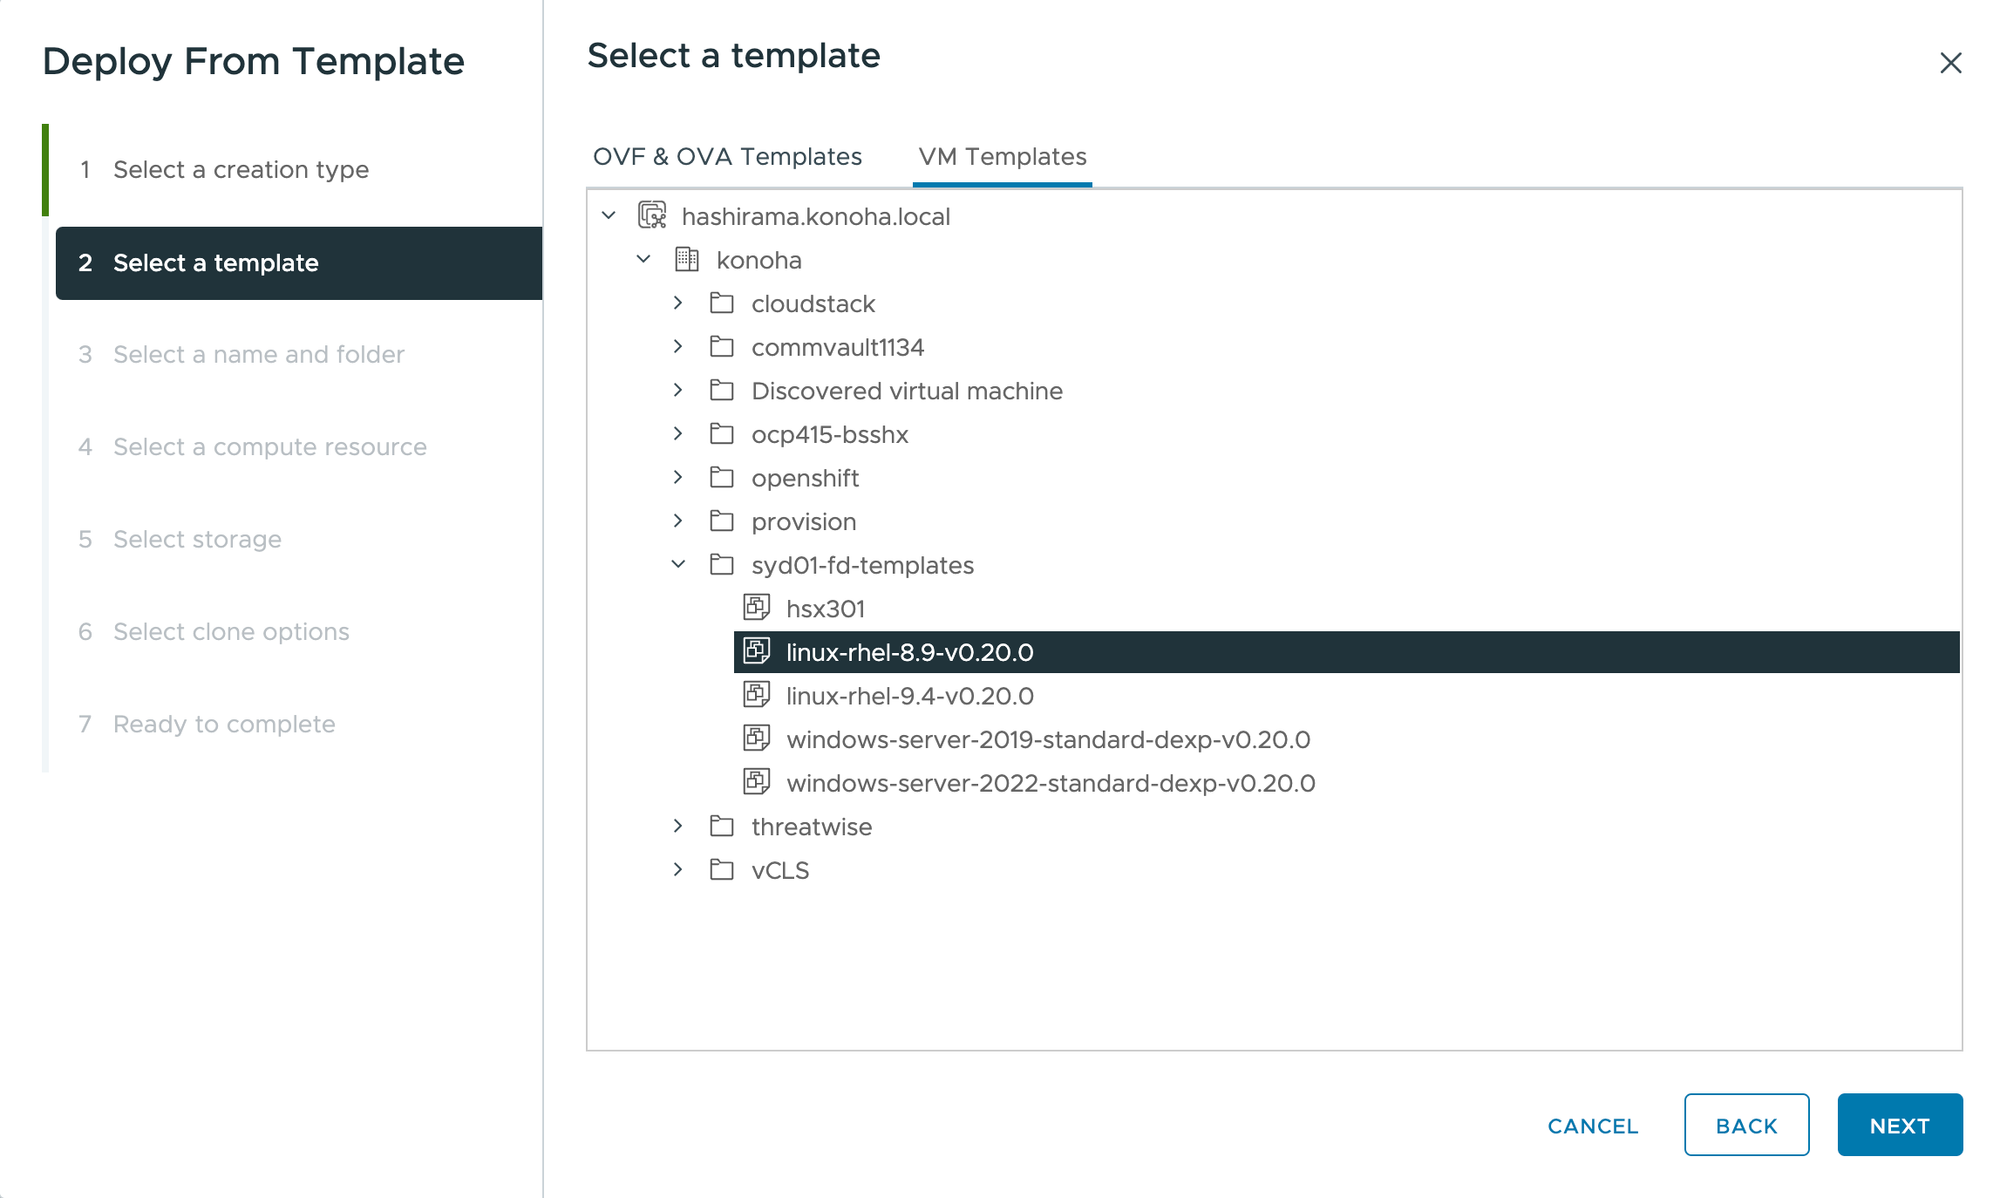
Step 4
From the Select a template form, click VM Templates.
Expand the templates folder and select the appropriate template.
I am going to provision a Red Hat Enterprise Linux version 8 for my management server as suggested by the system requirements. Click Next.
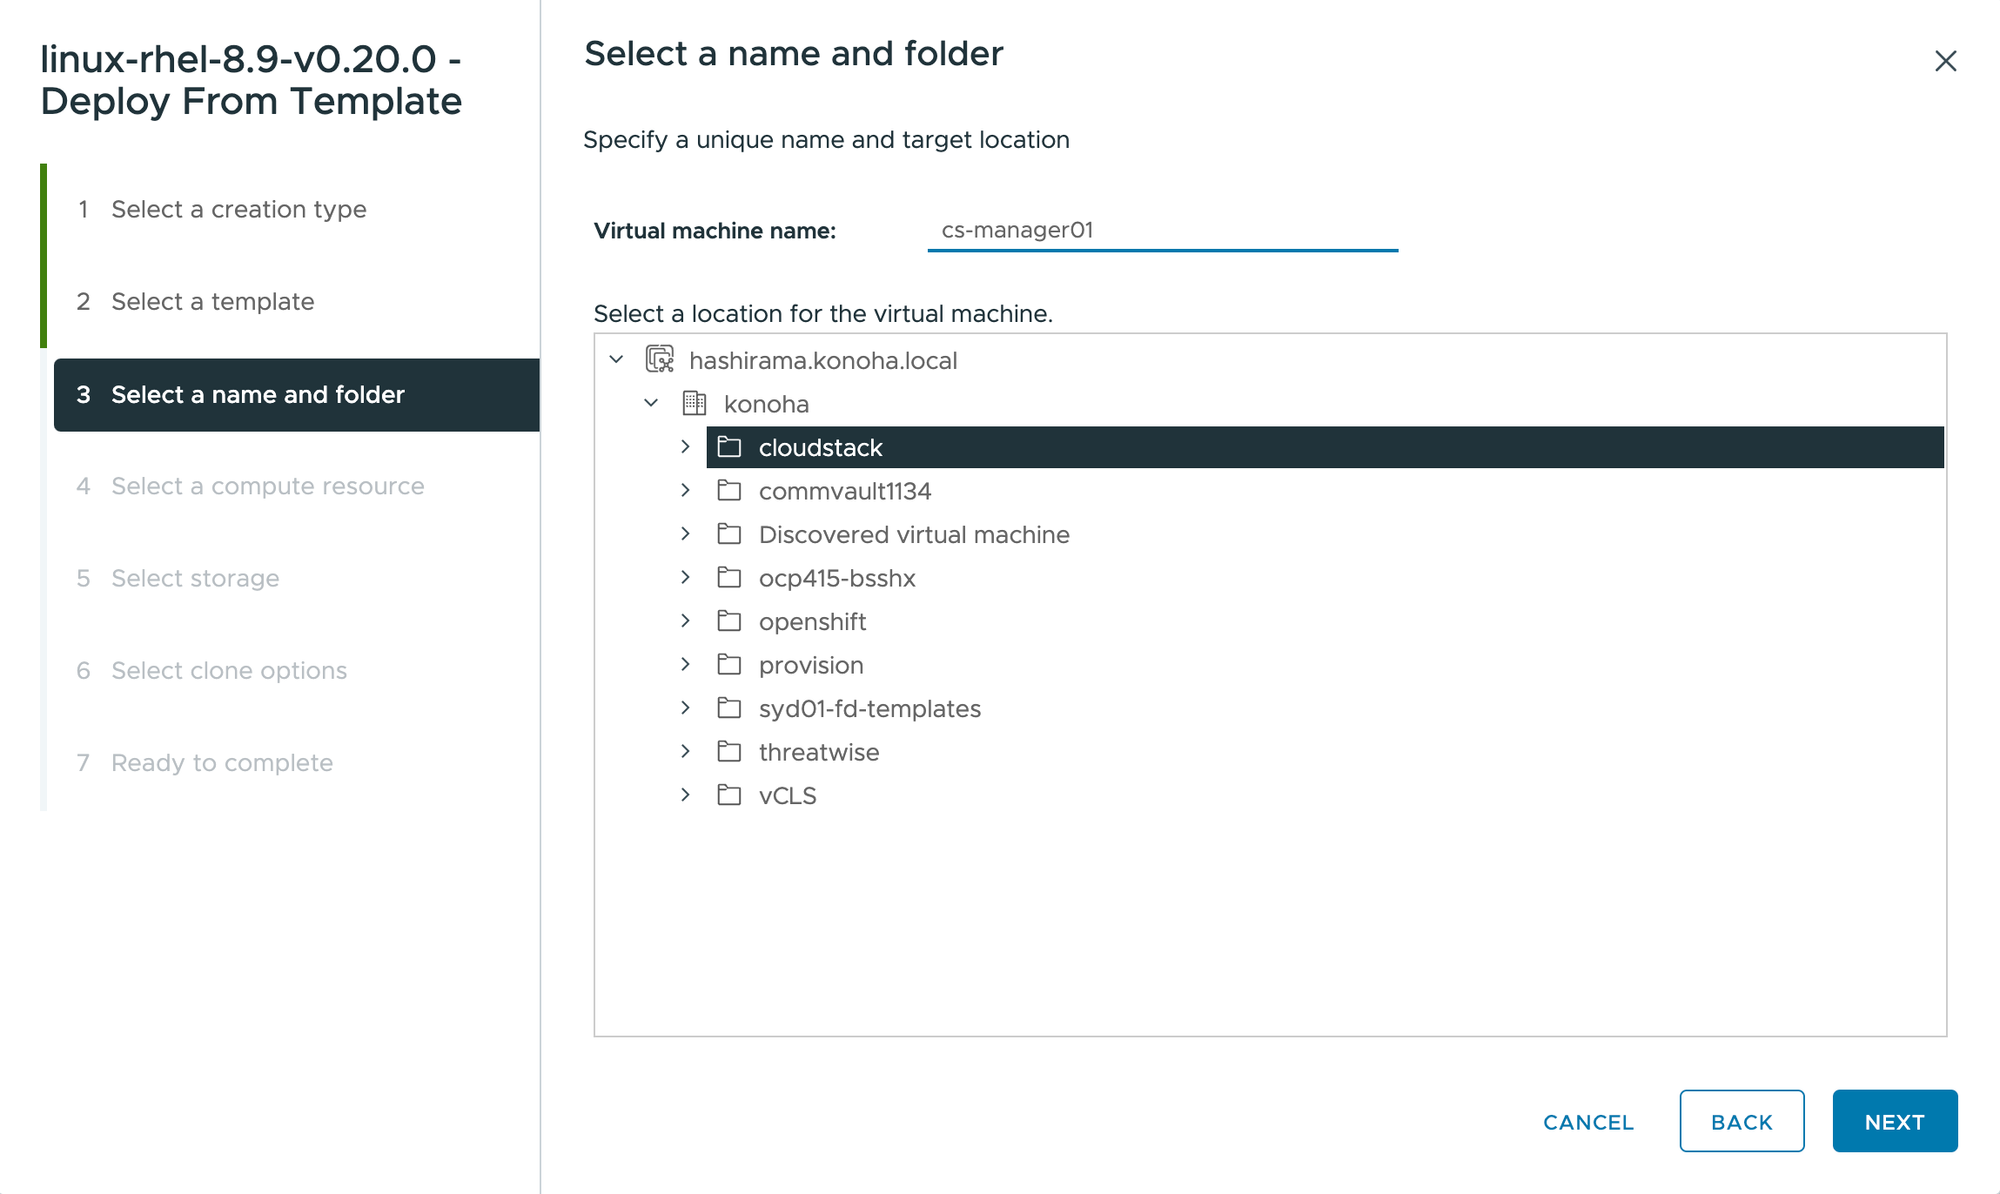
Step 5
From the Select a name and folder form, type in the Virtual machine name and select the newly created cloudstack VM folder. Click Next.
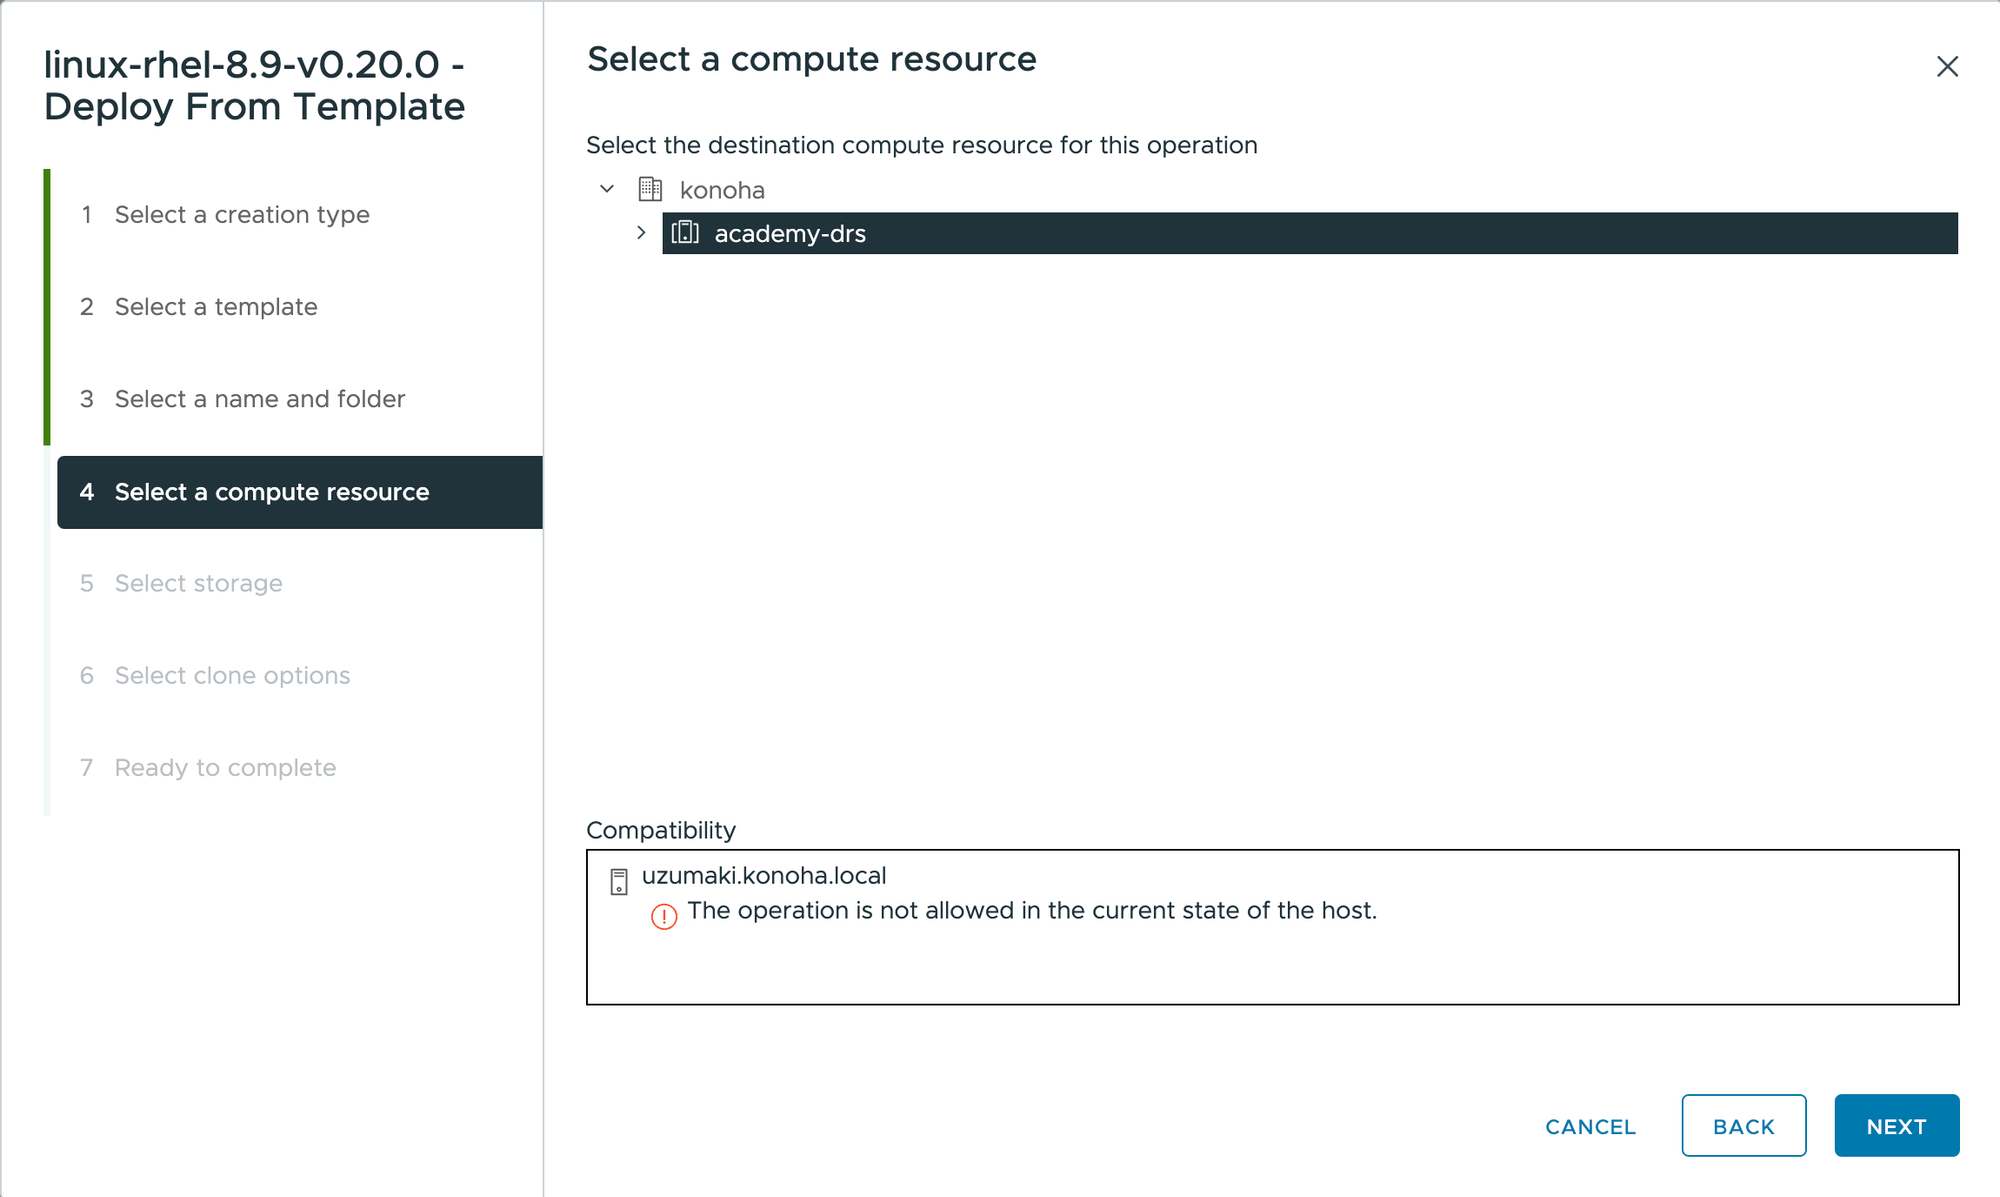
Step 6
On the Select a computer resource form, select the desired cluster or ESXi host. Click Next.
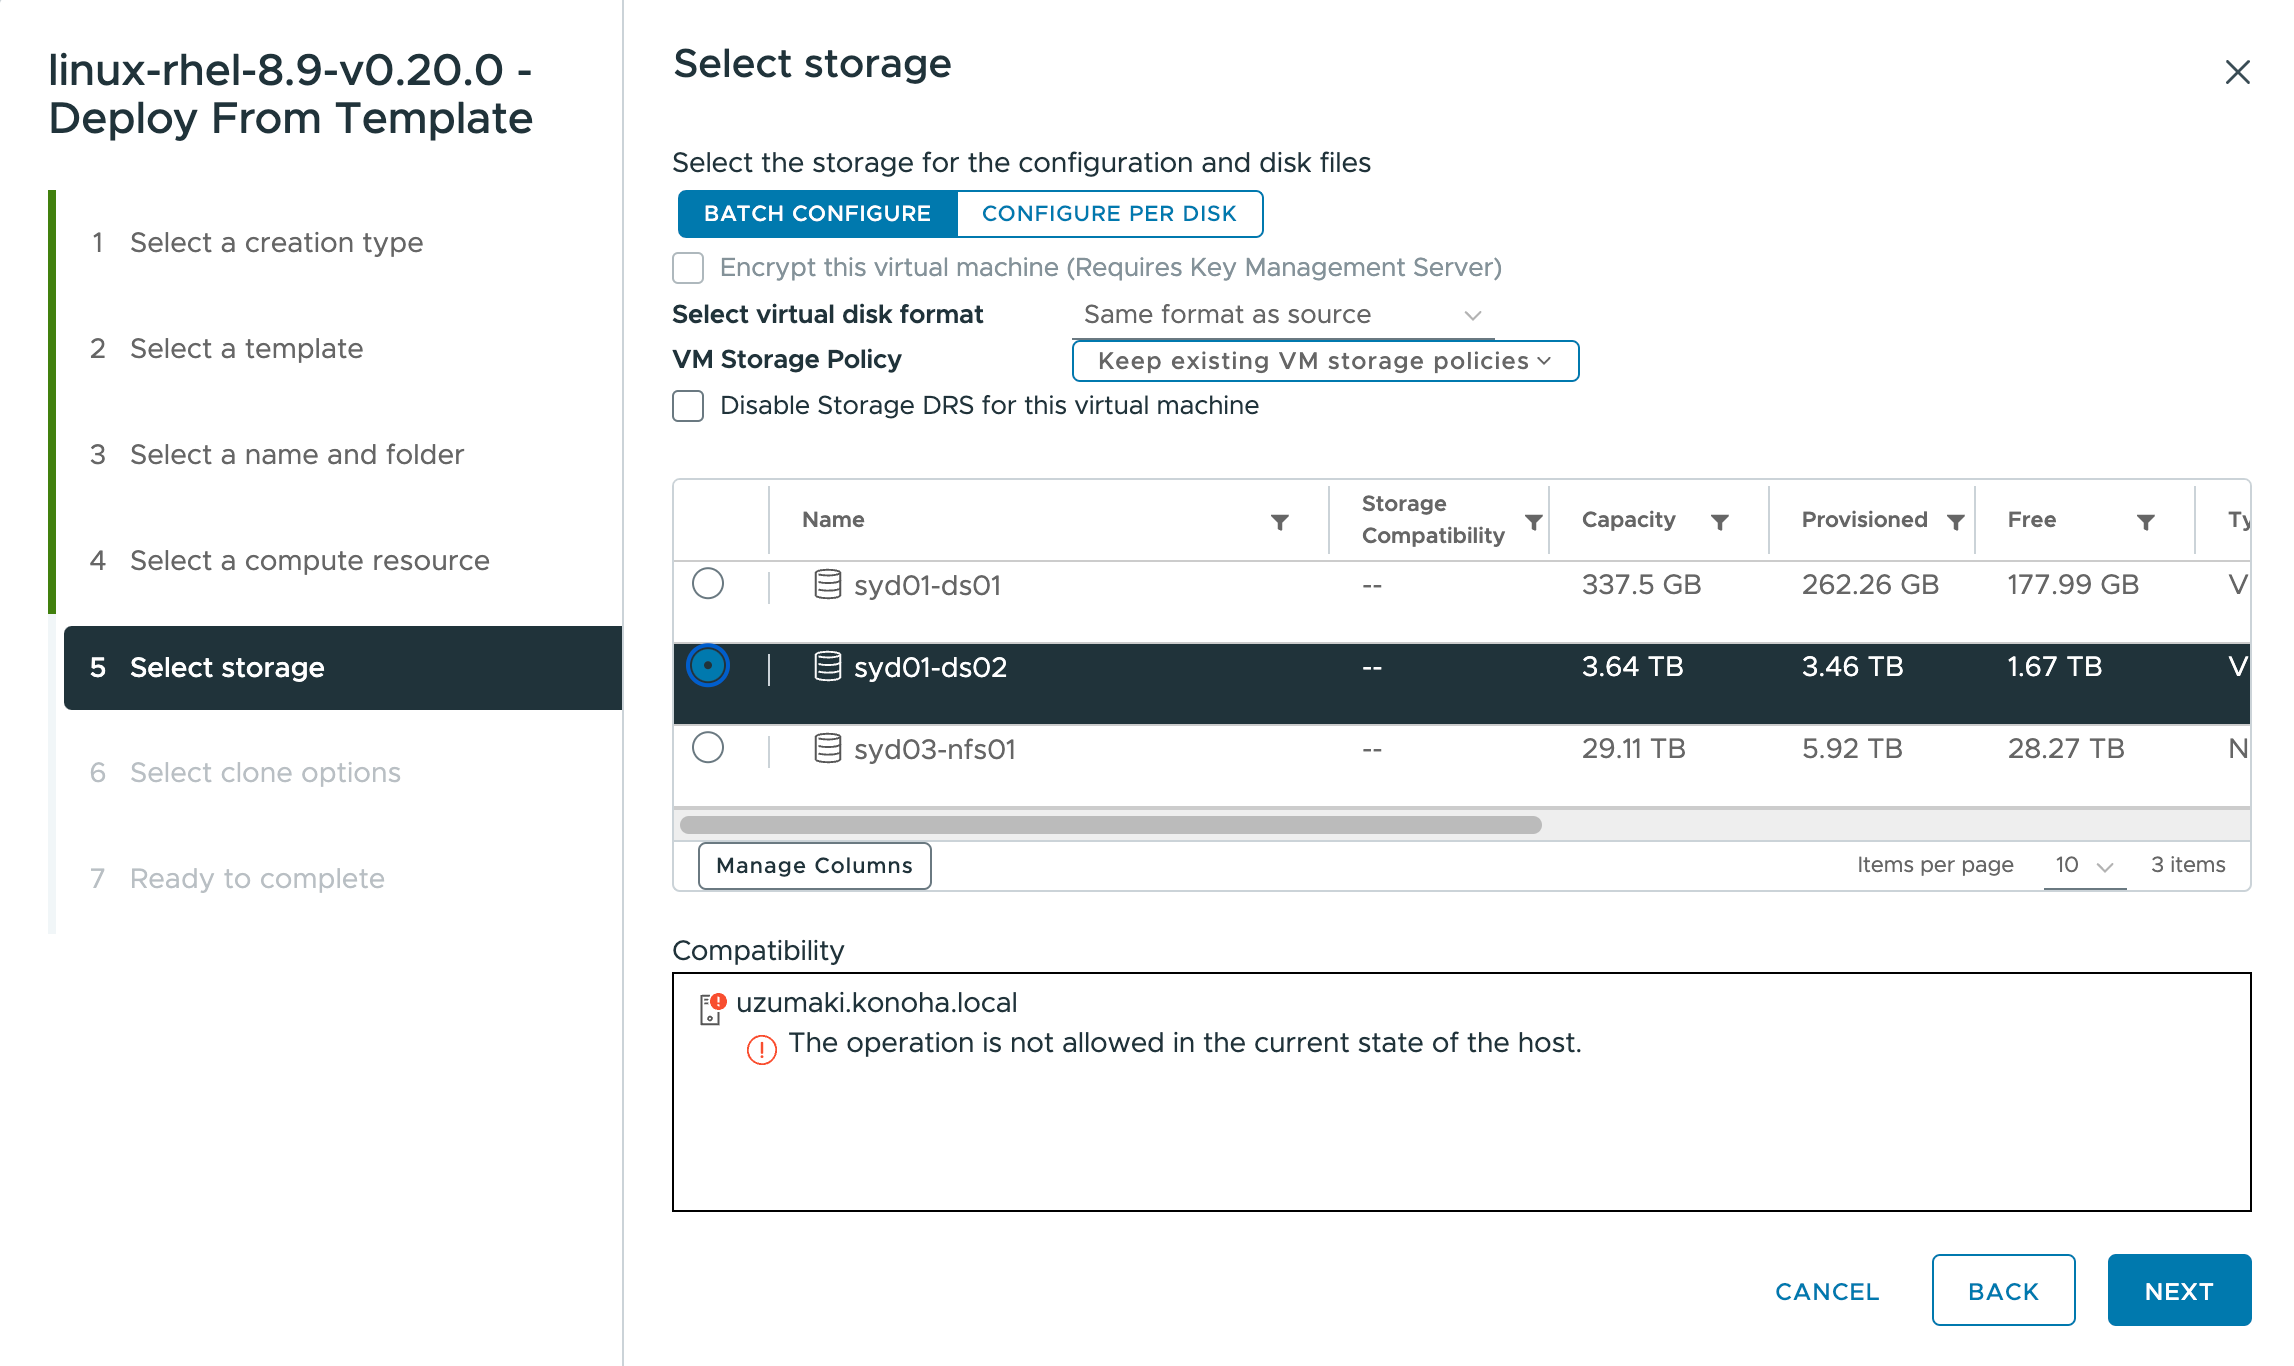
Step 7
On the Select storage form, select the desired storage. Click Next.
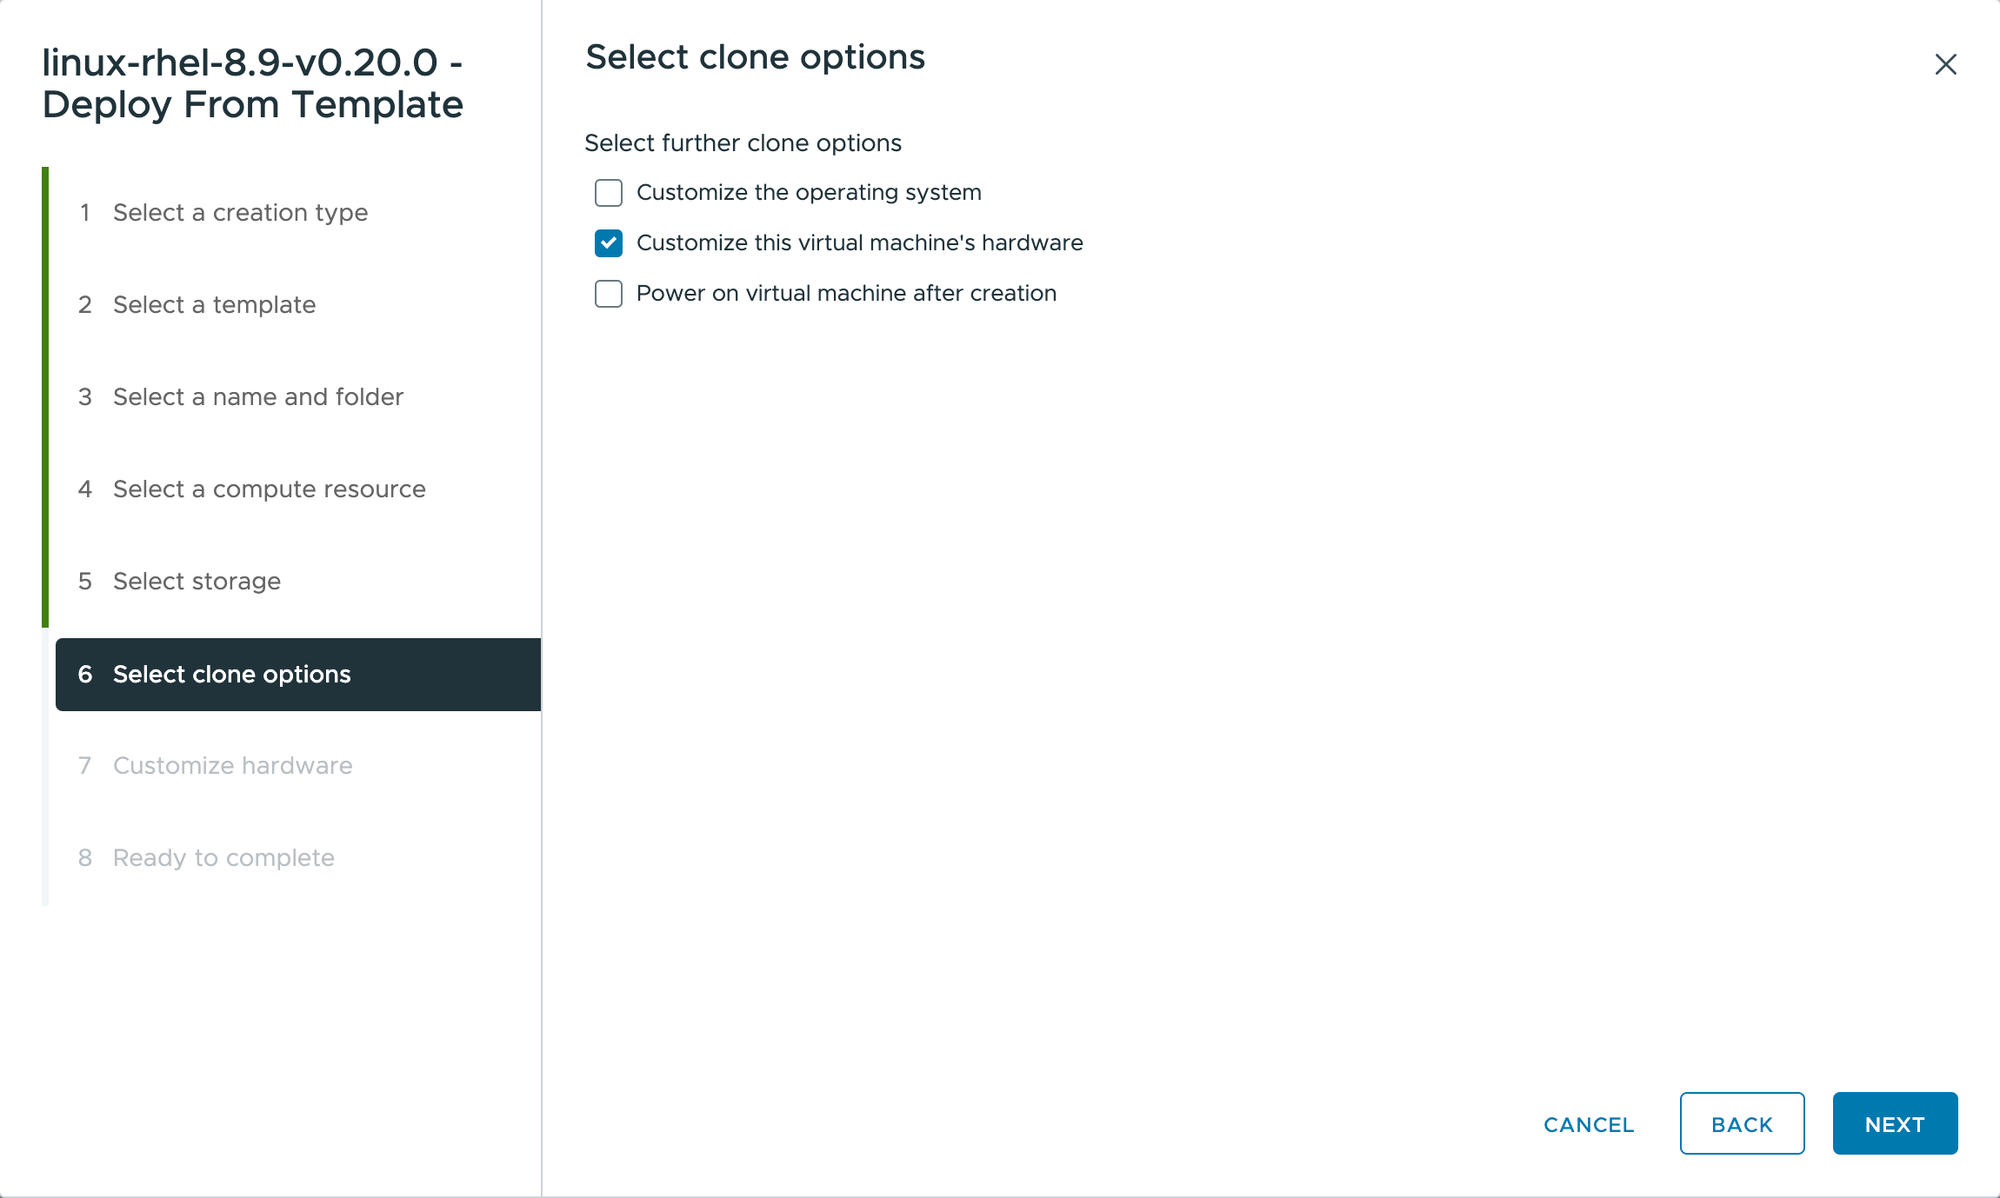
Step 8
On the Select clone options form, place a check mark on Customize this virtual machine's hardware. Click Next.
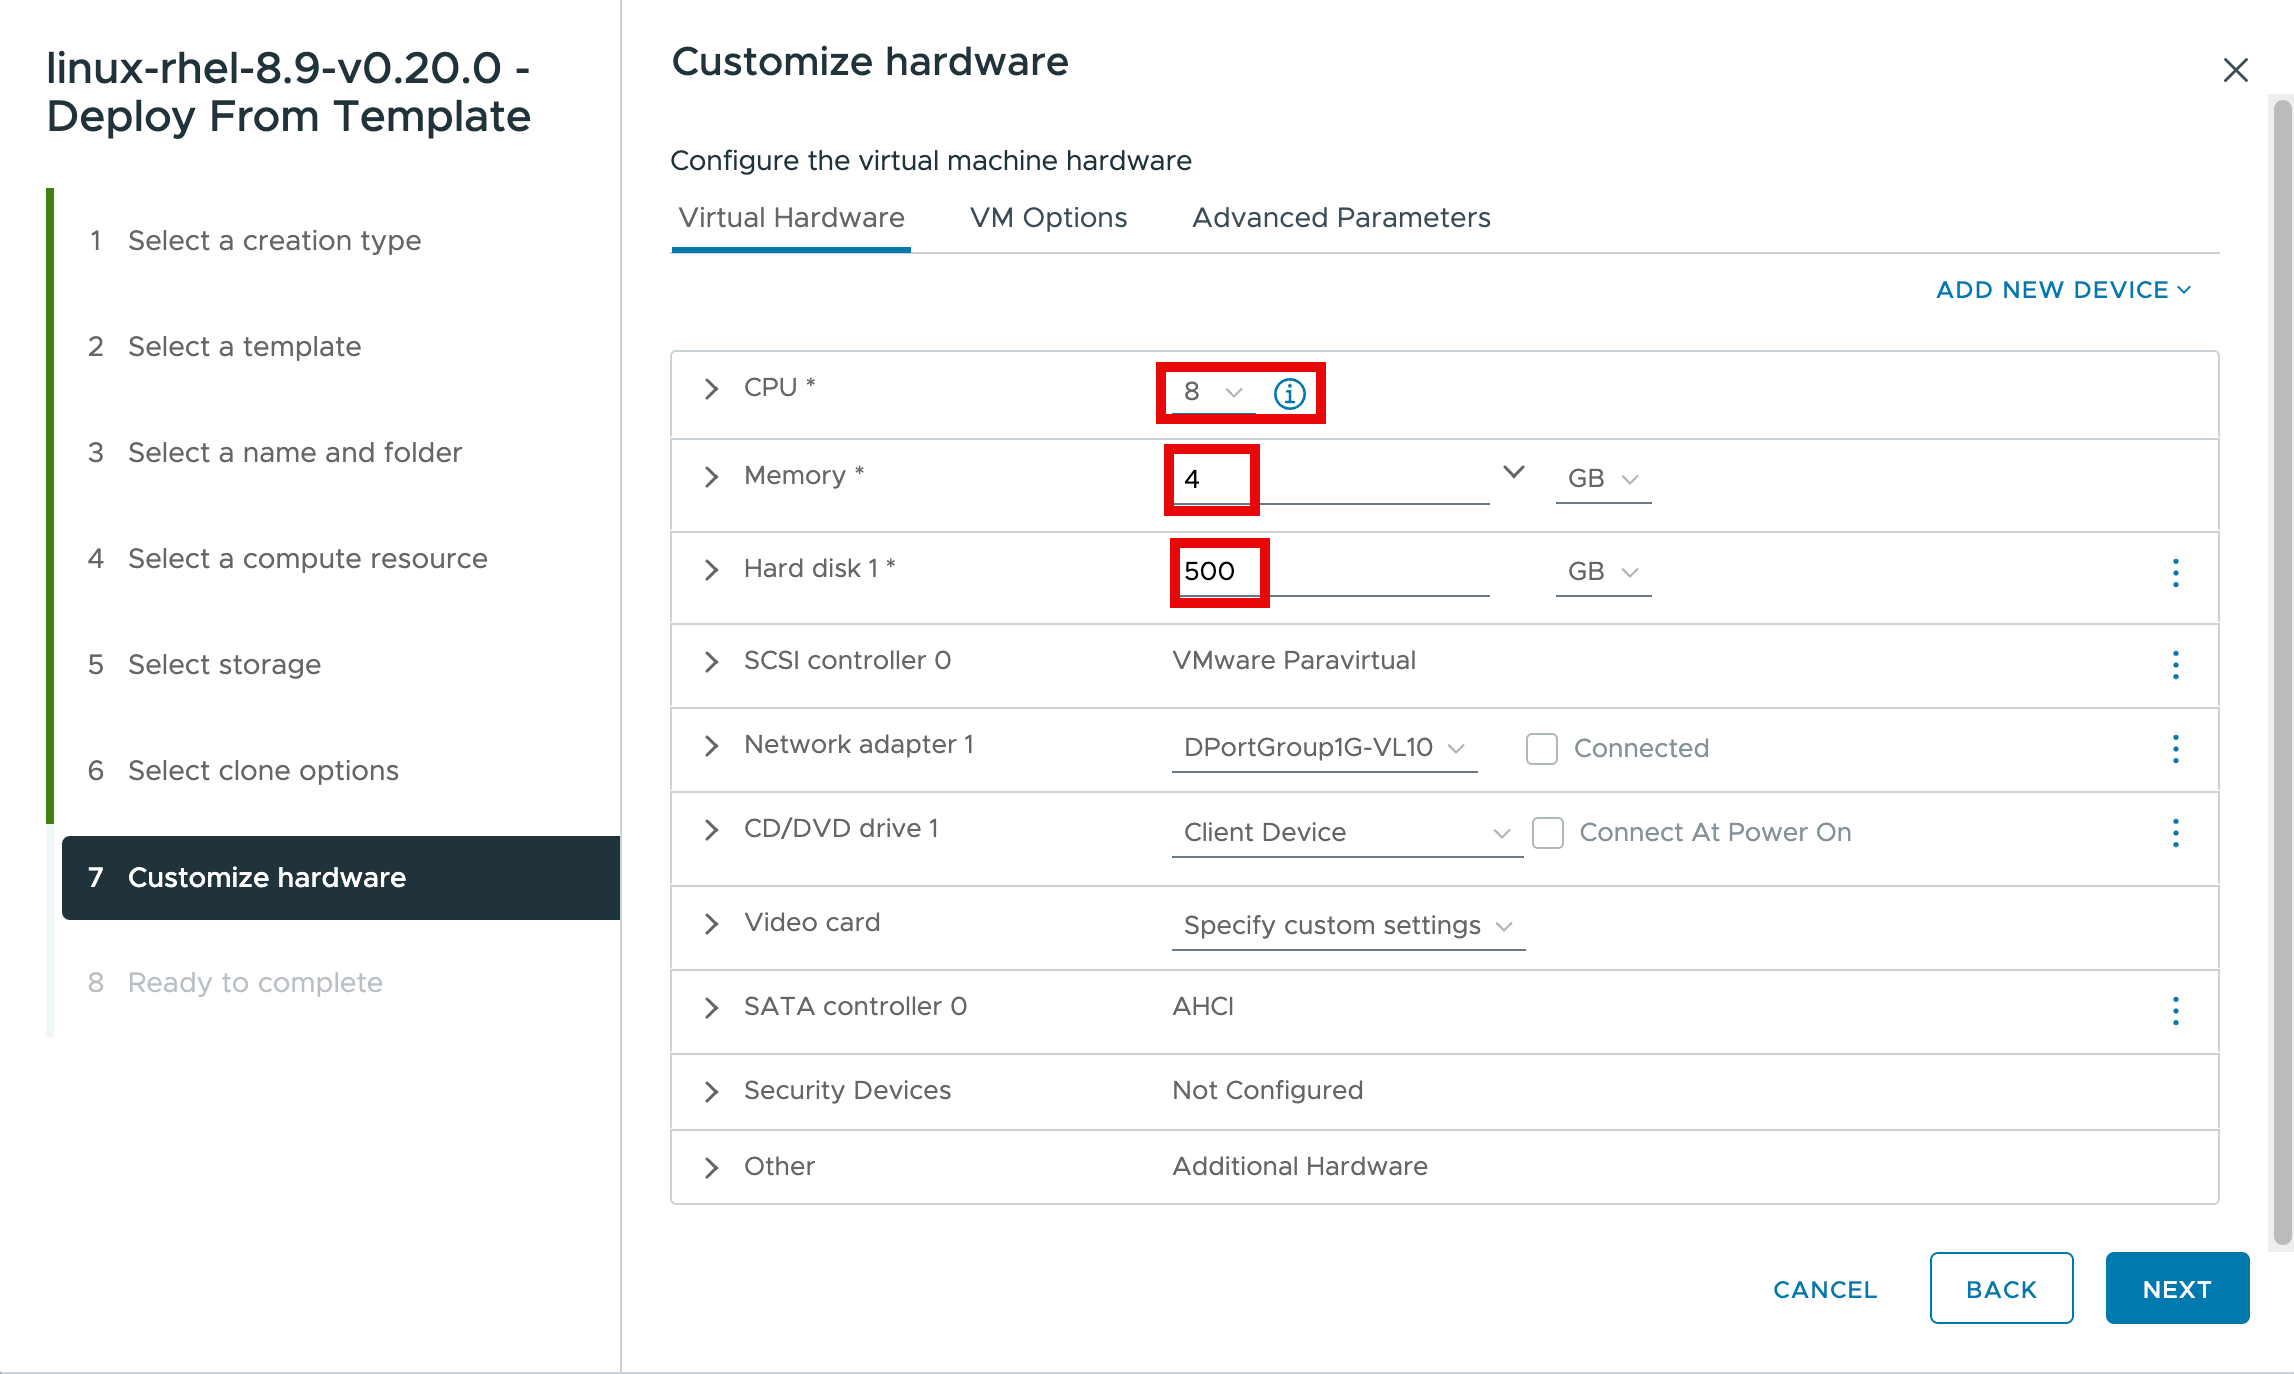
Step 9
Customize the hardware as desired. Click Next.
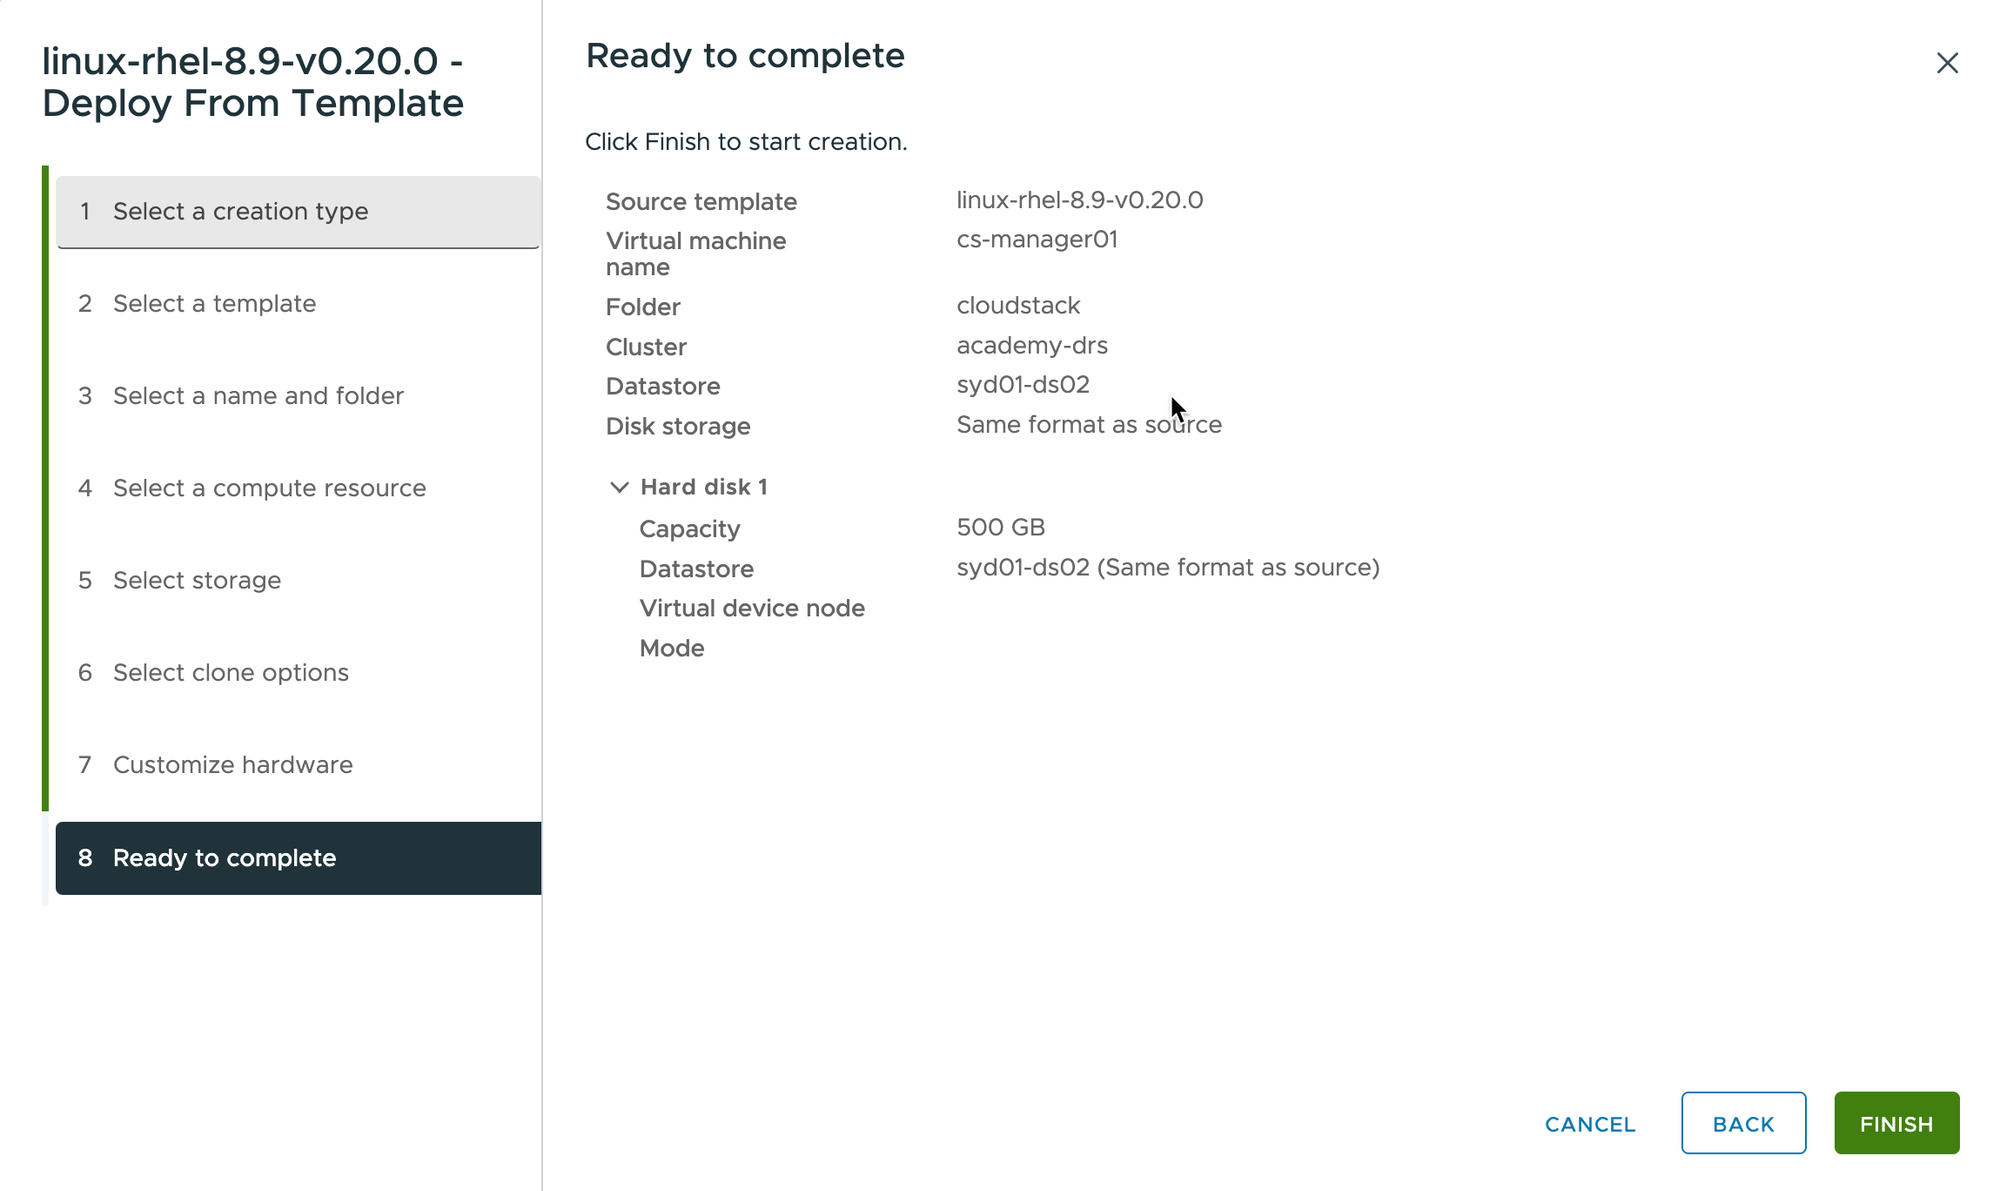
Step 10
Review the options summary. Click Back to change options. Click Finish when completed.
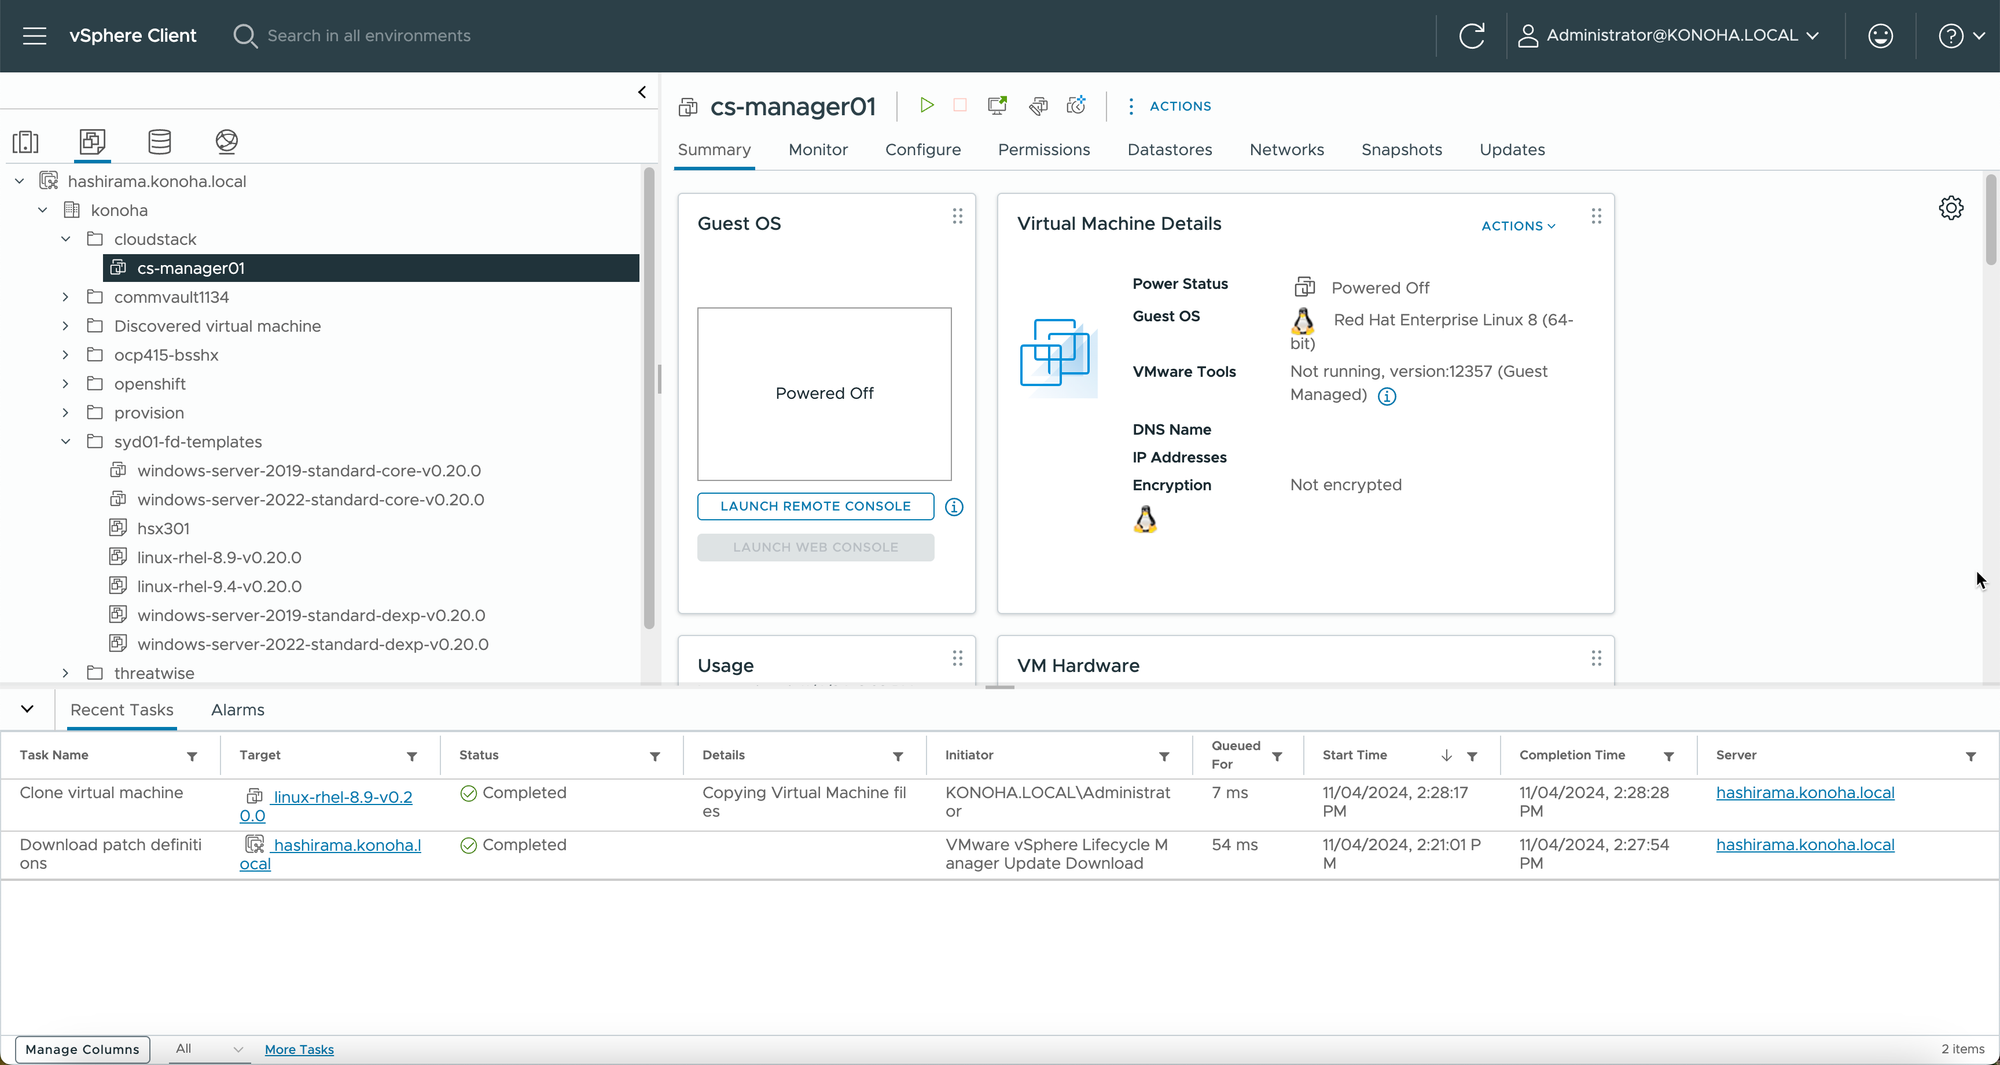
Step 11
The Red Hat Enterprise Linux 8 virtual machine has now been successfully created.
On the next post, I will show you how to expand the desired disk size. The template always builds a 20Gb disk virtual machine.


