Provision a Windows Server on IBM Cloud in less than 10 minutes
Learn how to provision a Windows Server on the IBM Cloud

This is a follow up post about my experiences trying out IBM Cloud to build a test Commvault IBMi backup environment.
You can find the IBMi build post on this link.
https://connectedtech.com.au/provision-ibmi-on-ibm-cloud-in-less-than-30-minutes/
Before we get started, if you found this post helpful please consider signing up to receive future posts. It will be very much appreciated.
Please lookup Daryn Higgins on LinkedIn if you would like more information on IBM Cloud.
https://www.linkedin.com/in/daryn-higgins-7a95598/
Step 1
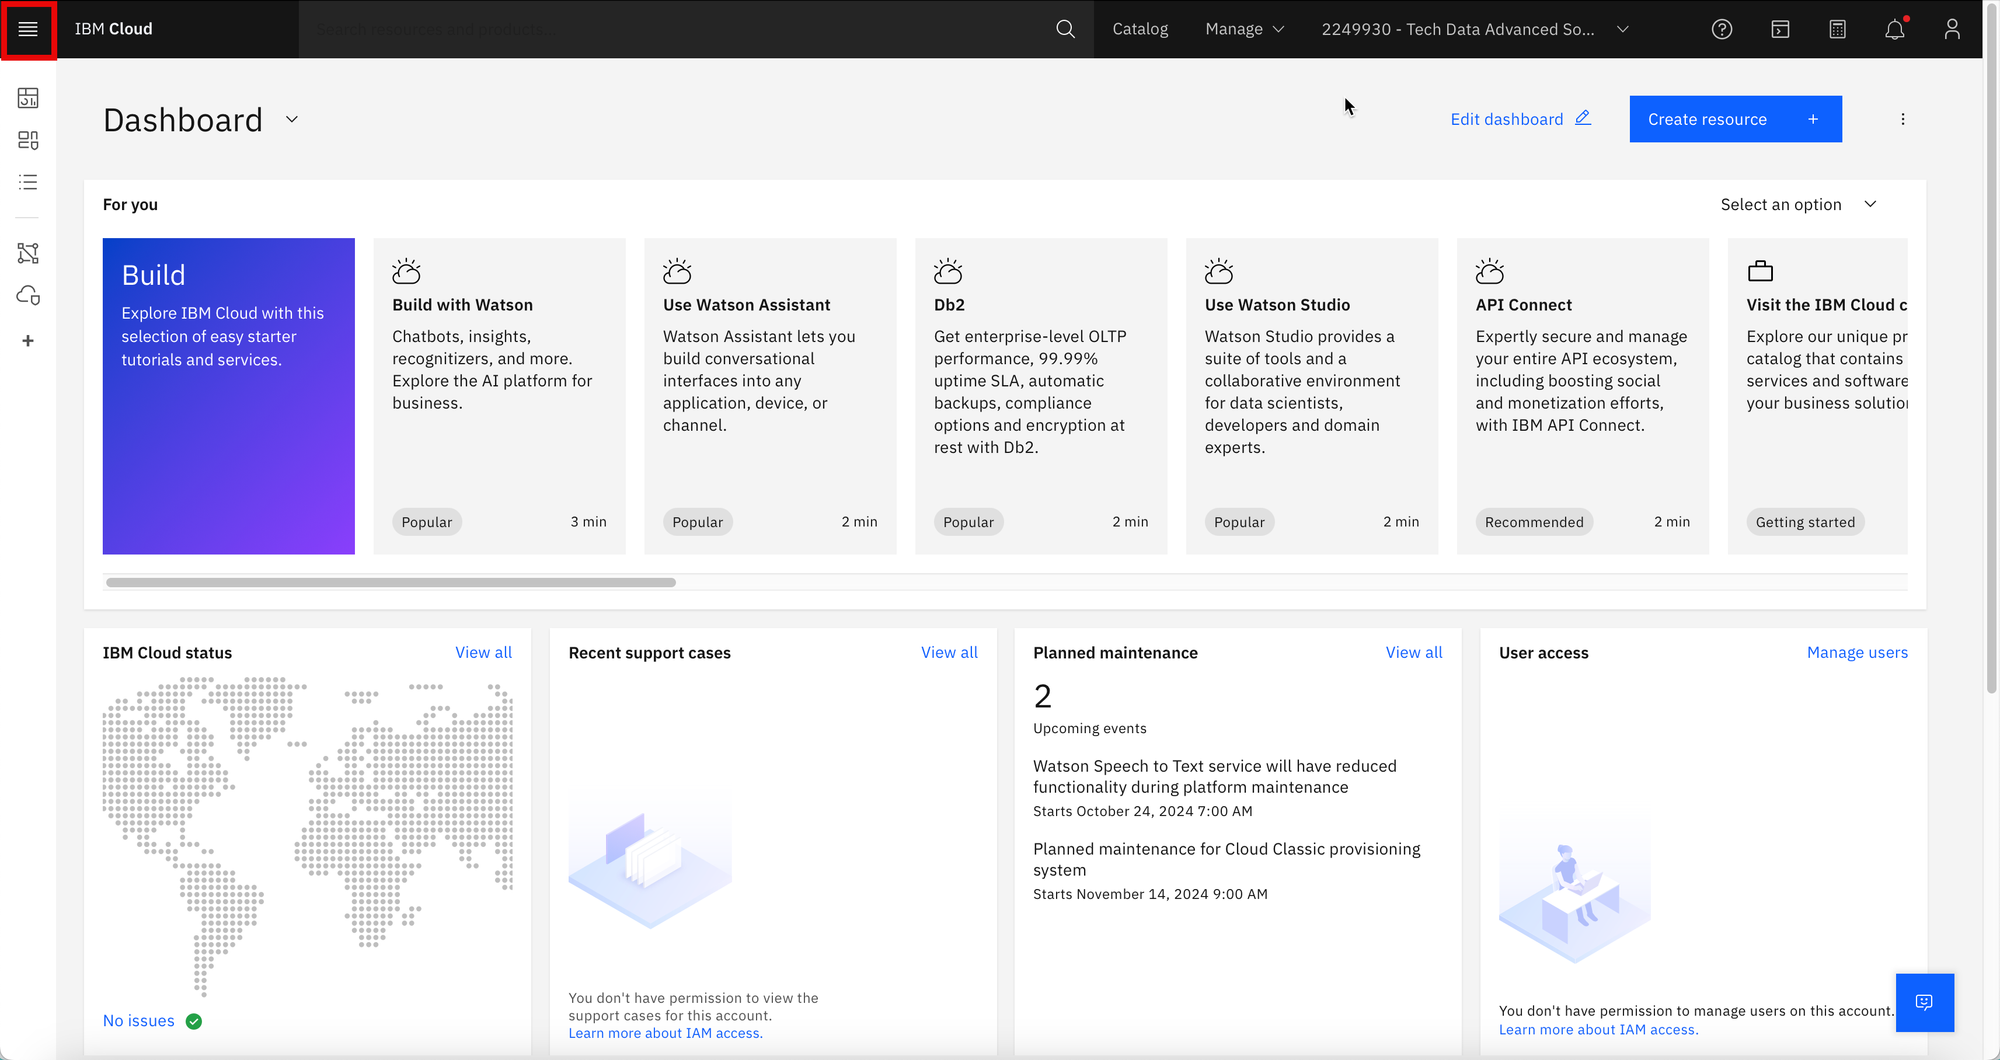
Logon to the IBM Cloud Dashboard then click the hamburger menu on the top left hand corner. Click Infrastructure.

Step 2
In the Infrastructure dashboard, click Network and then VPCs. Like with other cloud providers, VPC stands for Virtual private clouds. This resource needs to be created first. This is a logical grouping construct for the compute and network resources created on IBM Cloud. Click Create.

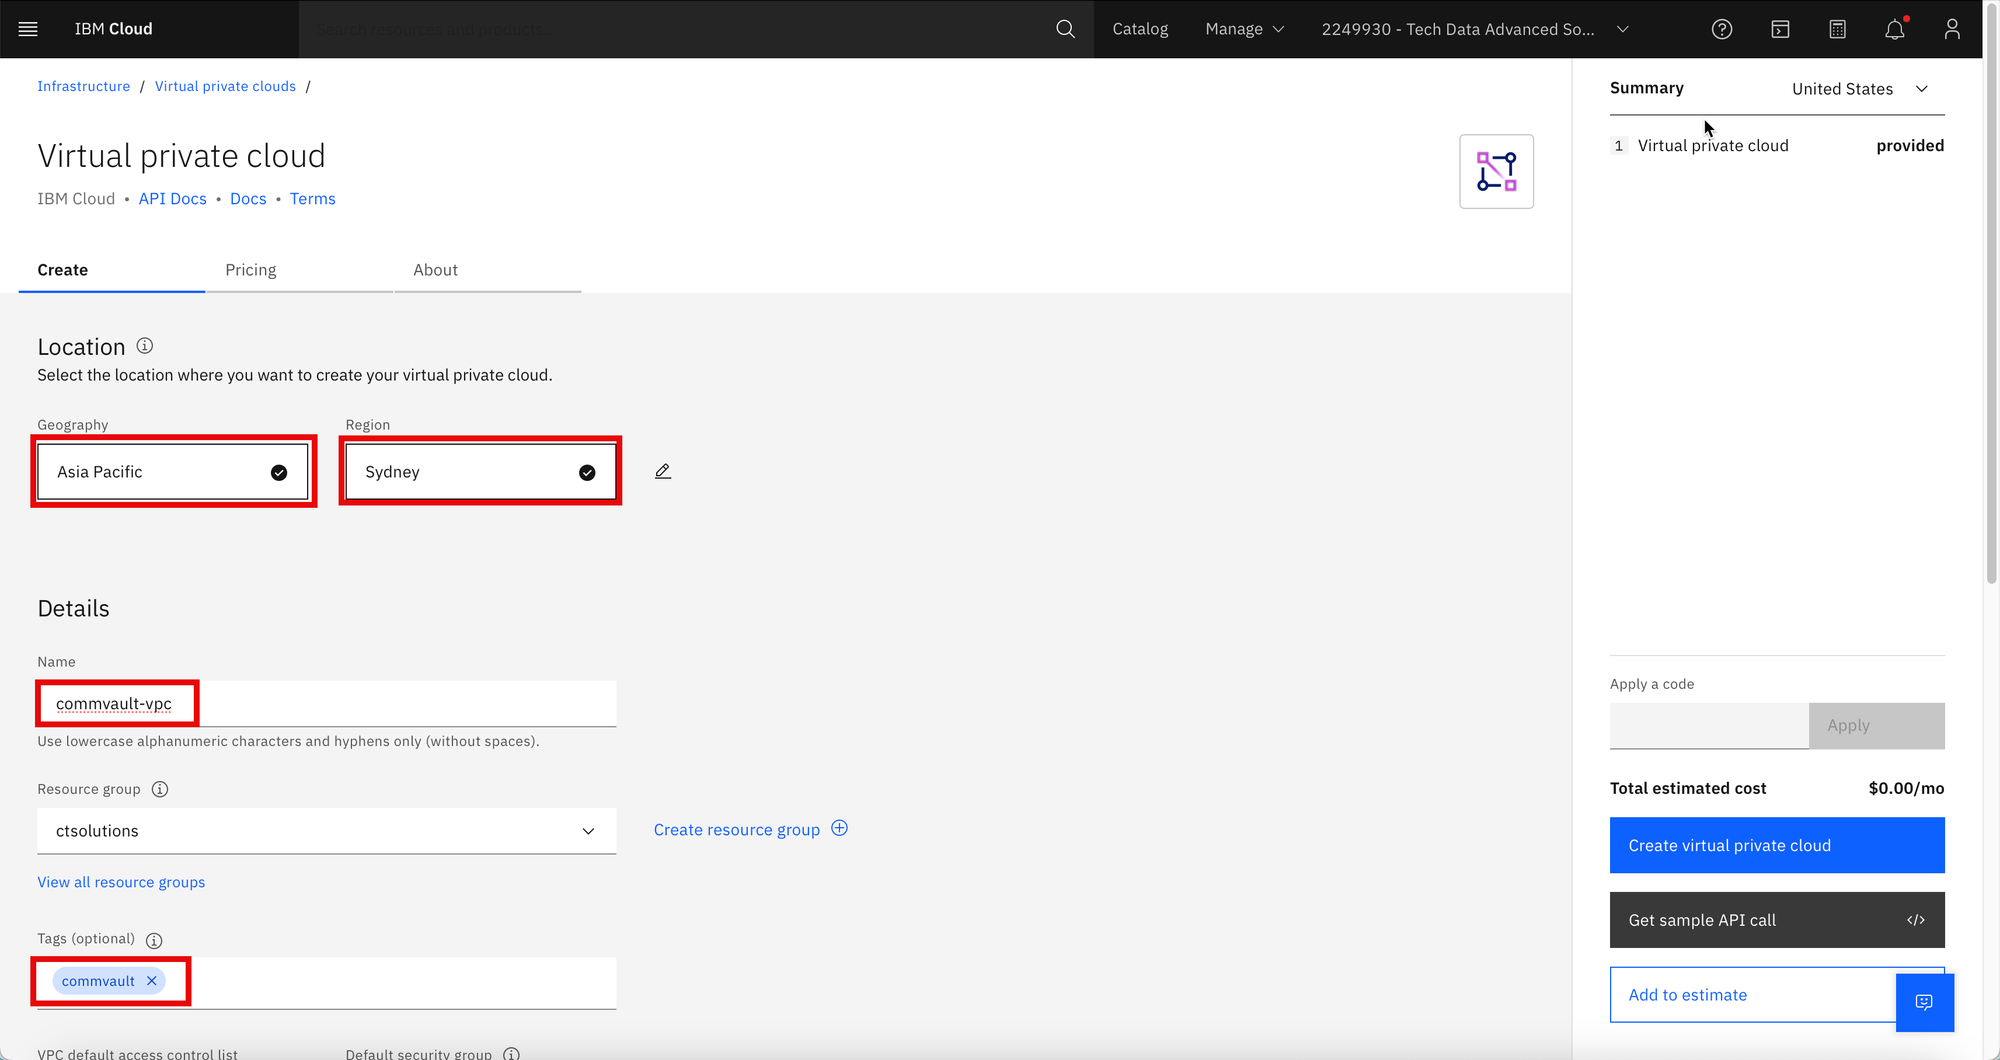
Step 3
On the VPC provisioning screen, confirm the Geography. Enter the VPC Name and any tags to be used.
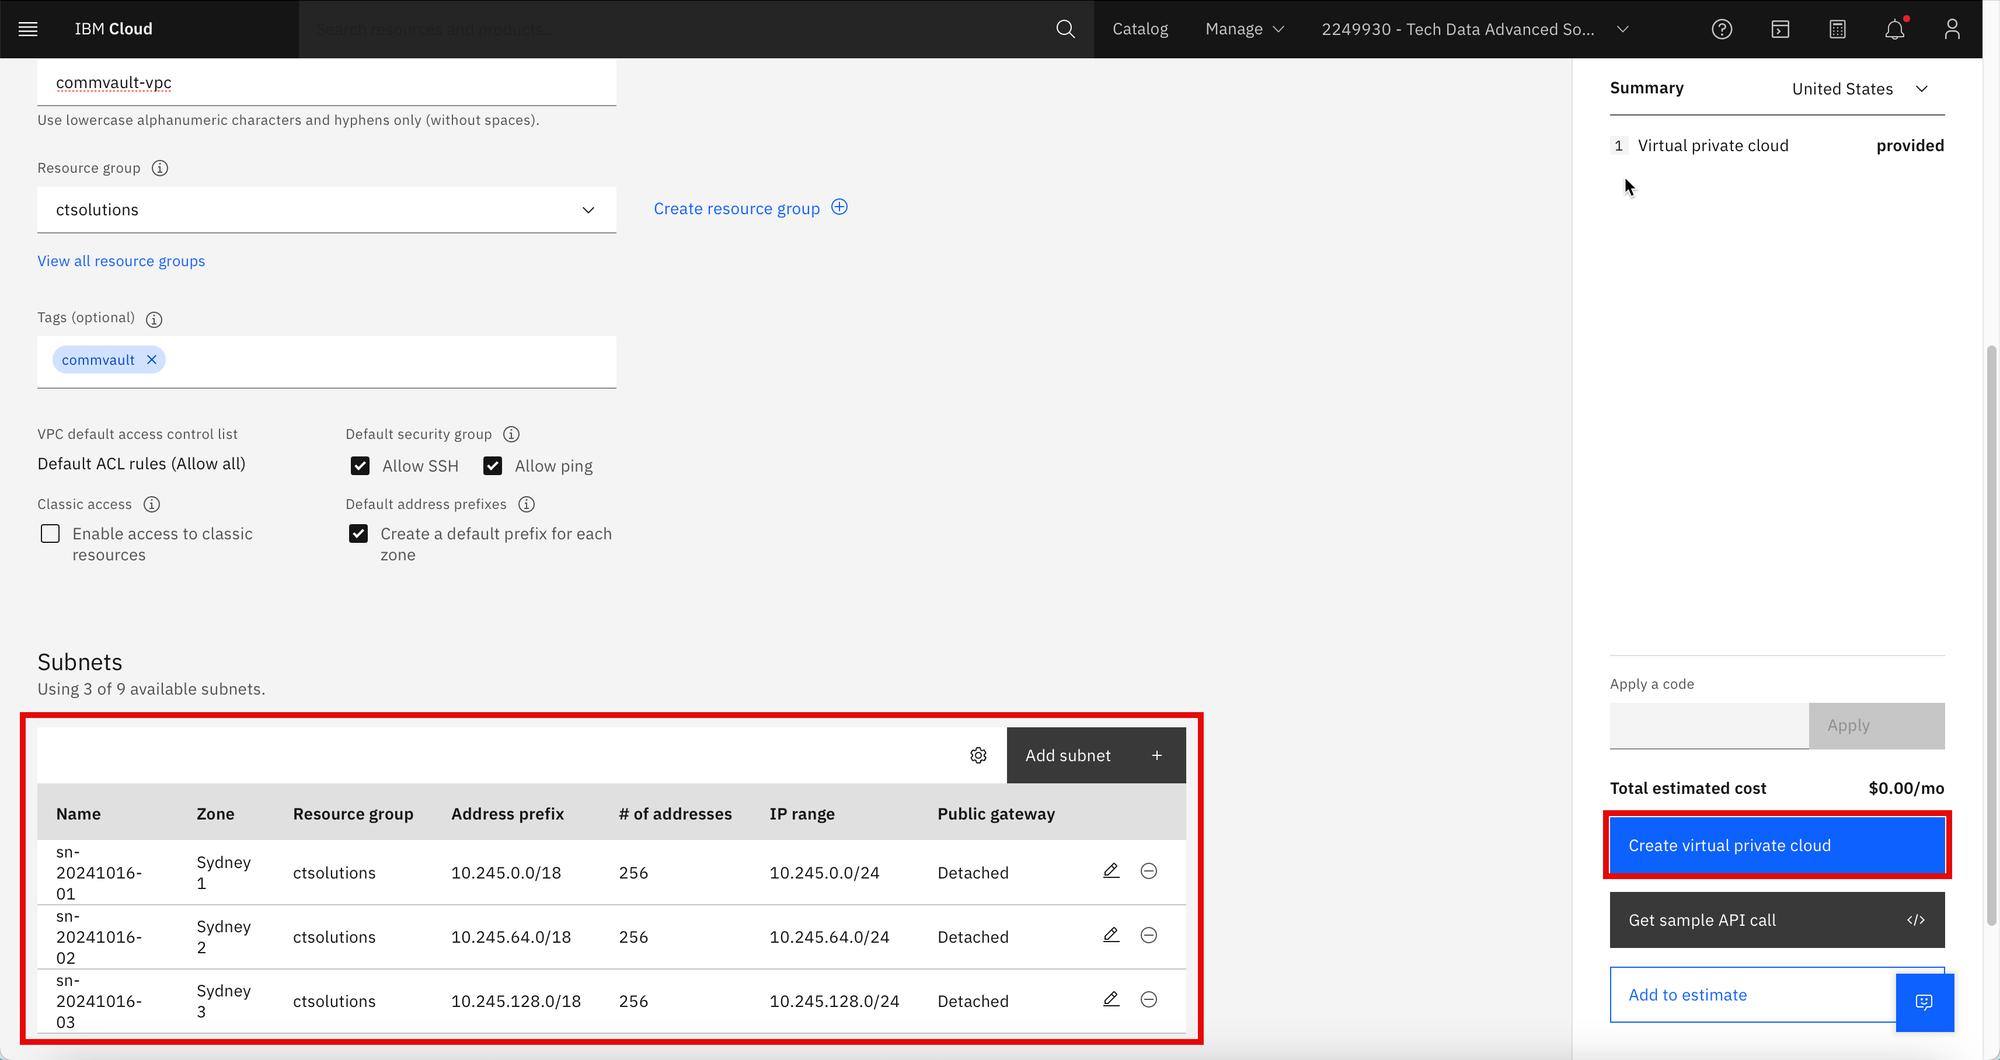
Scroll down to the Subnet section to confirm the automatically created subnets.
Click Create virtual private cloud.
Step 4
Click on Compute and then SSH keys. SSH keys are fundamental security requirement for any resources built in the IBM Cloud.
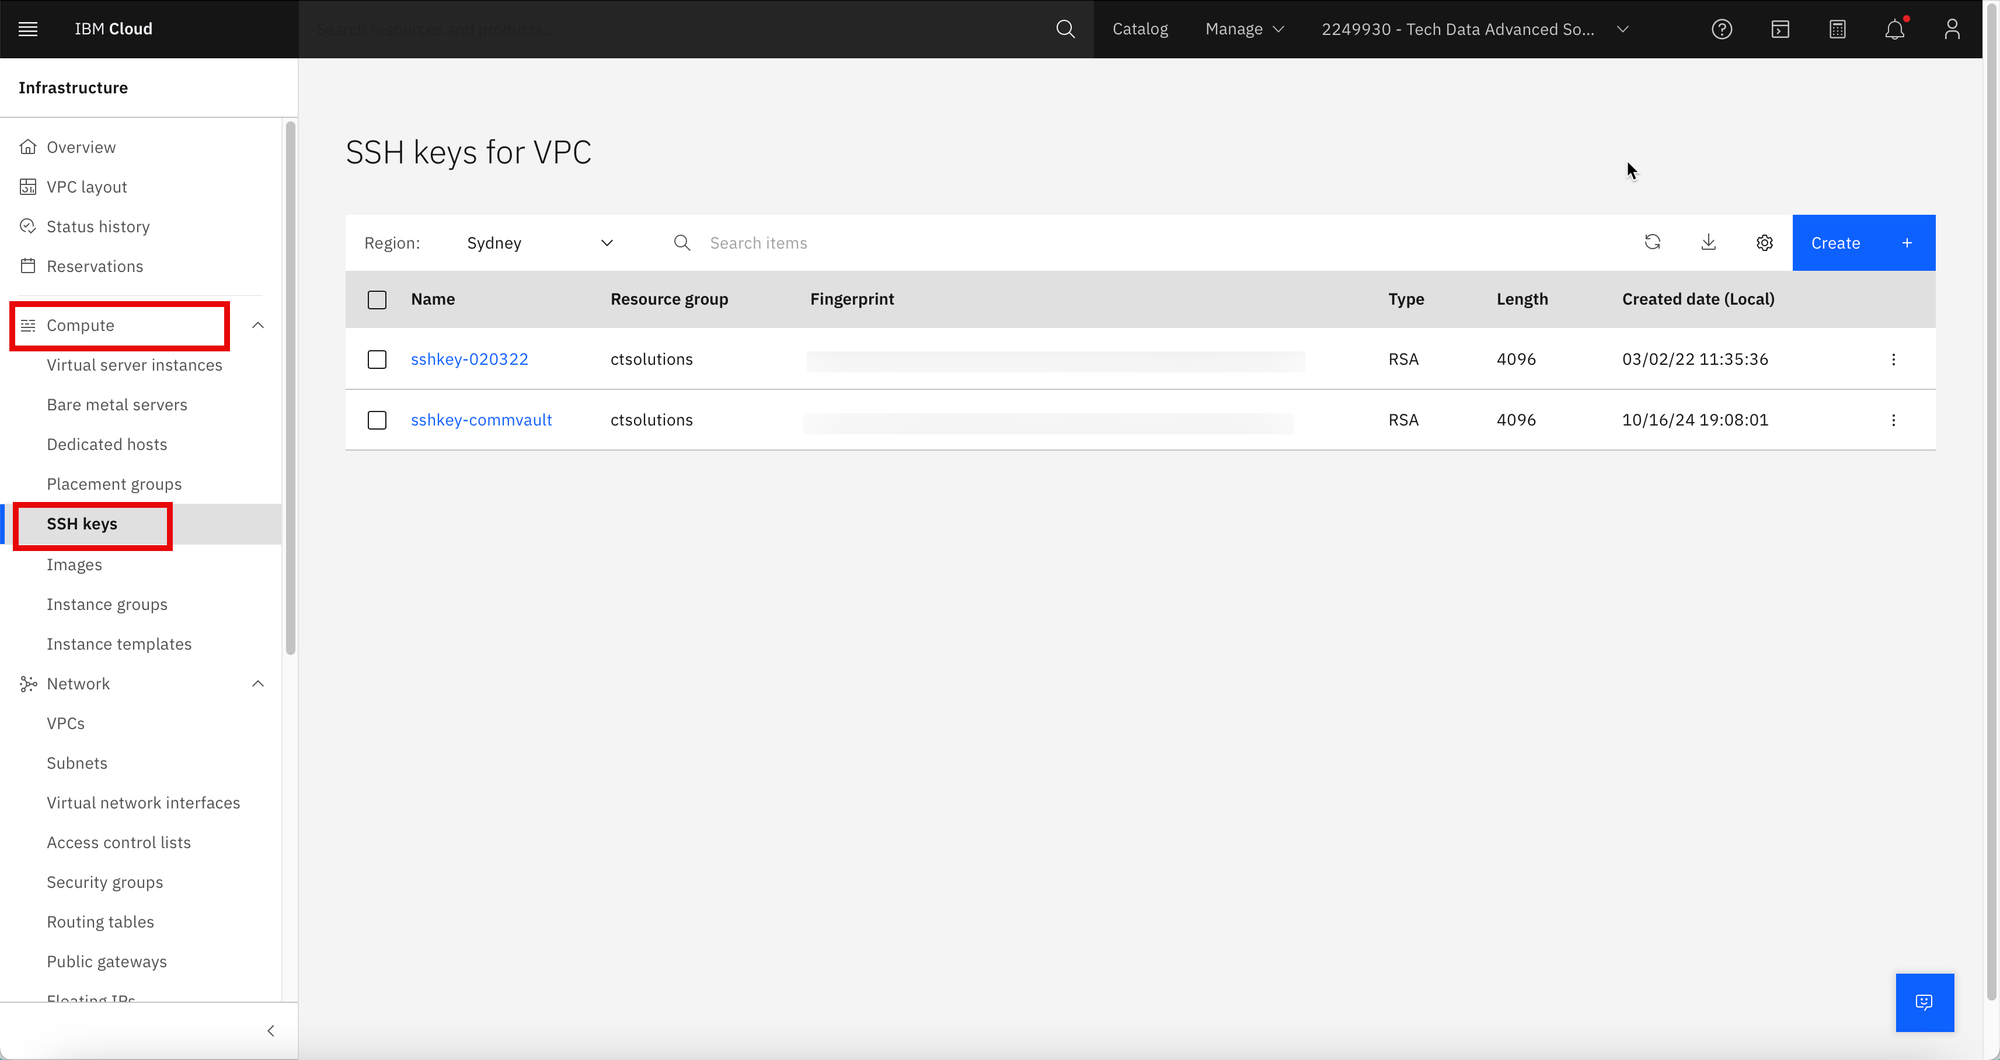
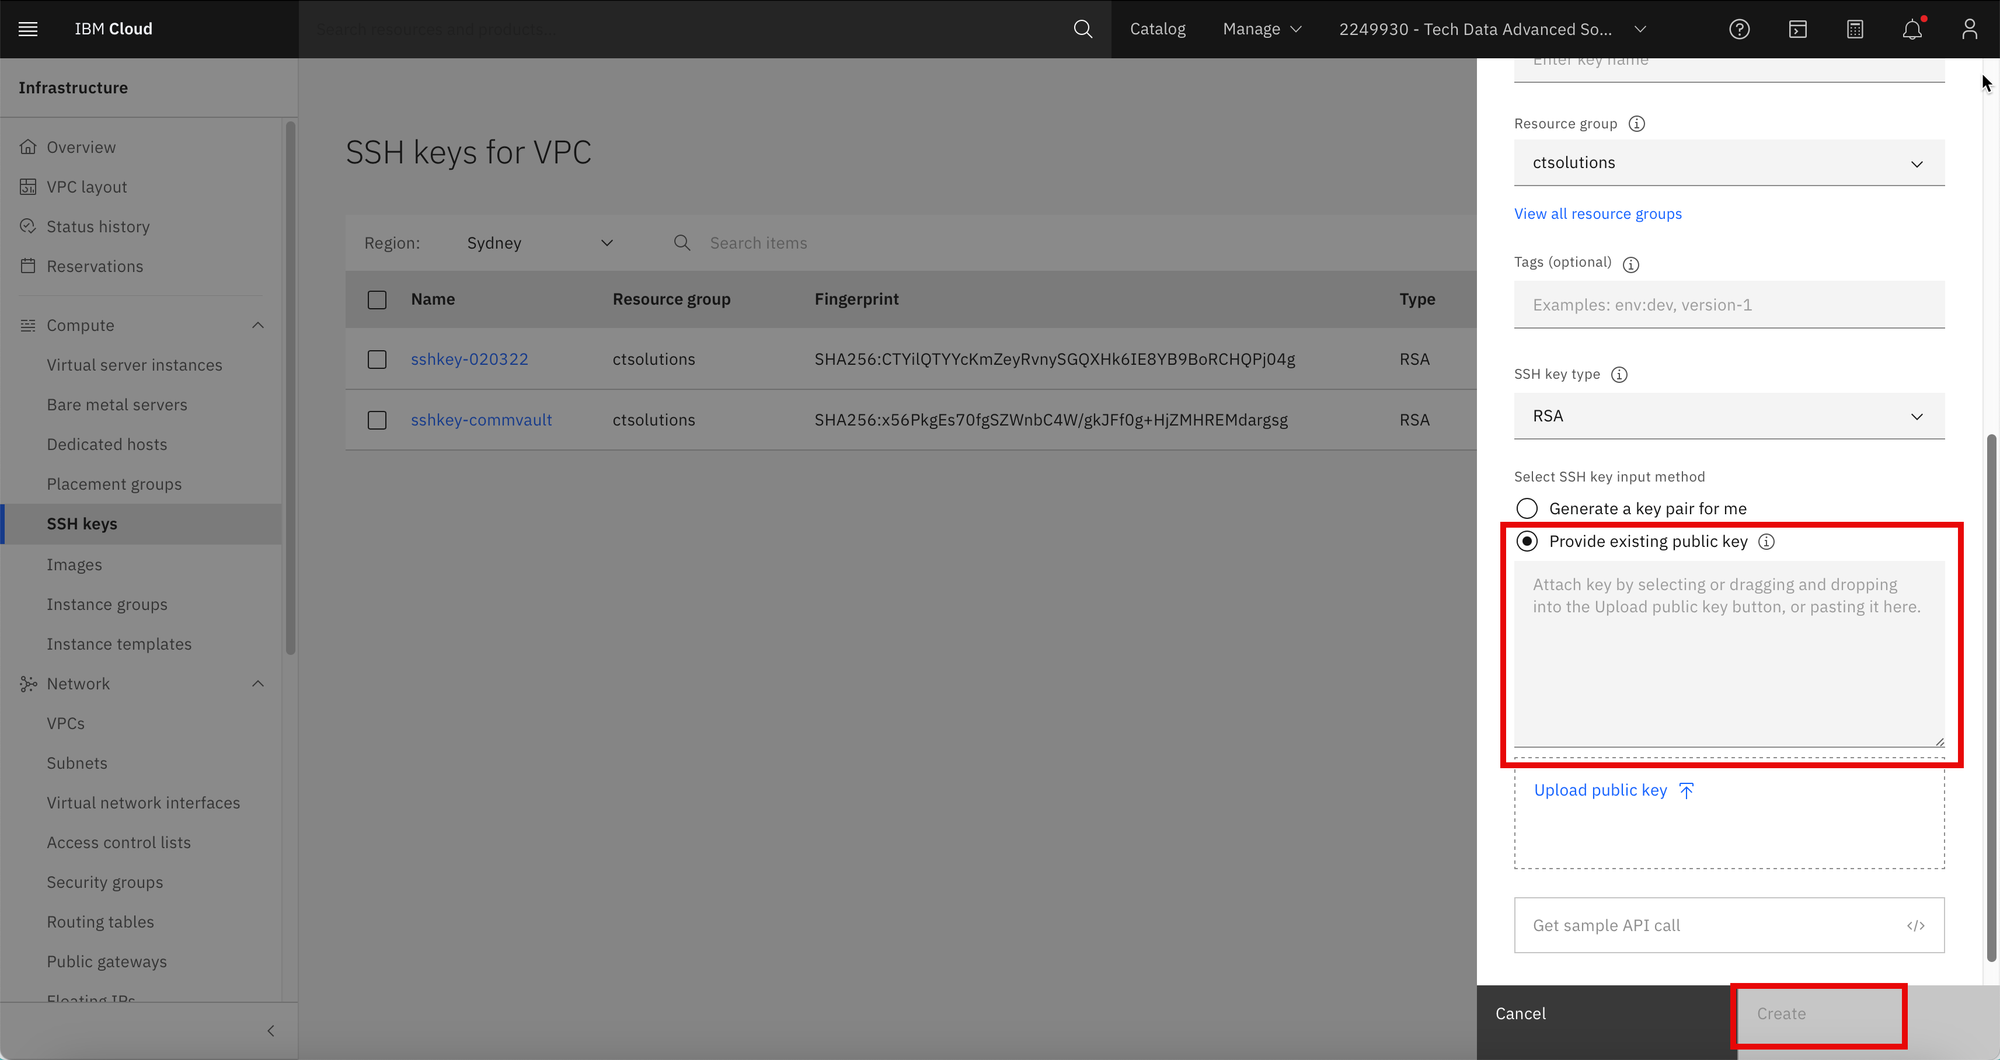
Step 5
Click Create and fill in the name and provide an existing SSH public key. You can re-use the ssh key pair that was generated from the previous post.
Click Create
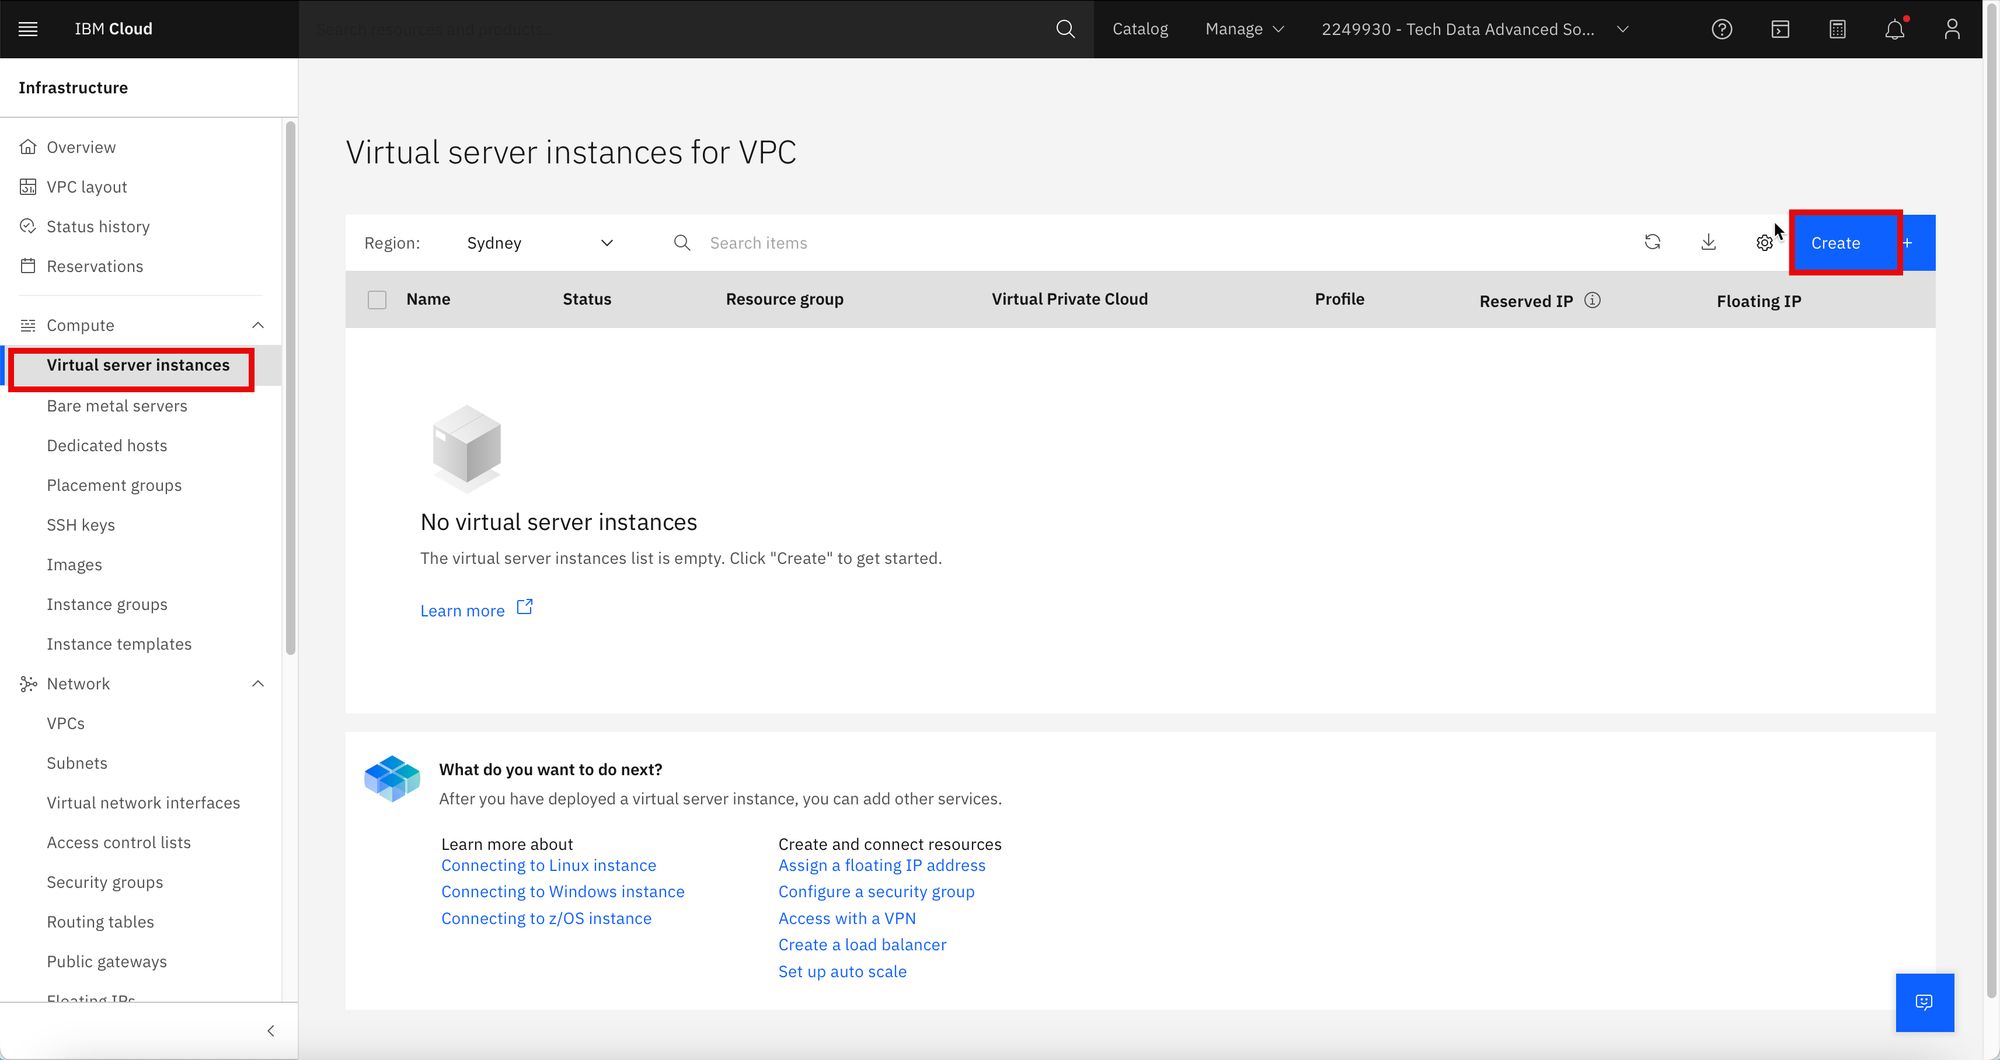
Step 6
We can now create the Windows virtual instance.
From the left hand side Infrastructure menu, click Virtual instances. Click Create.
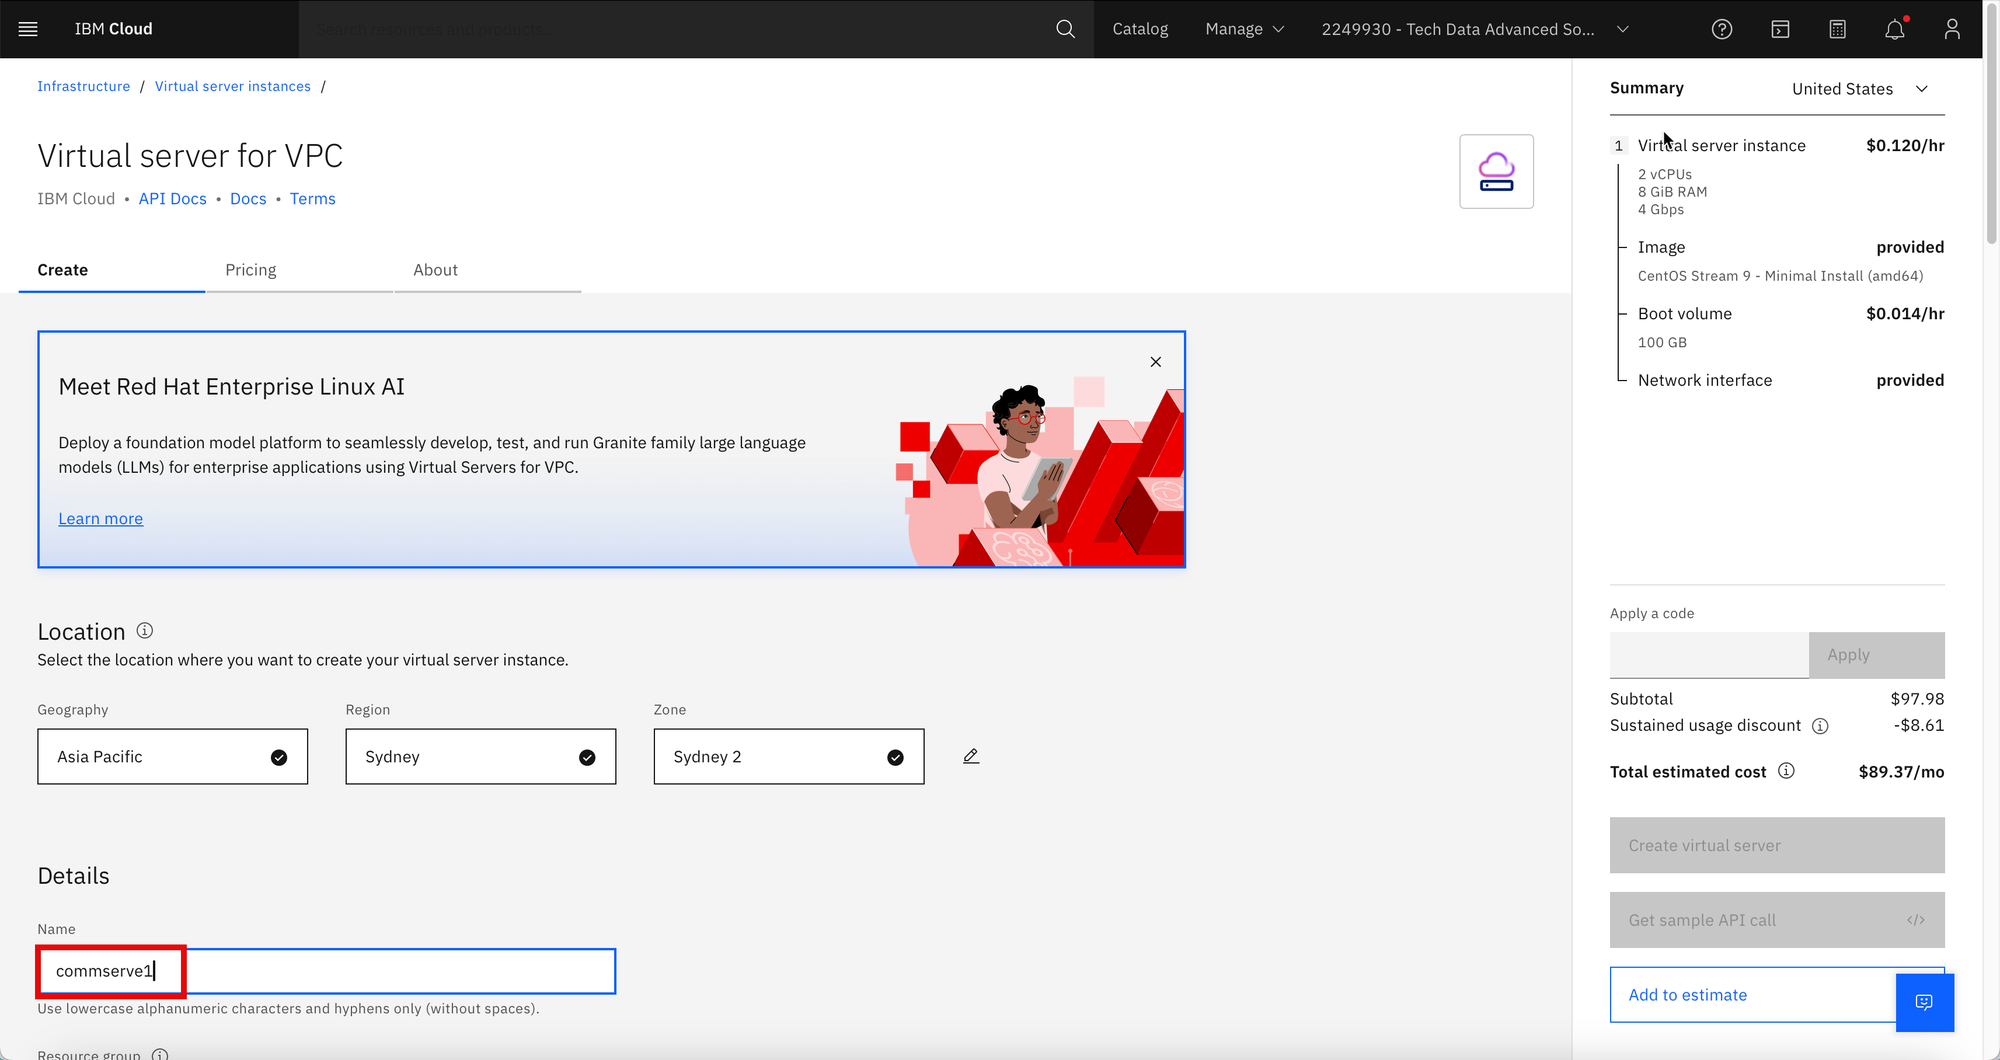
Step 7
On the top of the form, enter the Name of the instance. Scroll down.
Step 8
Enter Tags for the instance. This is optional. Then click Change image.
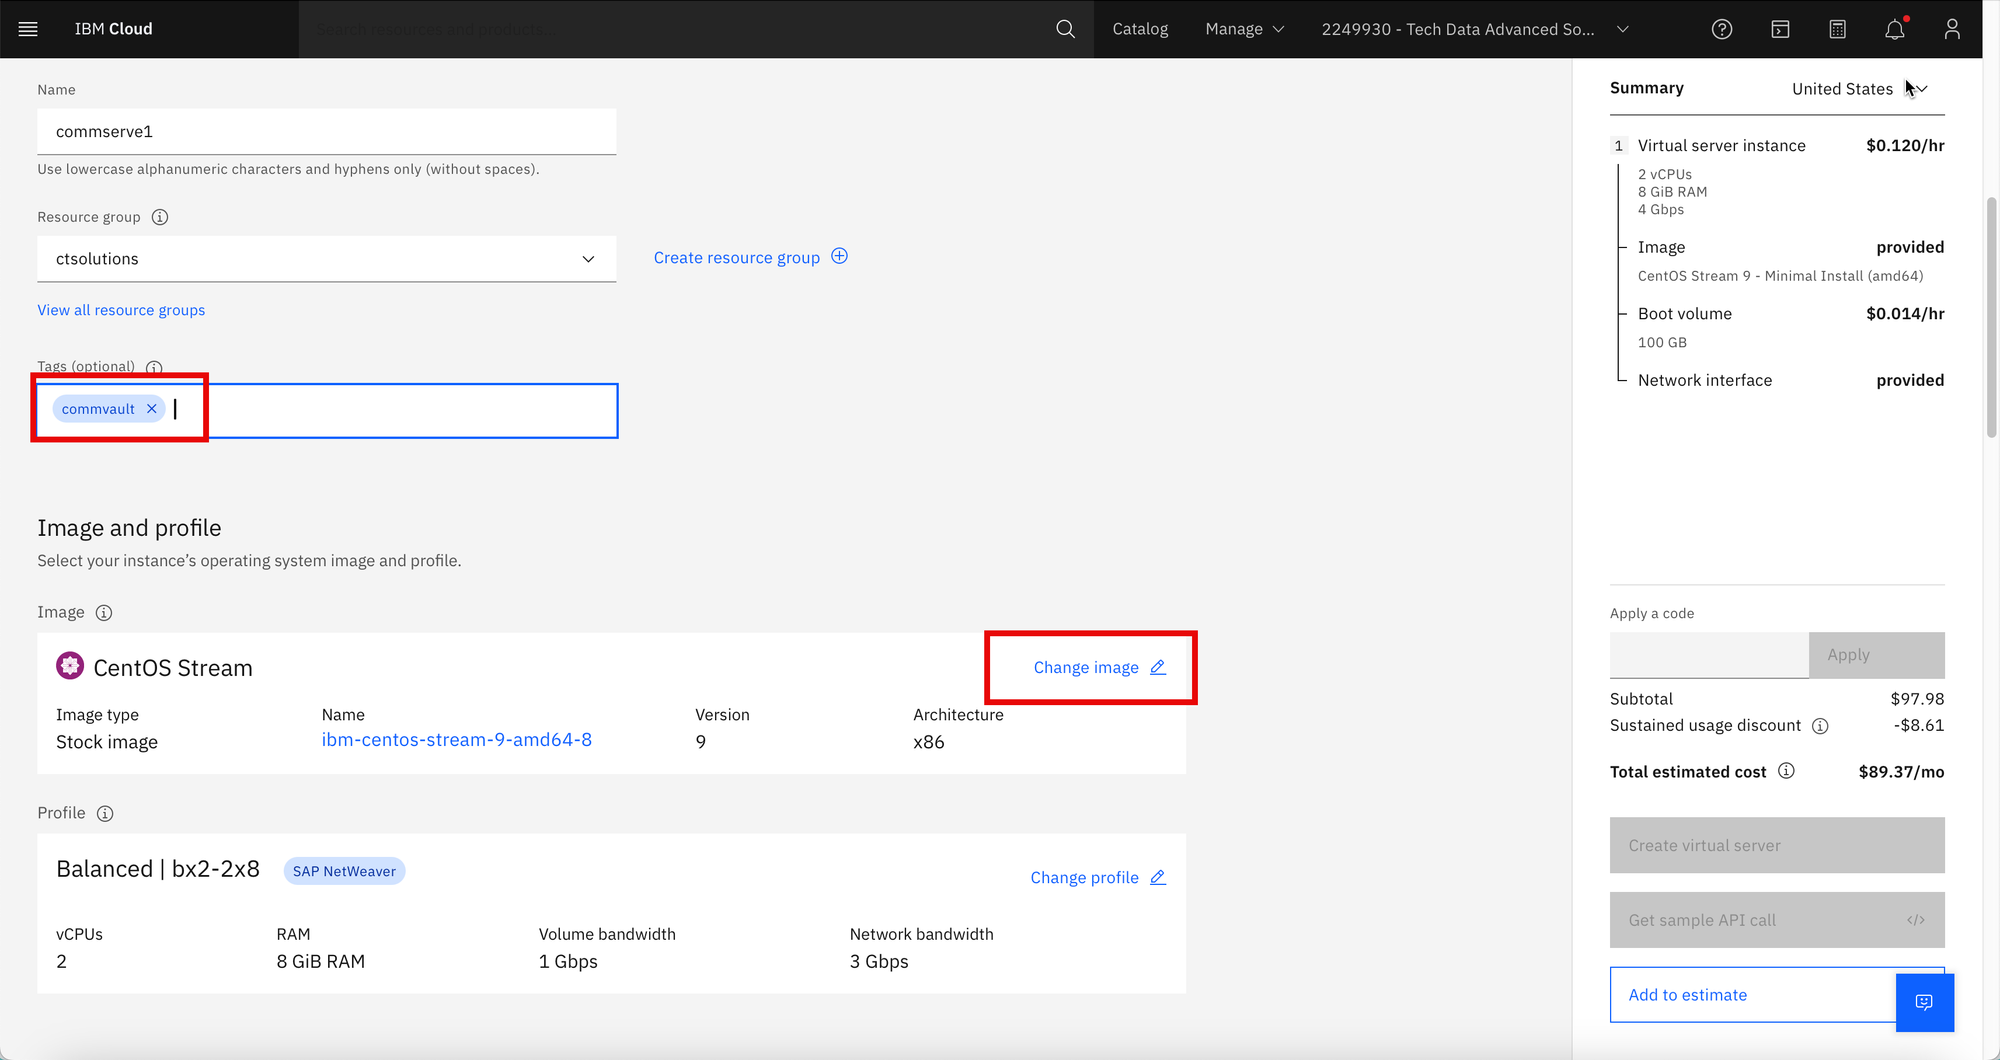
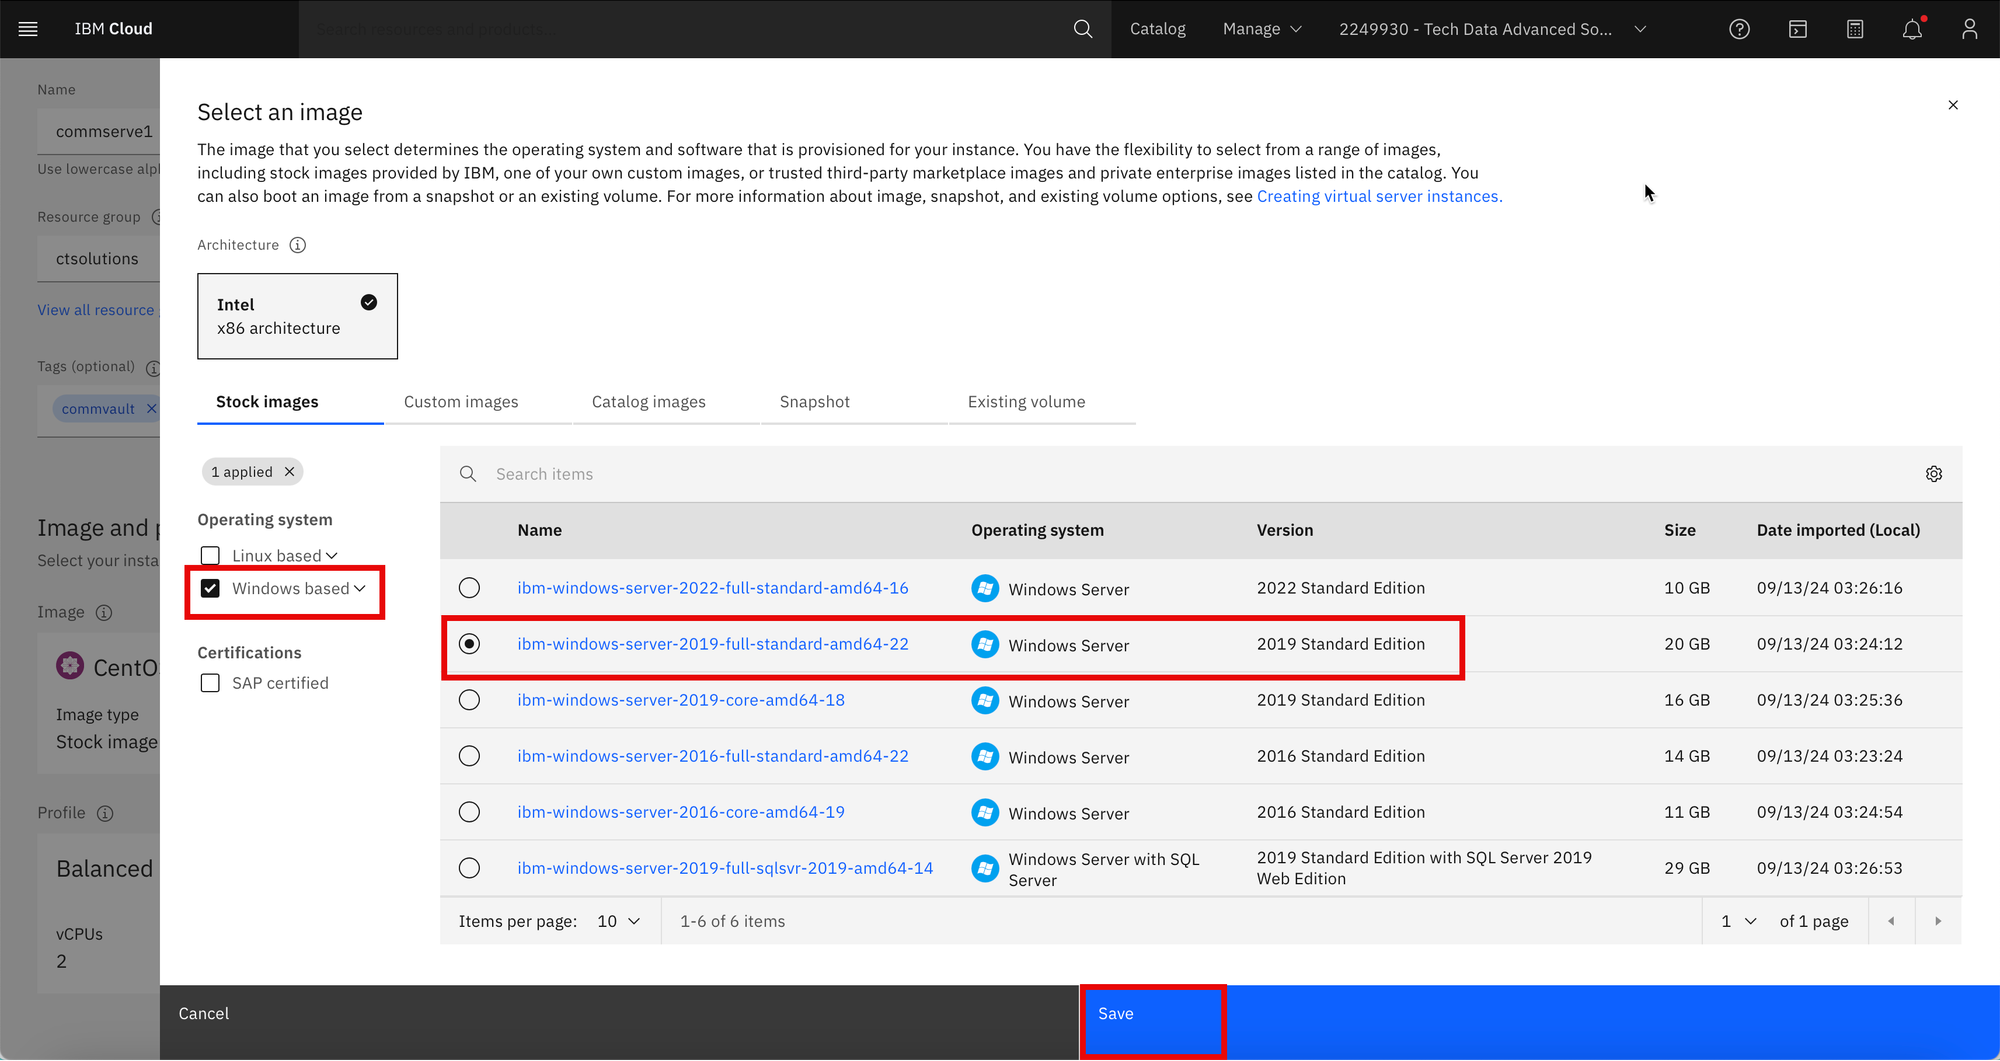
Step 9
Select Windows based. Select ibm-windows-server-2019-full-standard-amd64-22. Click Save.
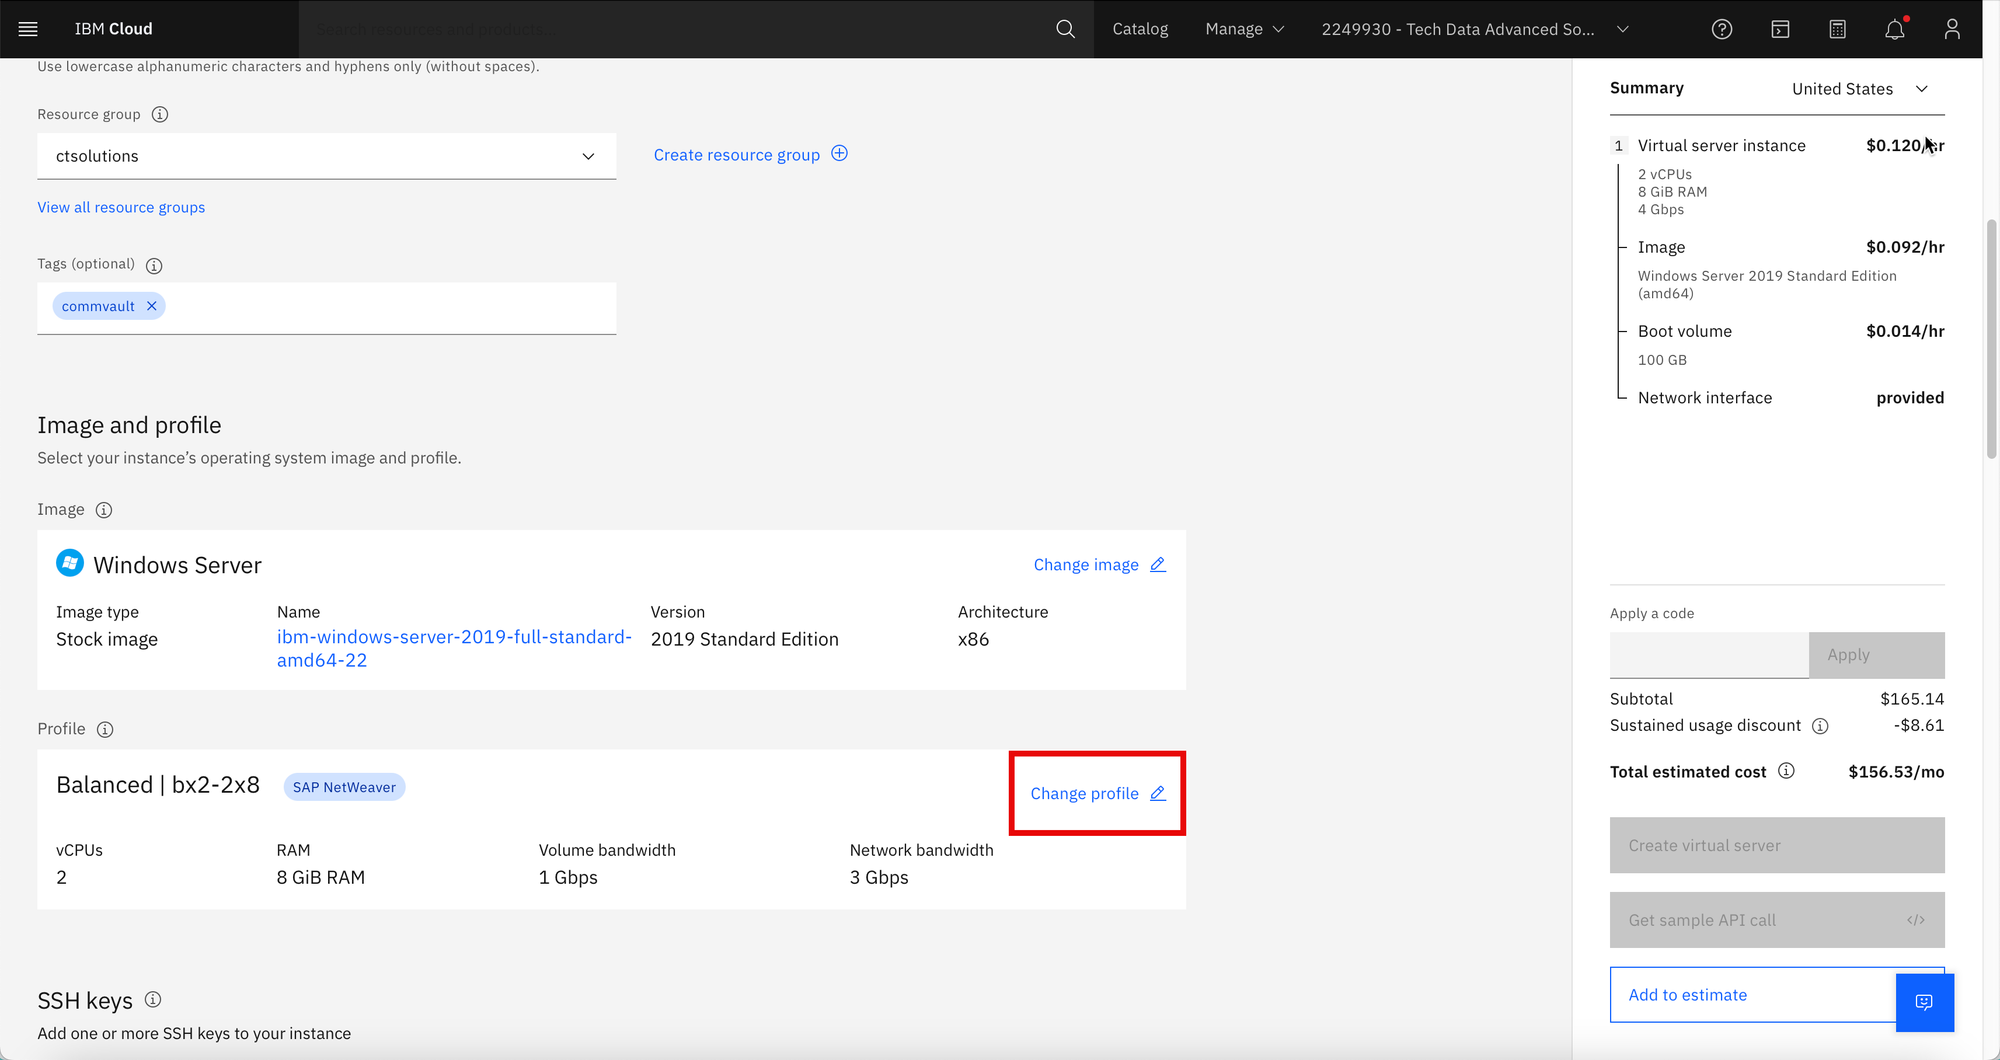
Step 10
Click Change profile.
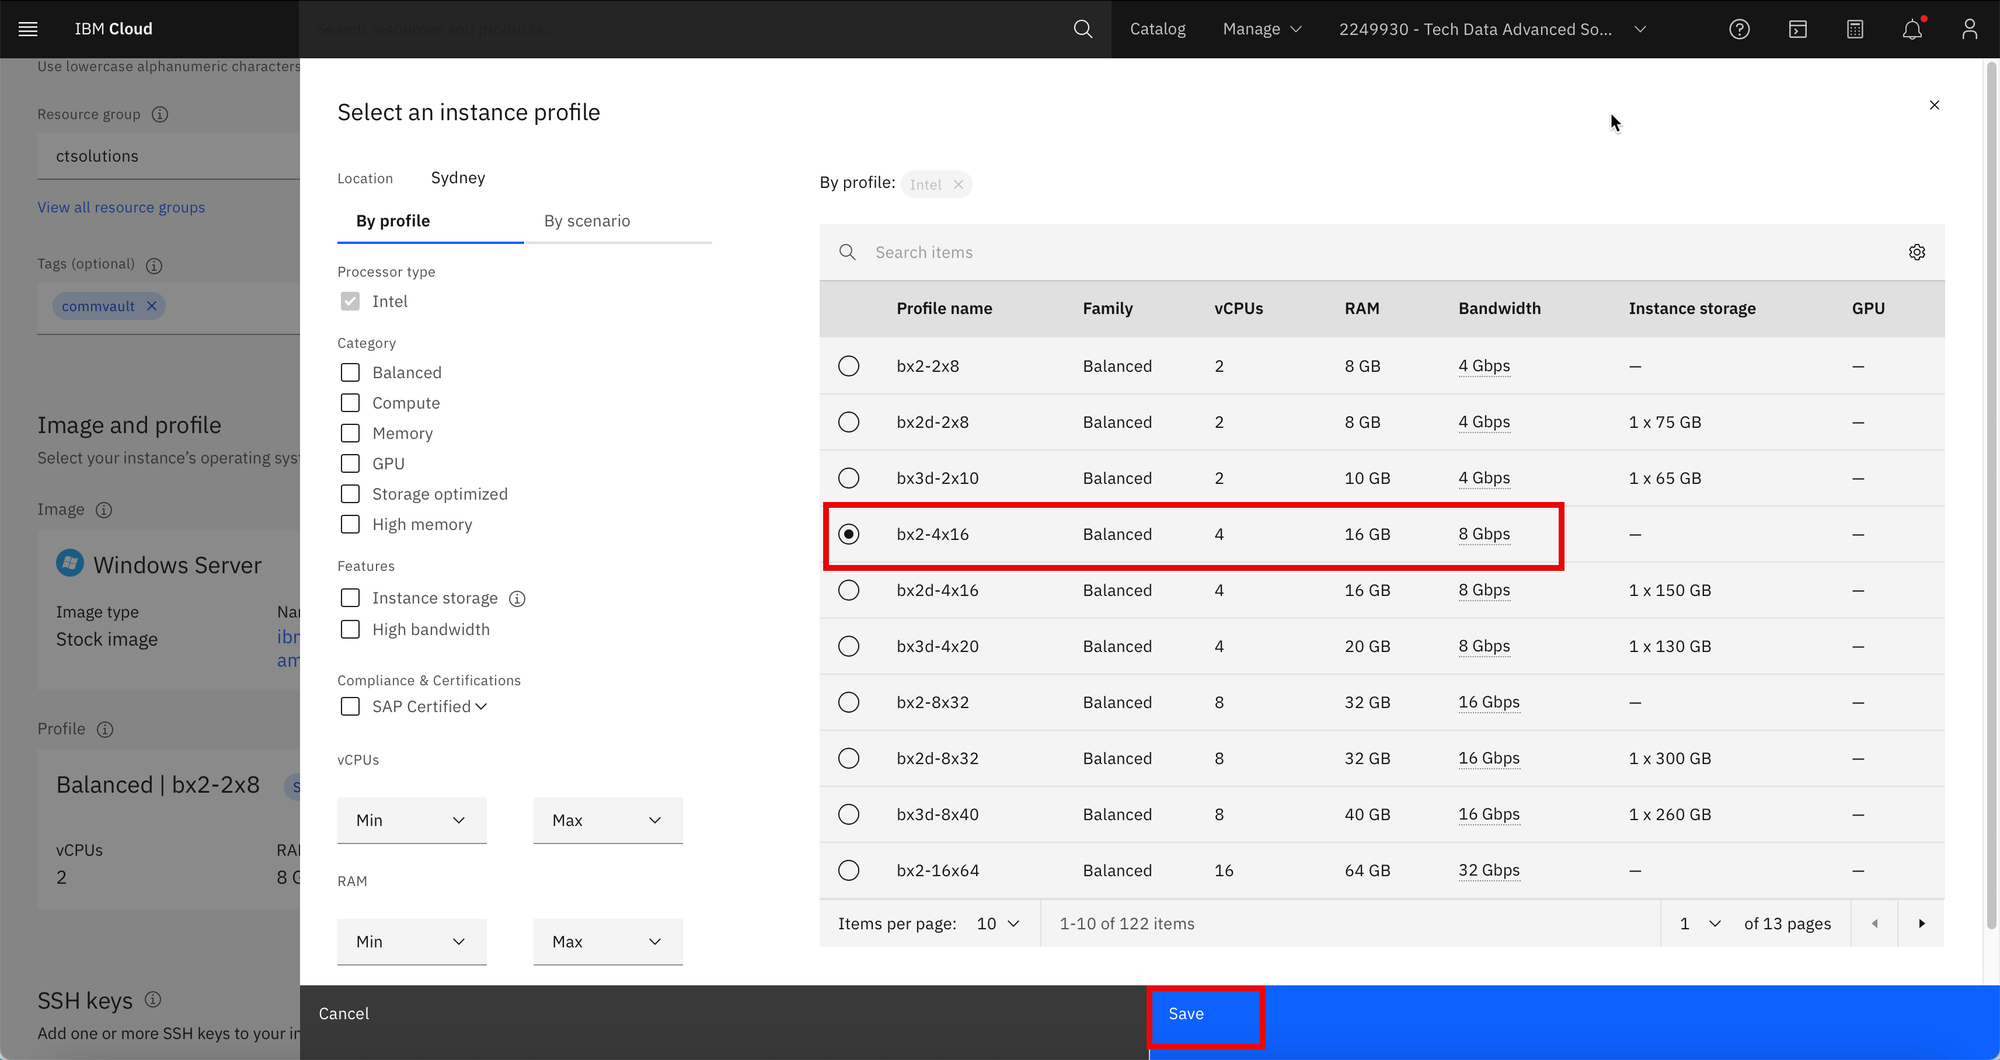
Step 11
Choose the desired vCPUs, memory and Bandwidth. Click Save.
Step 12
Scroll down and choose the SSH key created on Step 4. Then click Create virtual server.

Step 13
IBM Cloud will start building the instance.
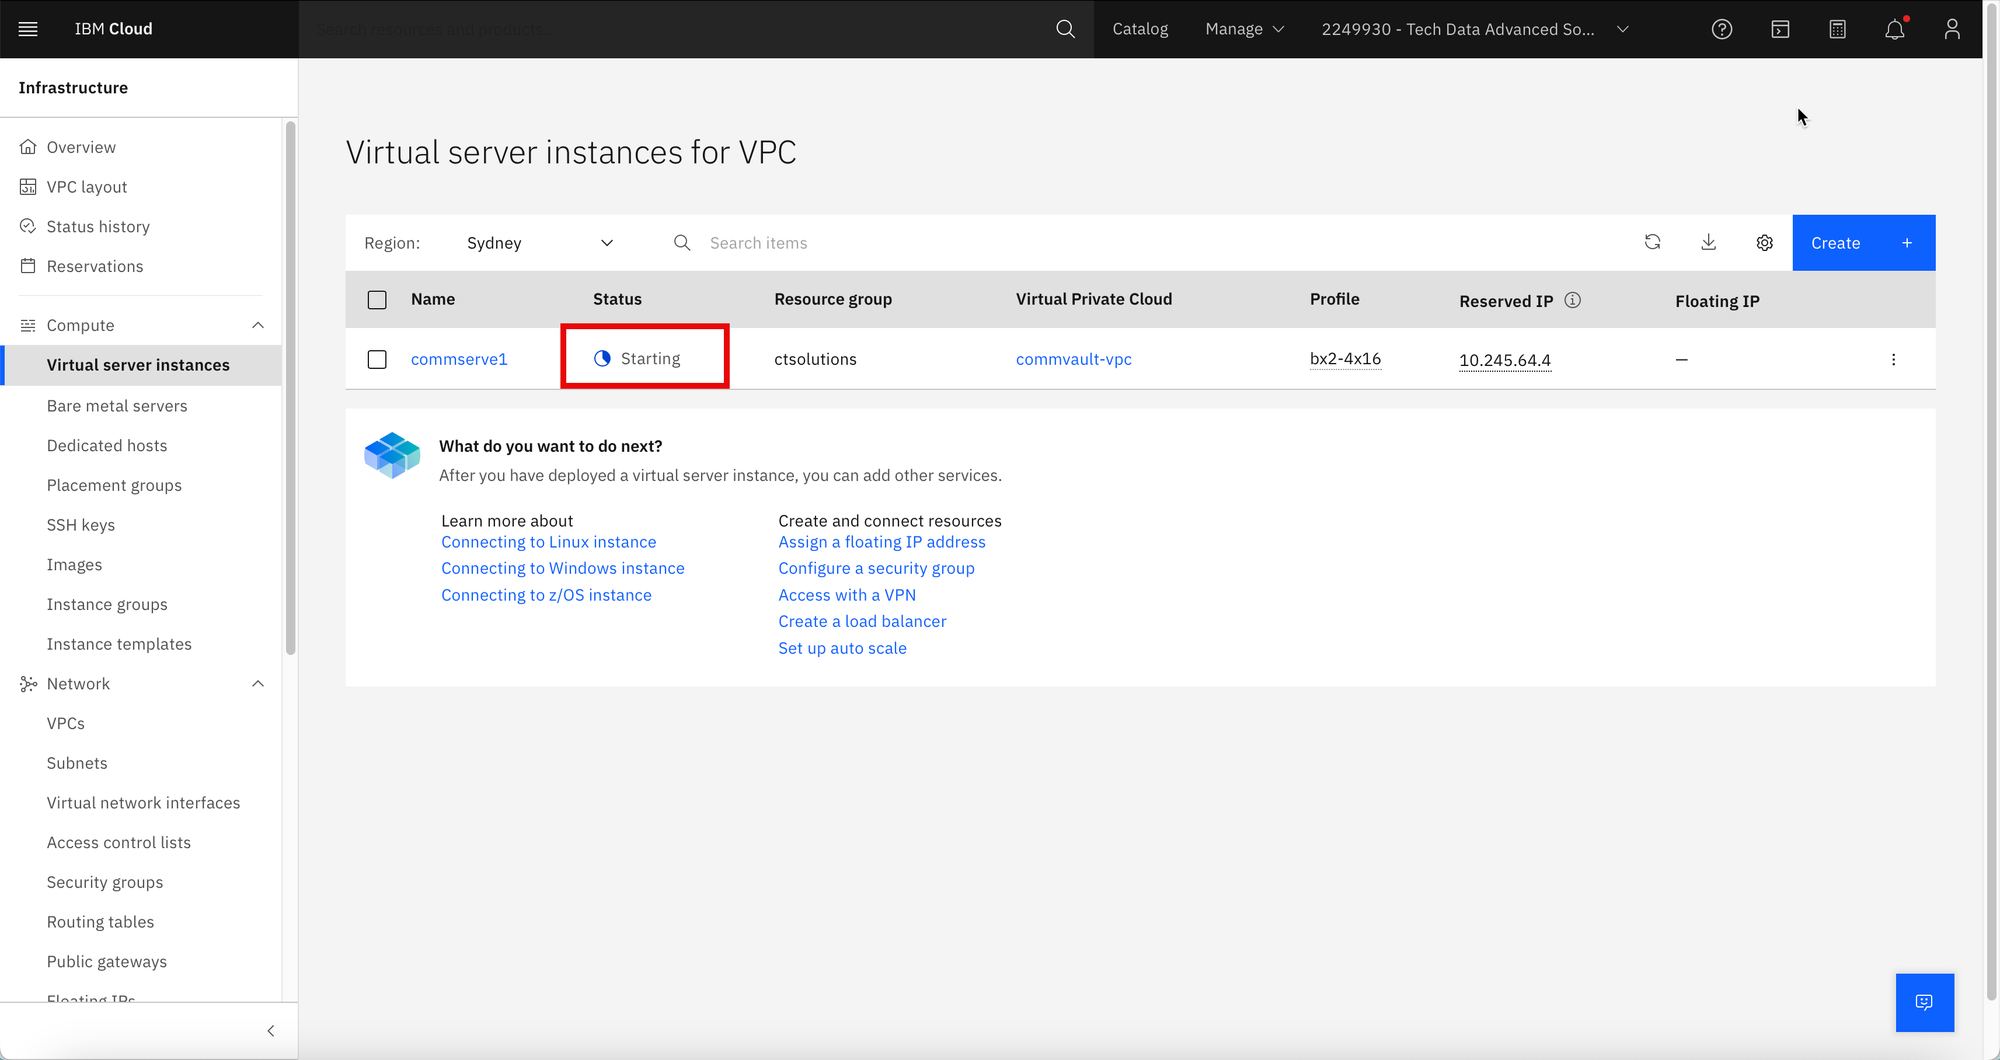
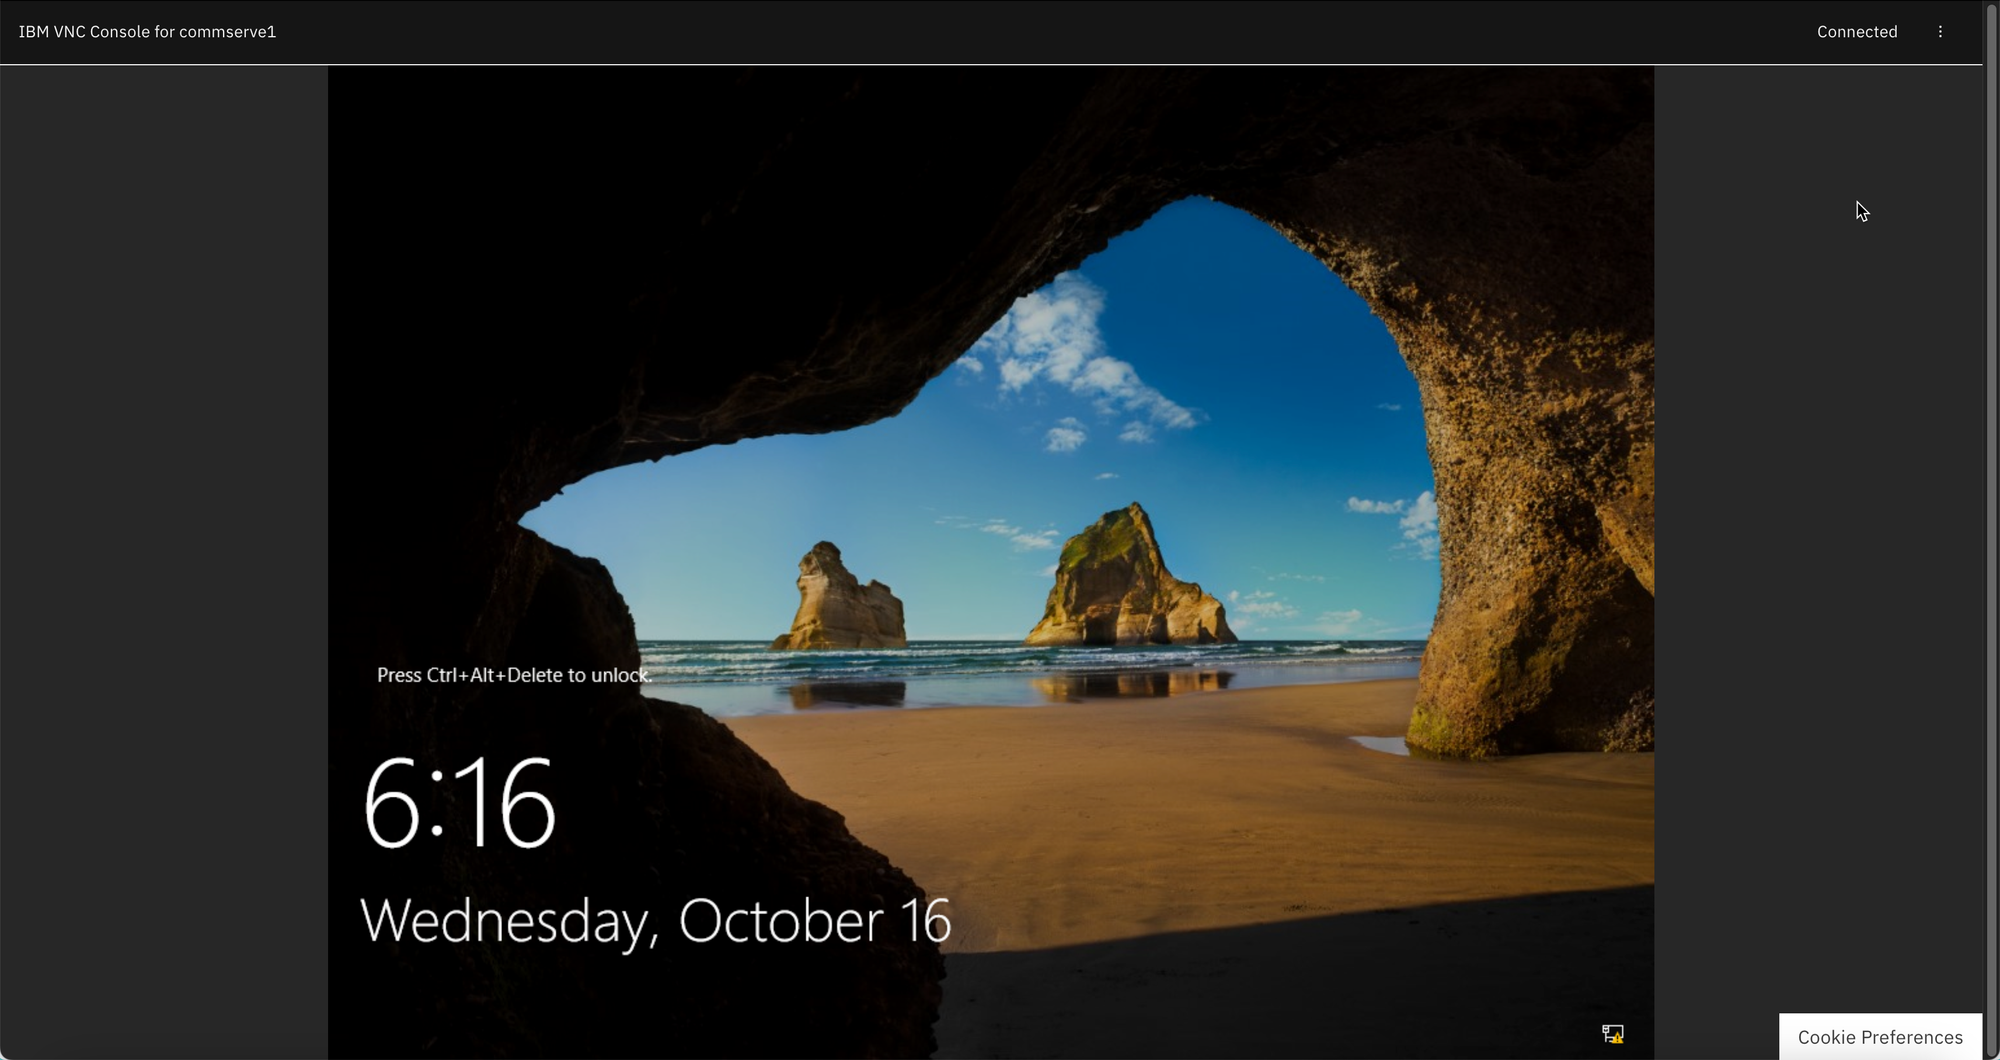
Step 14
Once the Status changes to Running, click the instance options and select Open VNC console.

Step 15
The VNC console session will show the status of the build. The screen shot below signifies the build has been completed and the Windows virtual instance is now ready for use.
Step 16
We now need to retrieve the Windows Server Administrator password.
Back to the IBM Cloud dashboard, click on the IBM CLI interface on the top right hand side.

Step 17
On the IBM CLI interface, ensure you are on the right region and resource group.
Then type the following commands,
~$ ic is instances - This will show the instance id.
Upload the private key file created on Step 4. The upload icon is on the top right hand side of the IBM CLI web interface.
~$ ic is instance-initialization-values <instance id> --private-key @/home/username/<private key>
The above command will show the Windows administrator password.

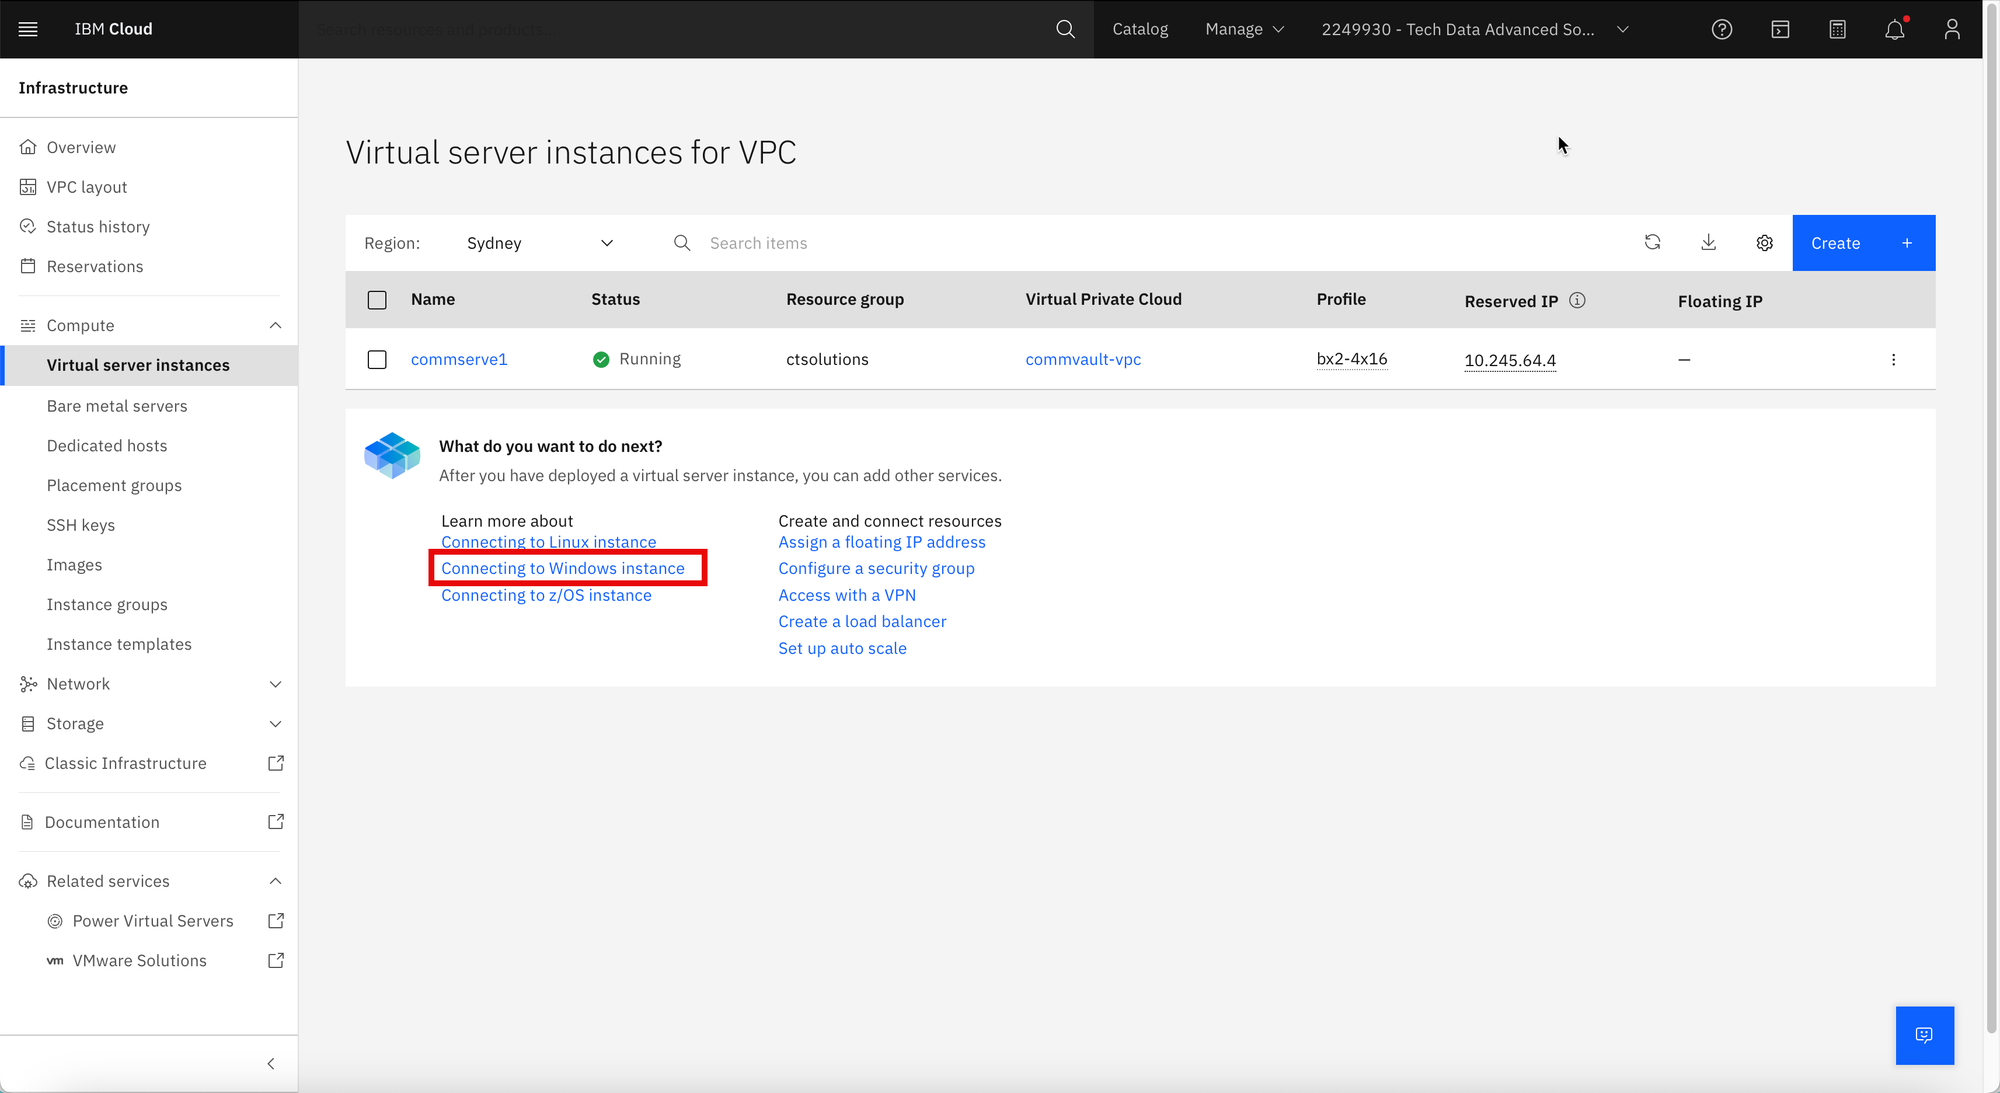
Bonus Tip
It is best to setup the Windows RDP connectivity by clicking on the link on Connecting to Windows instance.