Setting up remote RDP connection to an IBM Cloud Windows instance

I originally created a post on creating a Windows Server 2019 instance.
You can read it from this link,
https://connectedtech.com.au/provision-a-windows-server-on-the-ibm-cloud-in-less-than-10-minutes/
This is also part of a series of posts to help with someone looking at IBM Cloud as their air-gap or clean room staging environment.
I did mention that the VNC is enough to help with logging into the server but other than that, other tasks which require a lot of accurate mouse and keyboard input is a bit of a pain.
Please note these steps can be found on this link as mentioned in the above post.
https://cloud.ibm.com/docs/vpc?topic=vpc-vsi_is_connecting_windows
If you found this post useful, please consider hitting the Sign-up link to help us with future posts.
Step 1
Install the IBM Cloud CLI client on your desktop. I am using a macOS and I tend to use Homebrew to install software. Here is the command,
brew install --cask ibm-cloud-cliStep 2
Once installed login to your IBM Cloud account.
ibmcloud login --ssoEnter Y to open a web browser which will prompt you for your IBM Cloud credentials. This will then generate a One-time code. Copy this code. Paste it on your IBM Cloud CLI command prompt.

Step 3
Select the account if there is more than one account.
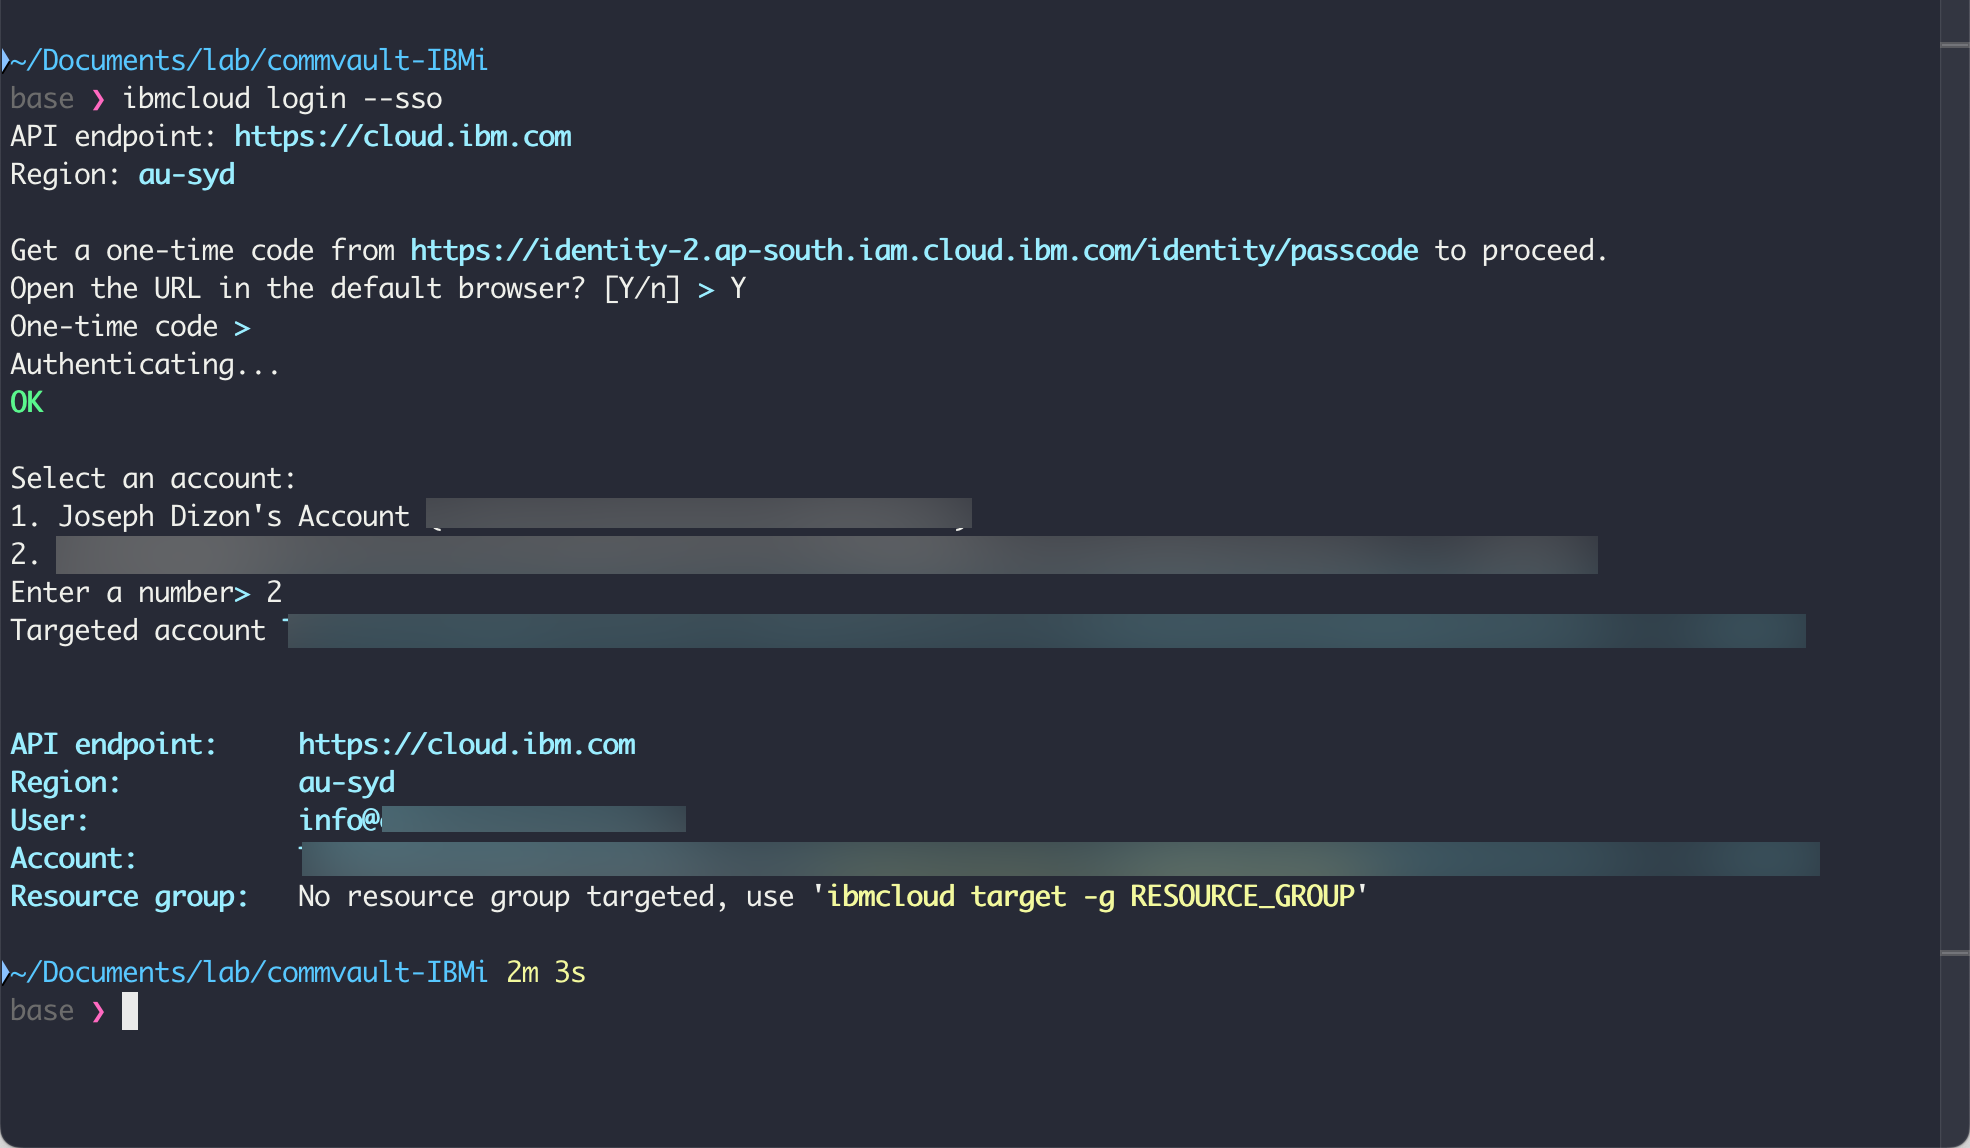
Step 4
Select the resource group as prompted. The command line should now be ready for use.
Step 5
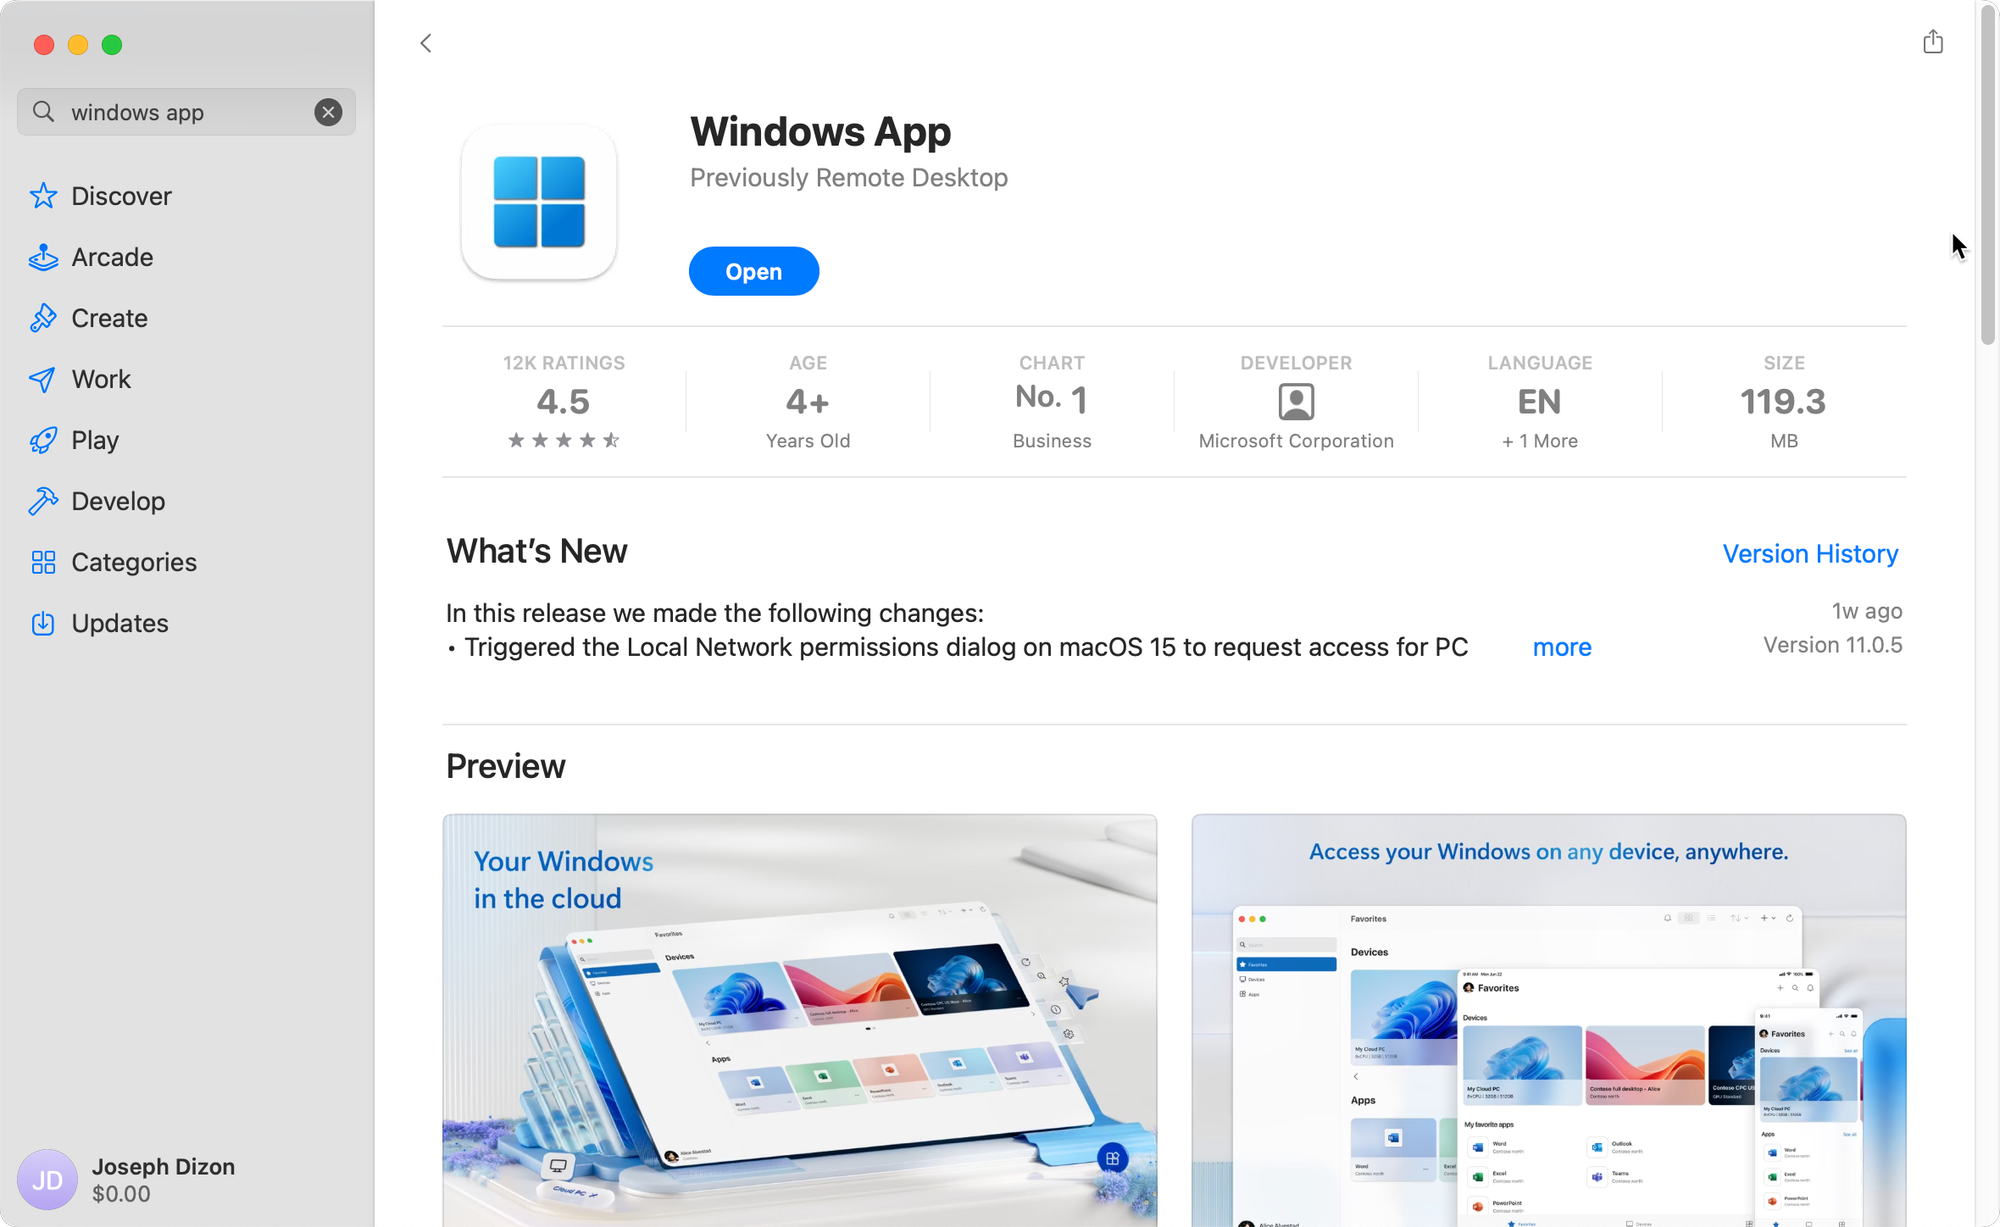
As mentioned, I am using macOS. For remote desktop, the application is called Windows App. Download and install this app.
Step 6
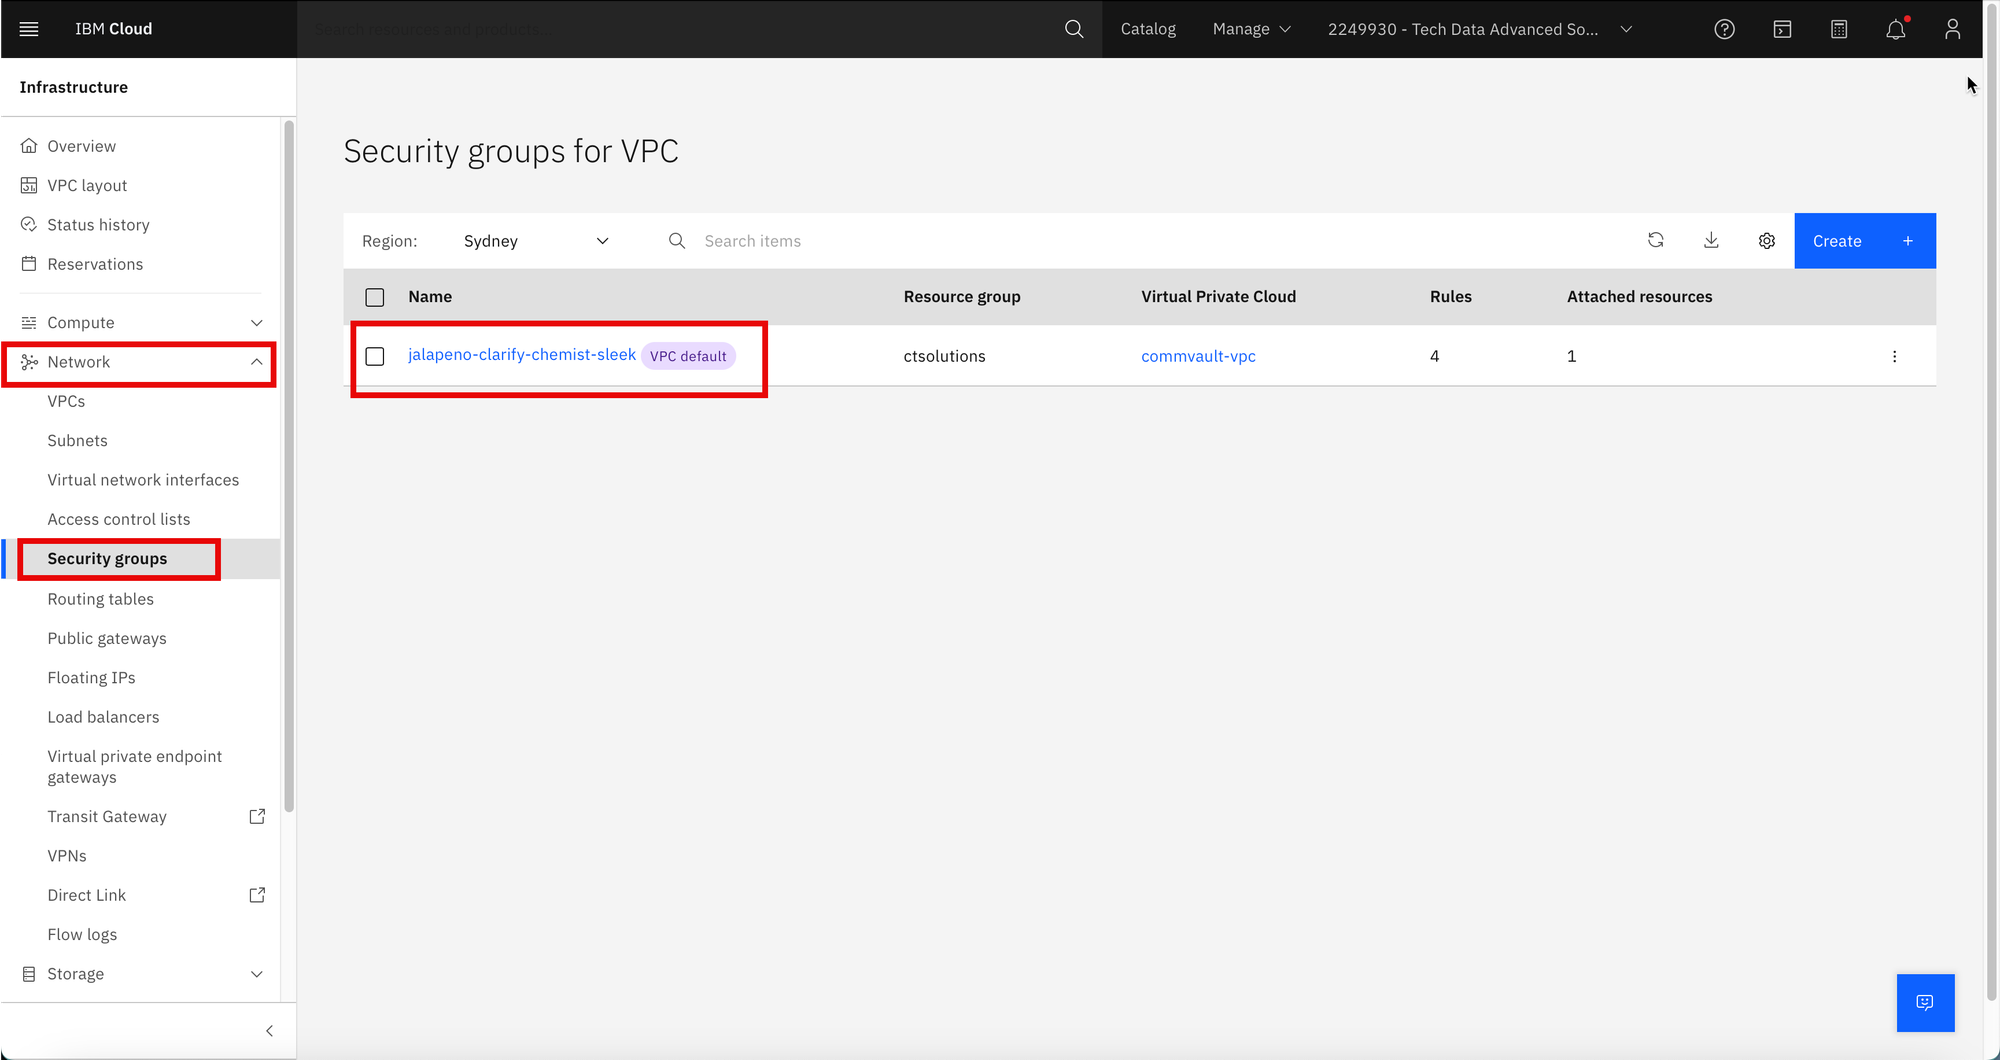
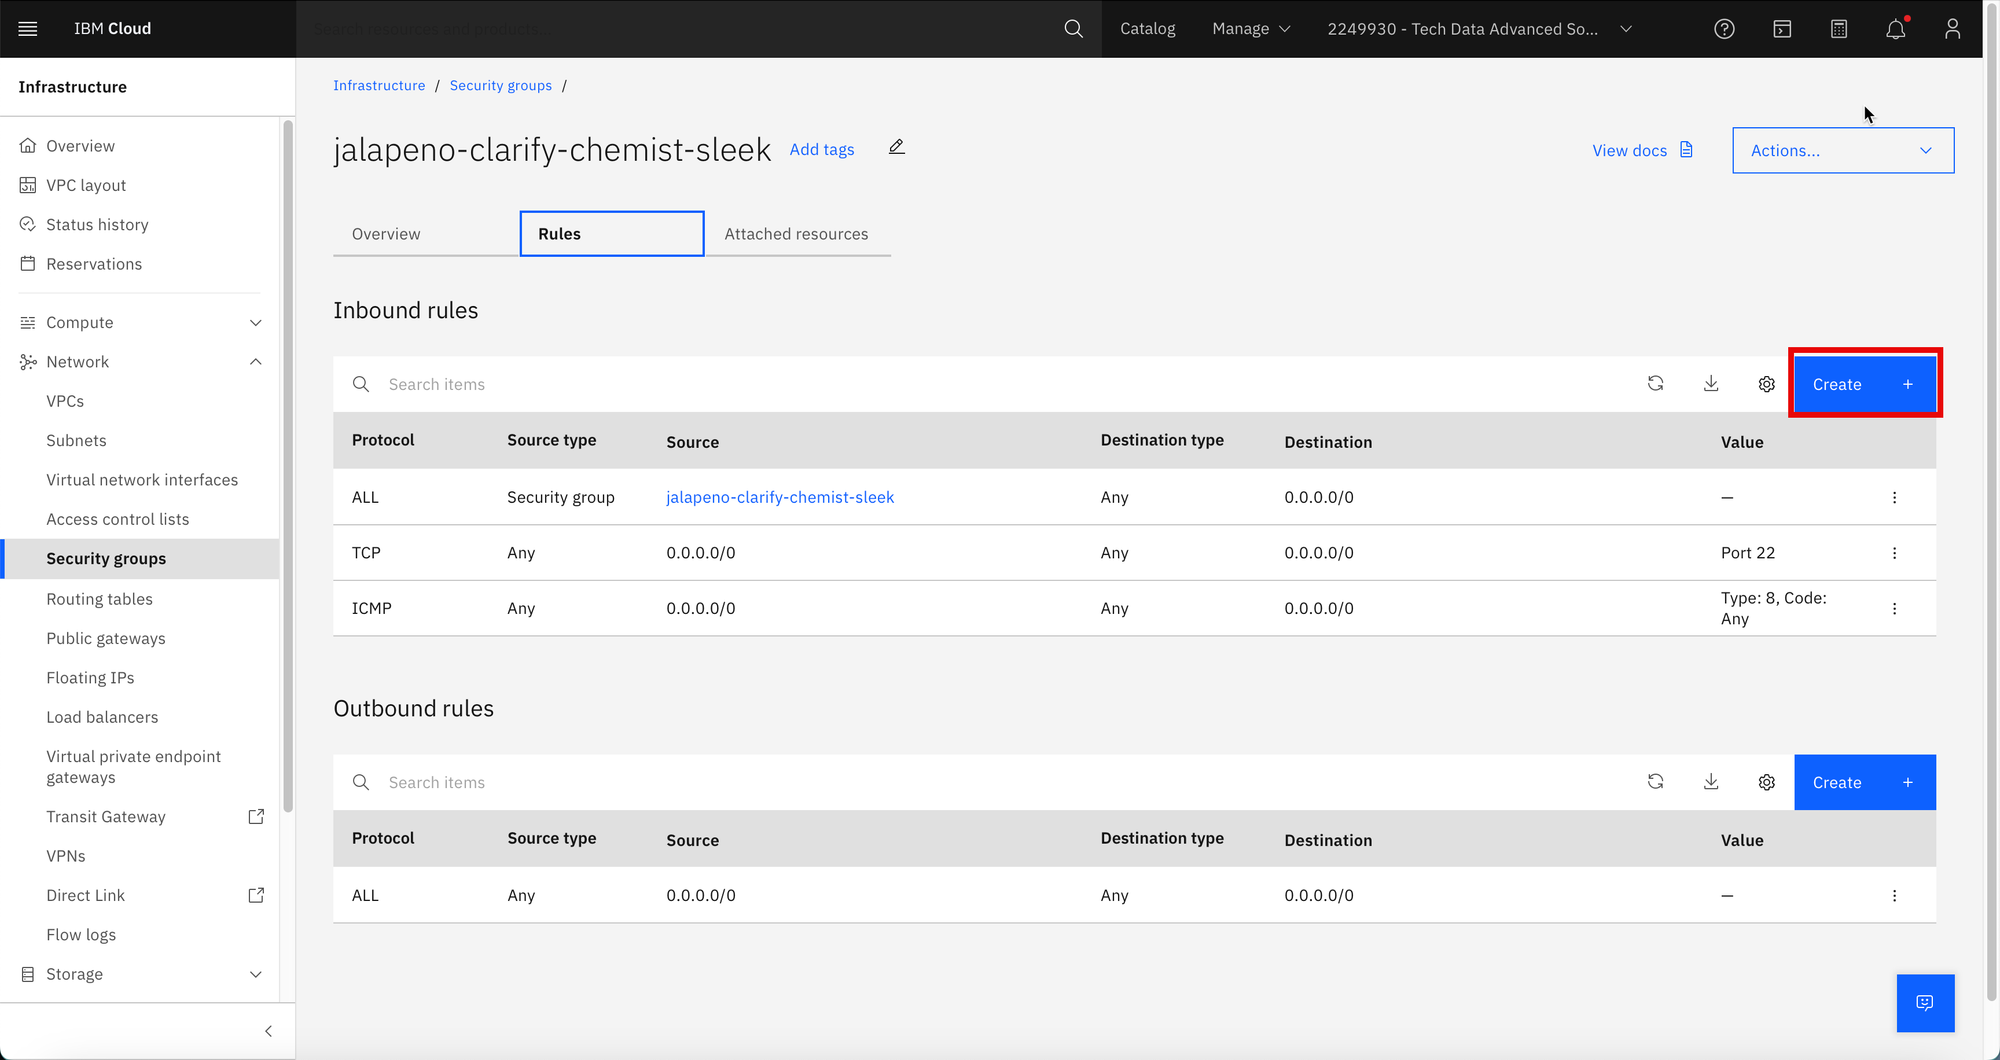
Back on the IBM Cloud Dashboard - Infrastructure -> Network -> Security Groups
Click the default security group
Step 7
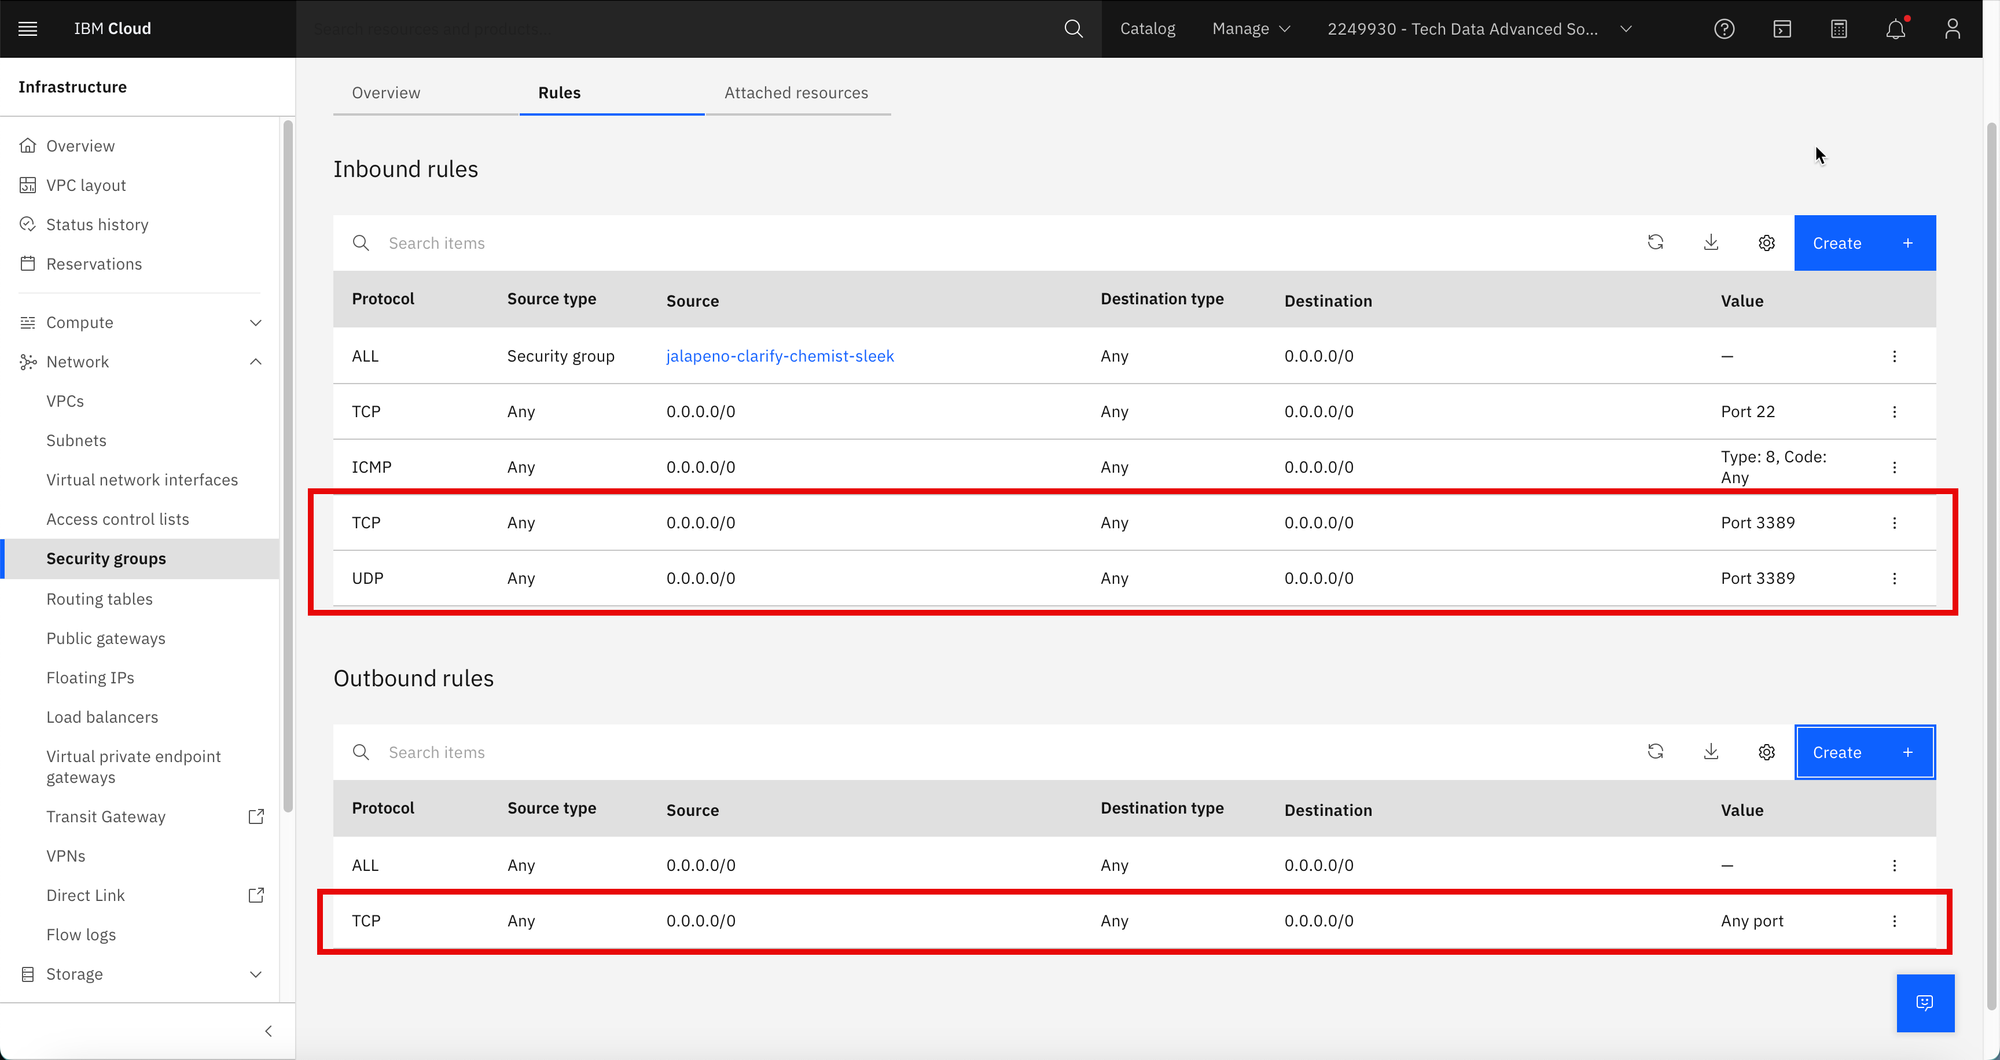
On the Rules tab, create the following port rules to allow TCP and UDP for port 3389.
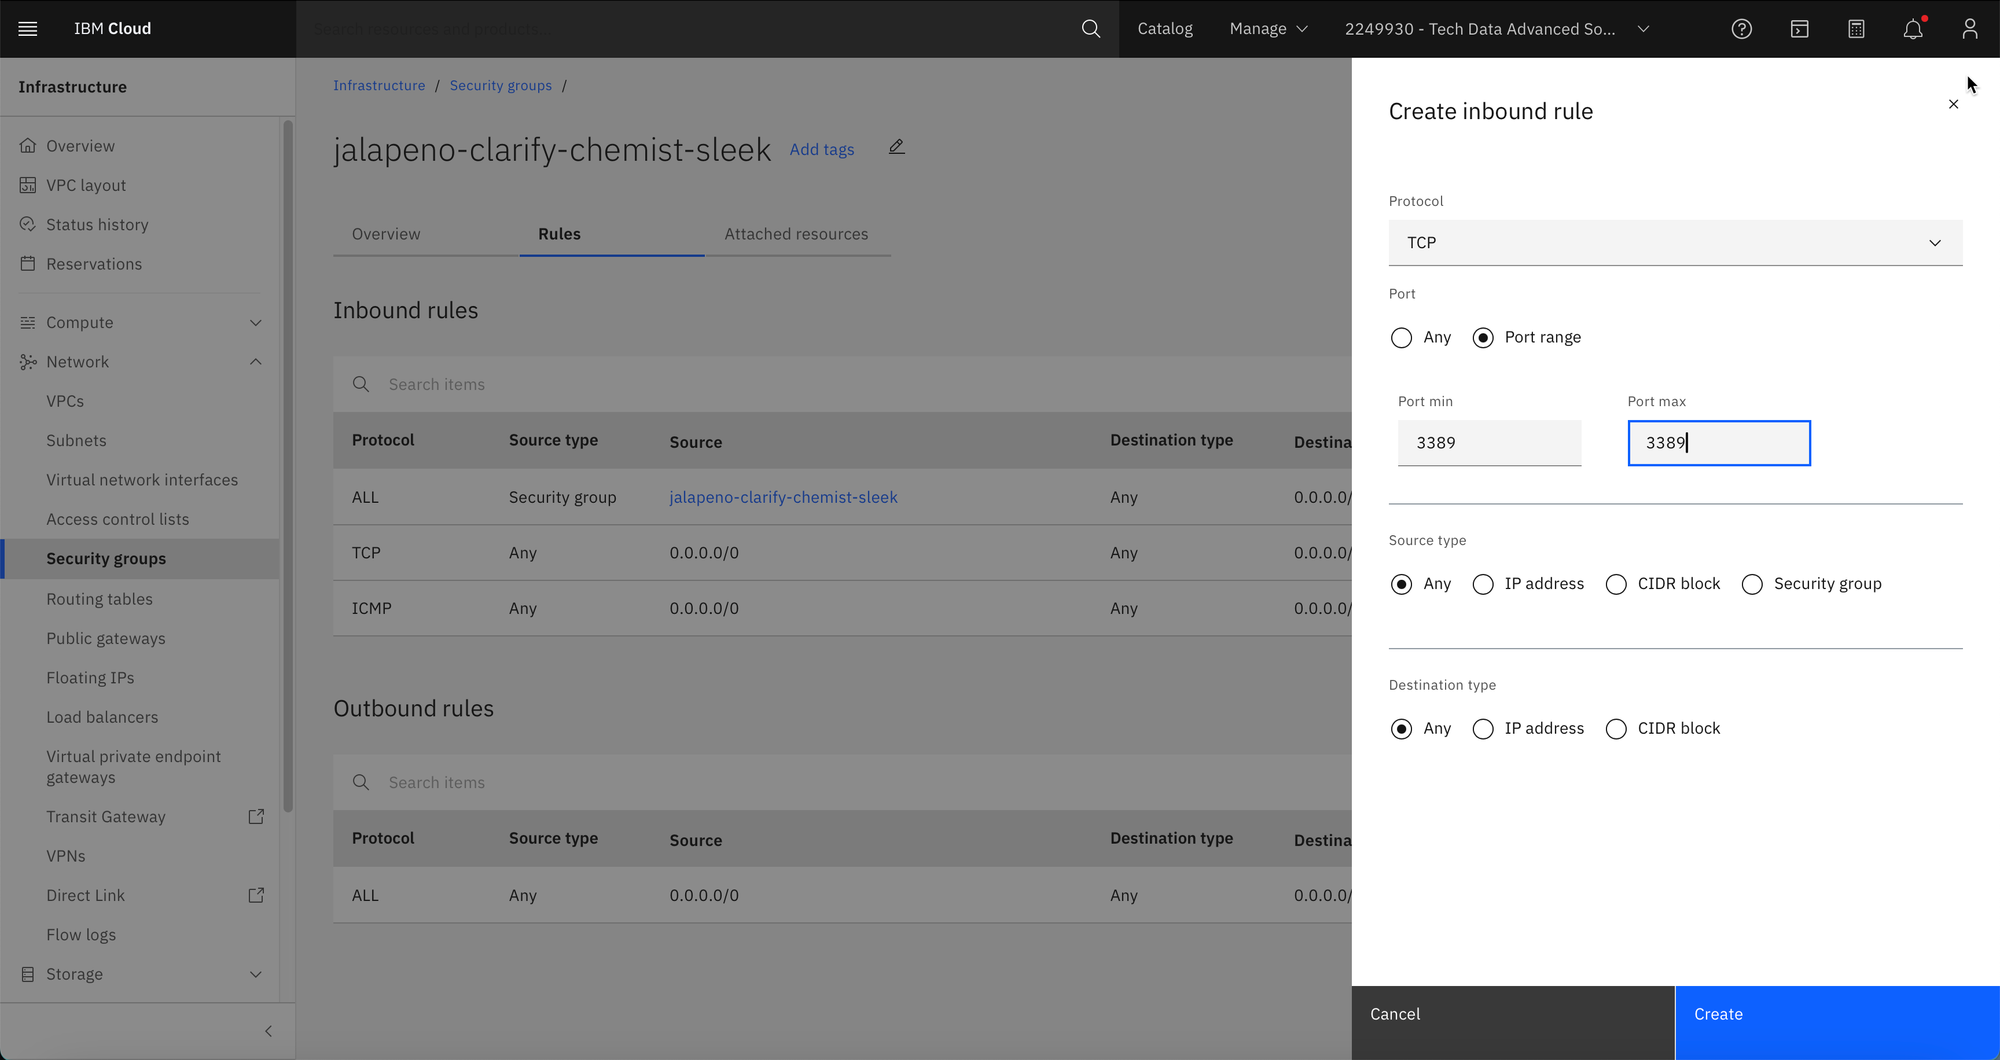
The Rules table should be similar to this screen shot.
Step 8
Reserve a Floating IP address to the Windows Server instance. Click Floating IPs, then click Reserve.
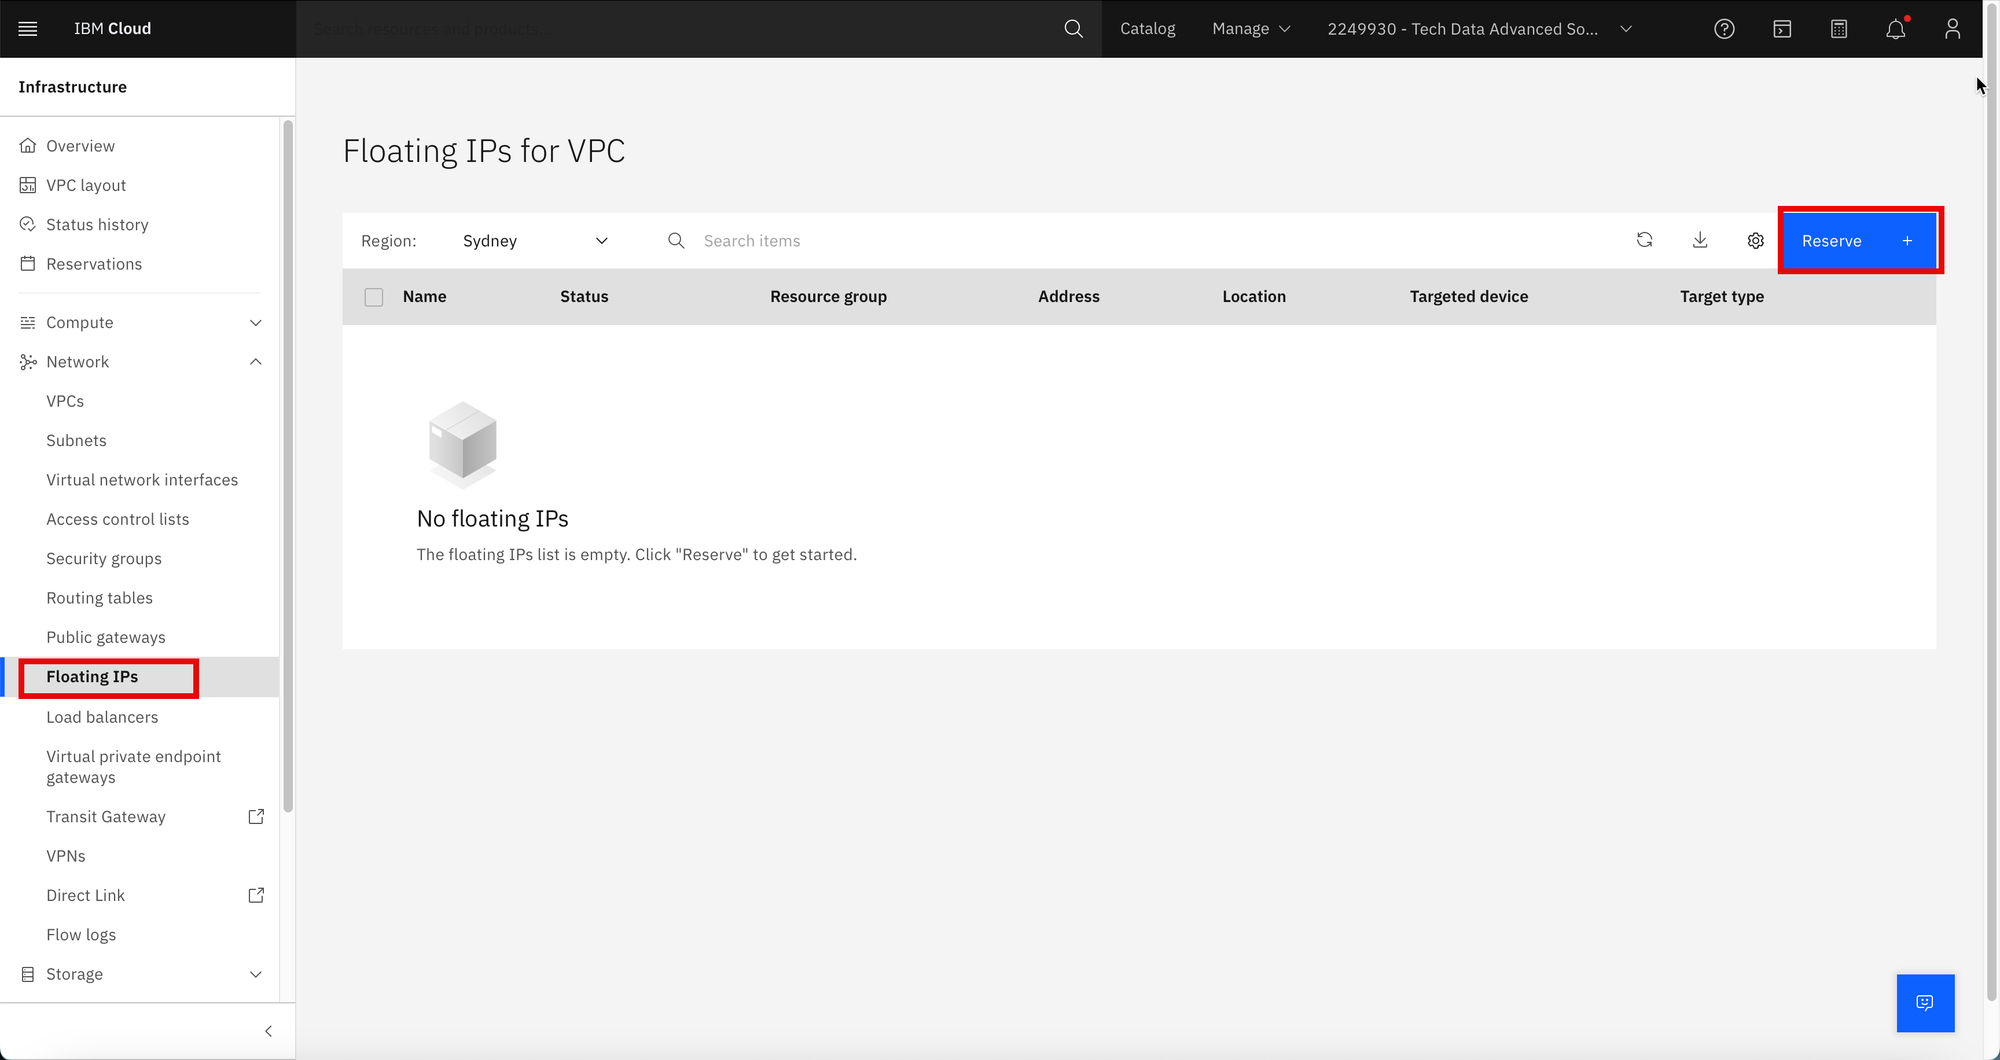
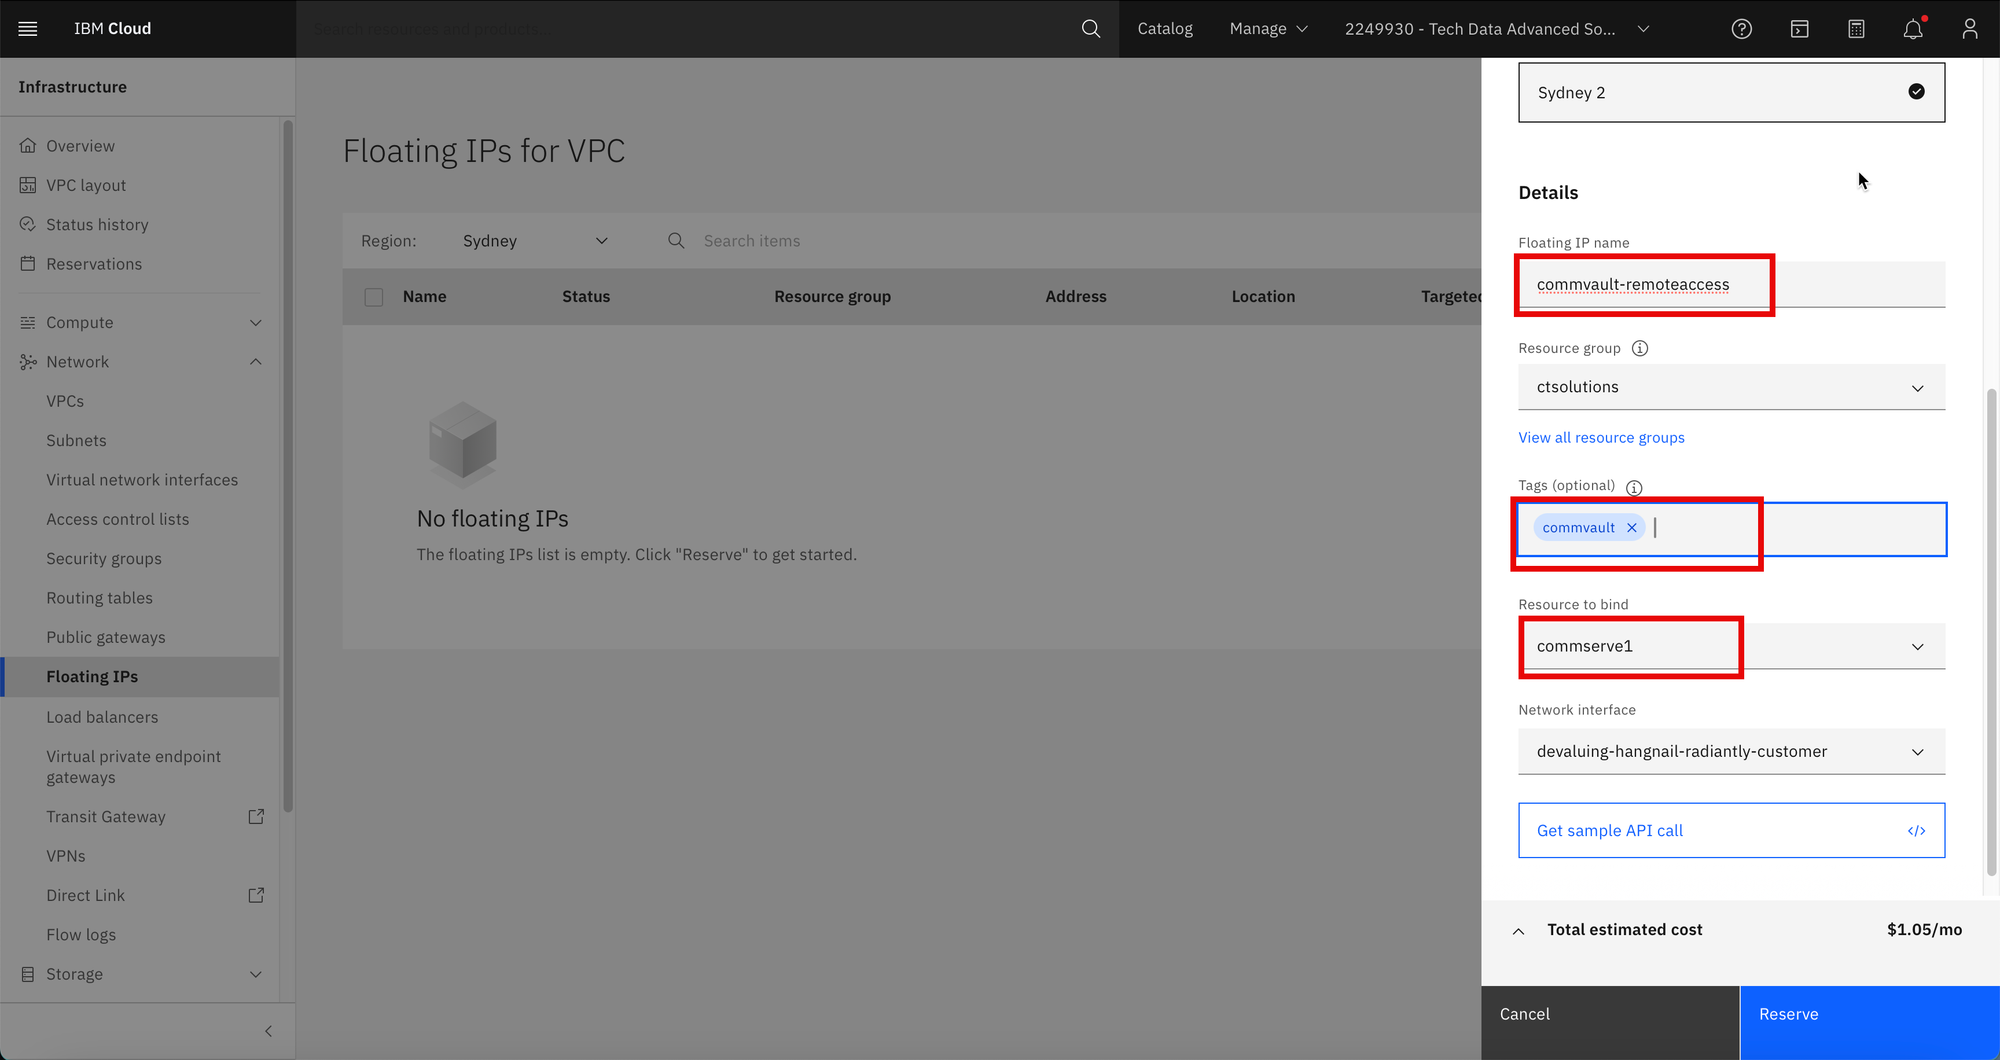
Step 9
Confirm the Geography details. Fill in the Floating IP name. Fill in a tag for the resource (Optional). Choose the instance for the Resource to bind field.
Click Reserve.
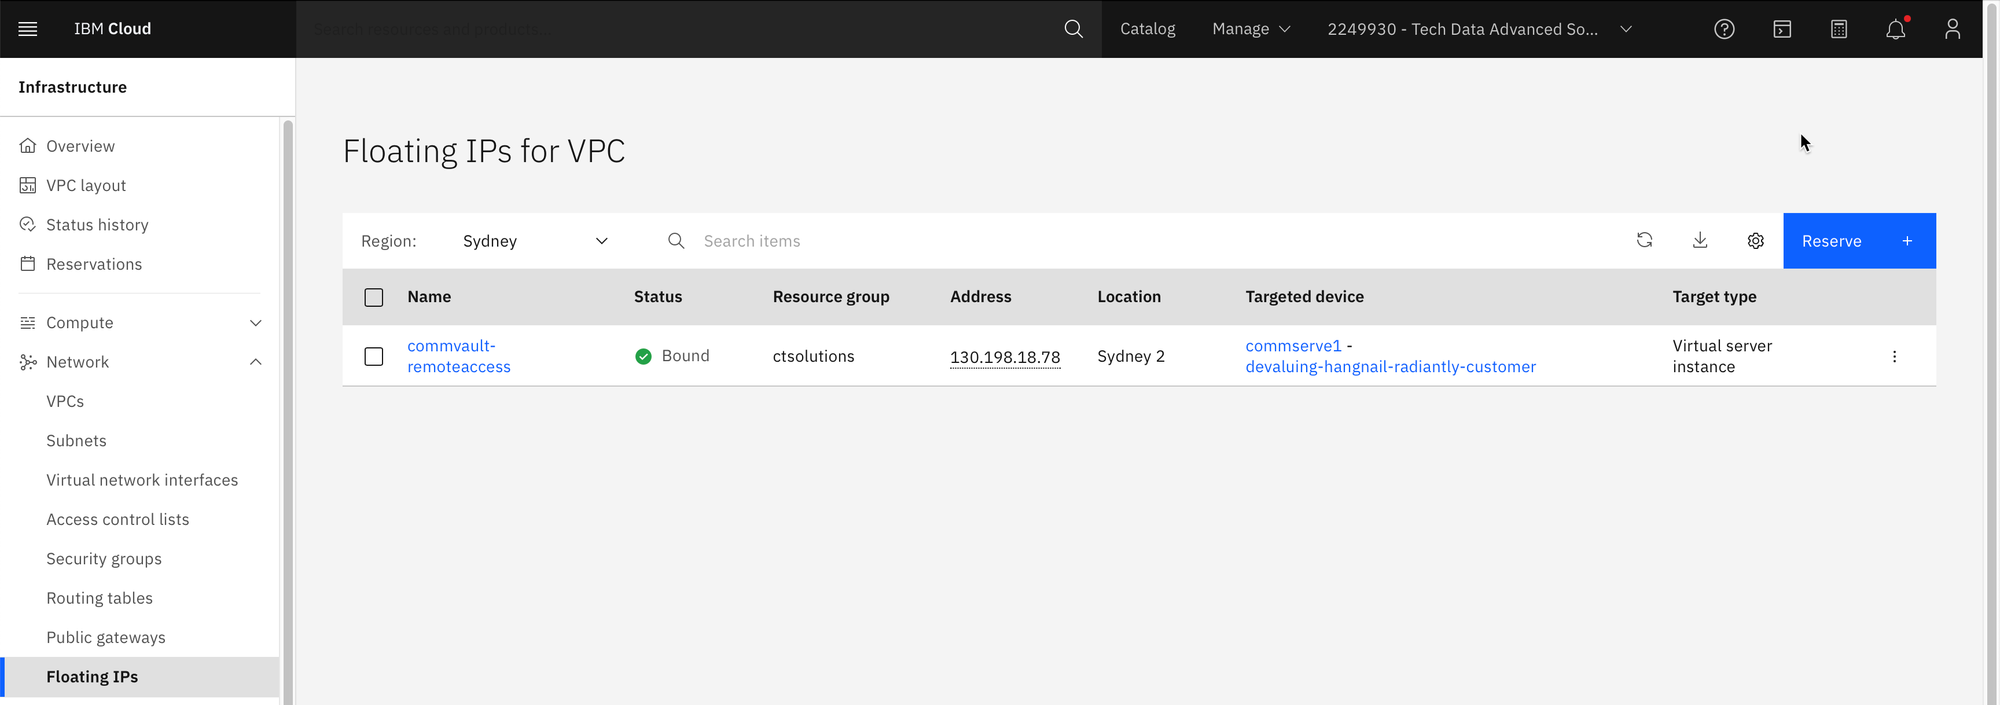
The Floating IP will now be created.
Step 10
Ensure you have the Windows Server administrator password available.
On the IBM CLI desktop command line, type in the following command.
ibmcloud is instancesibmcloud is instance-initialization-values <instance-id> -private-key @<path to key>The command output will be similar to this screen shot. The Password line of the output is the Windows administrator password.

Step 11
Now the exciting part!
Add the Windows Floating IP address and Administrator credentials.
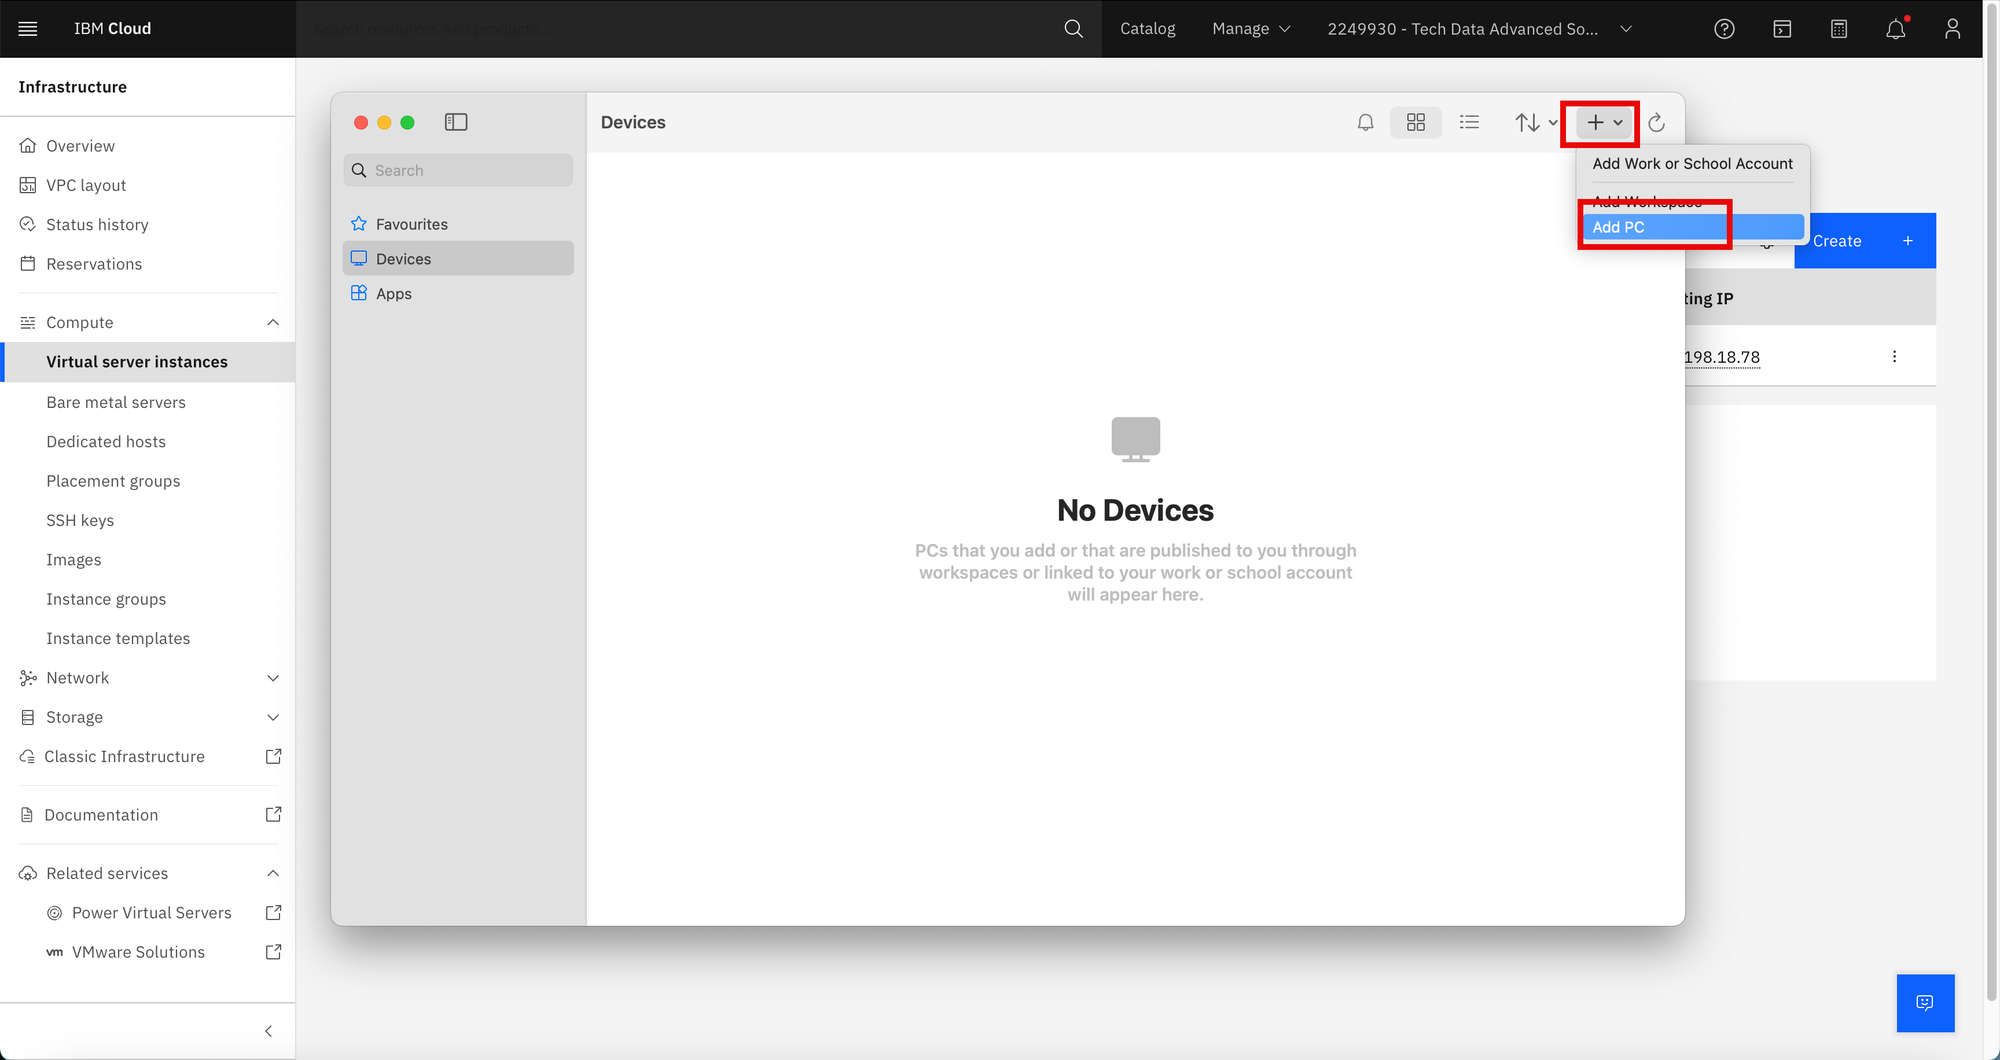
I use Windows App as my remote desktop app.
Click on the plus icon and click on Add PC.
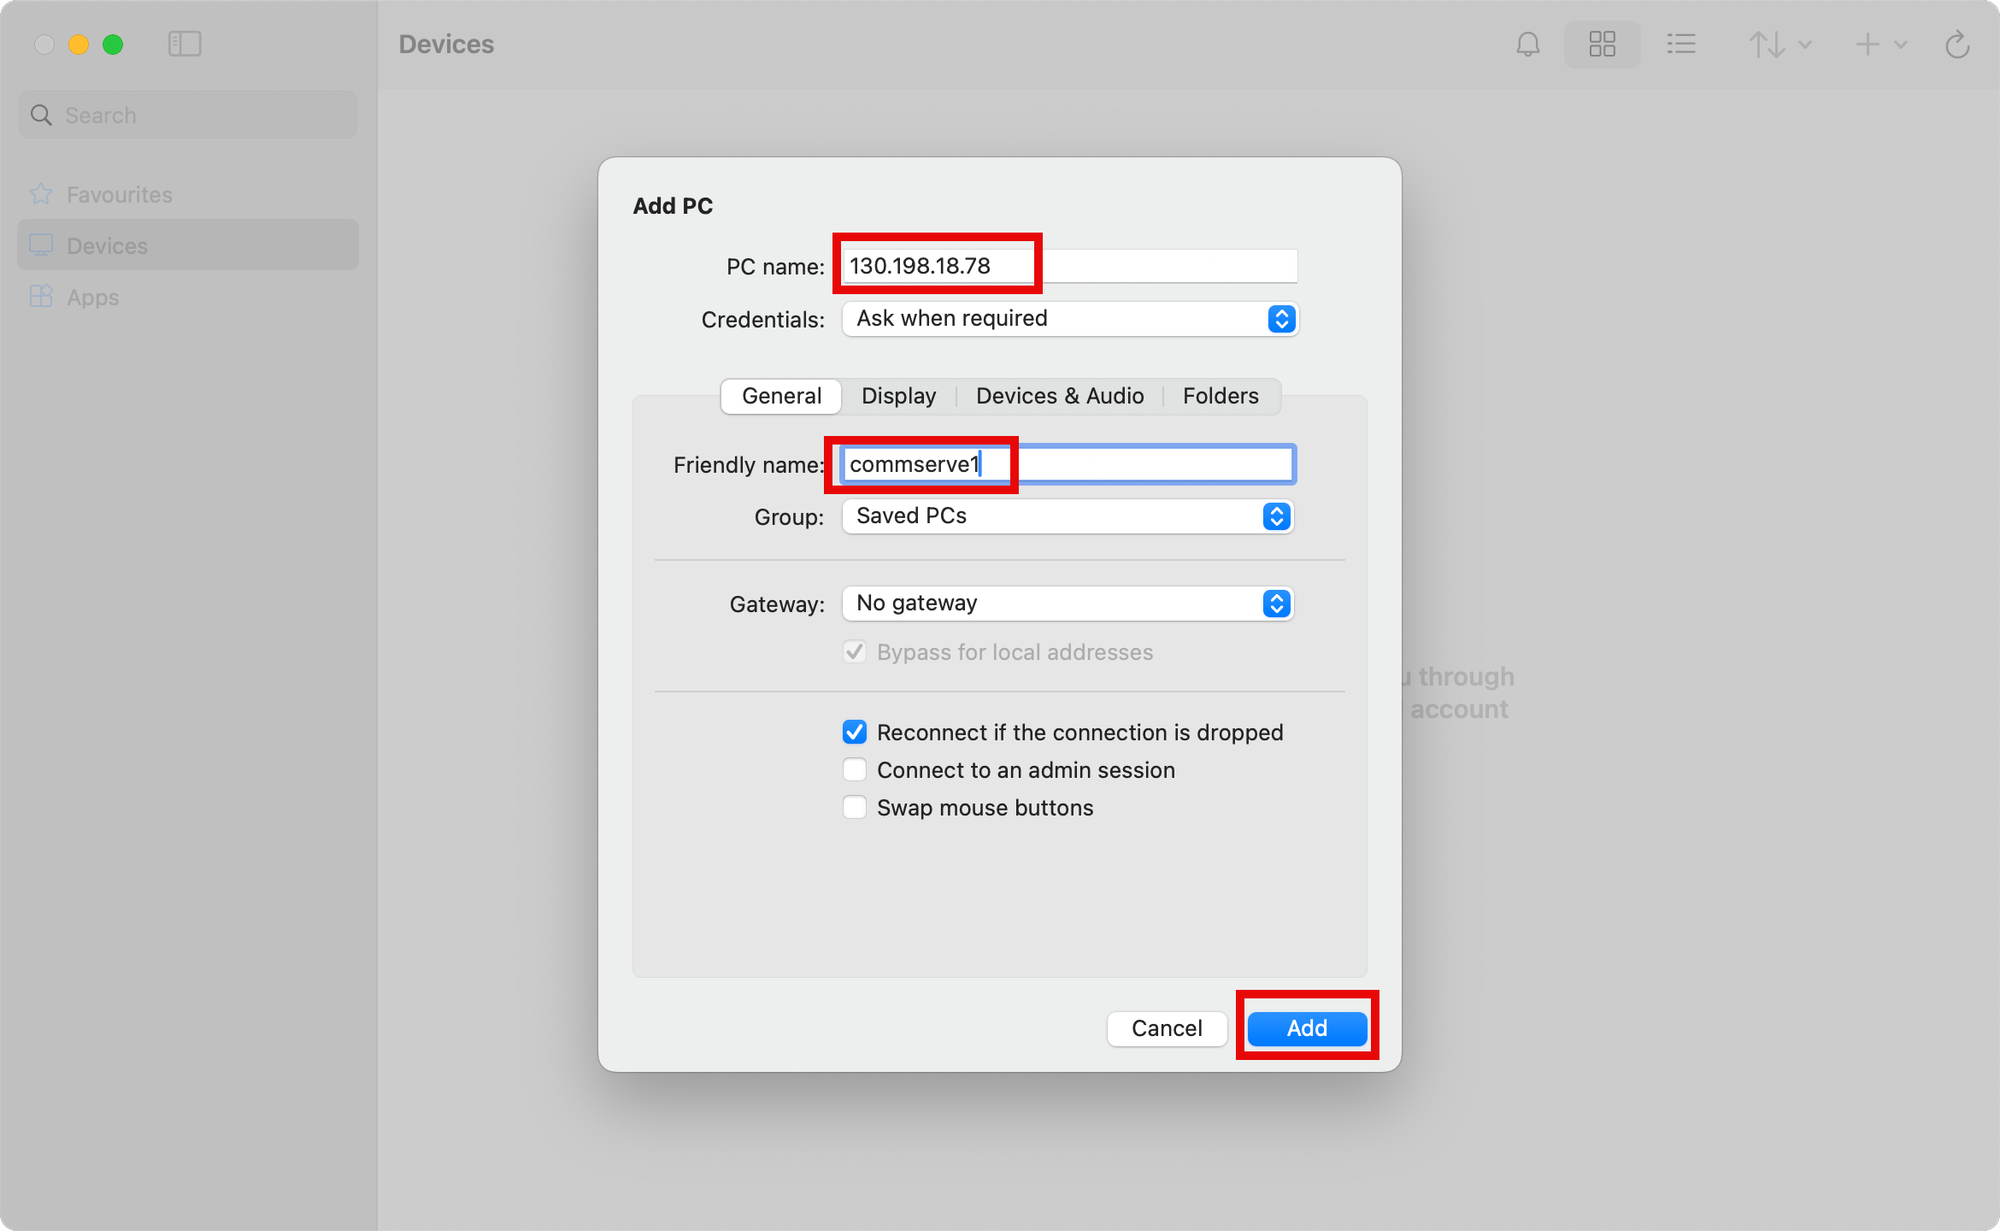
Step 12
Enter the Floating IP address on the PC name field. Type in the hostname on the Friendly name field. Click Add.
Step 13
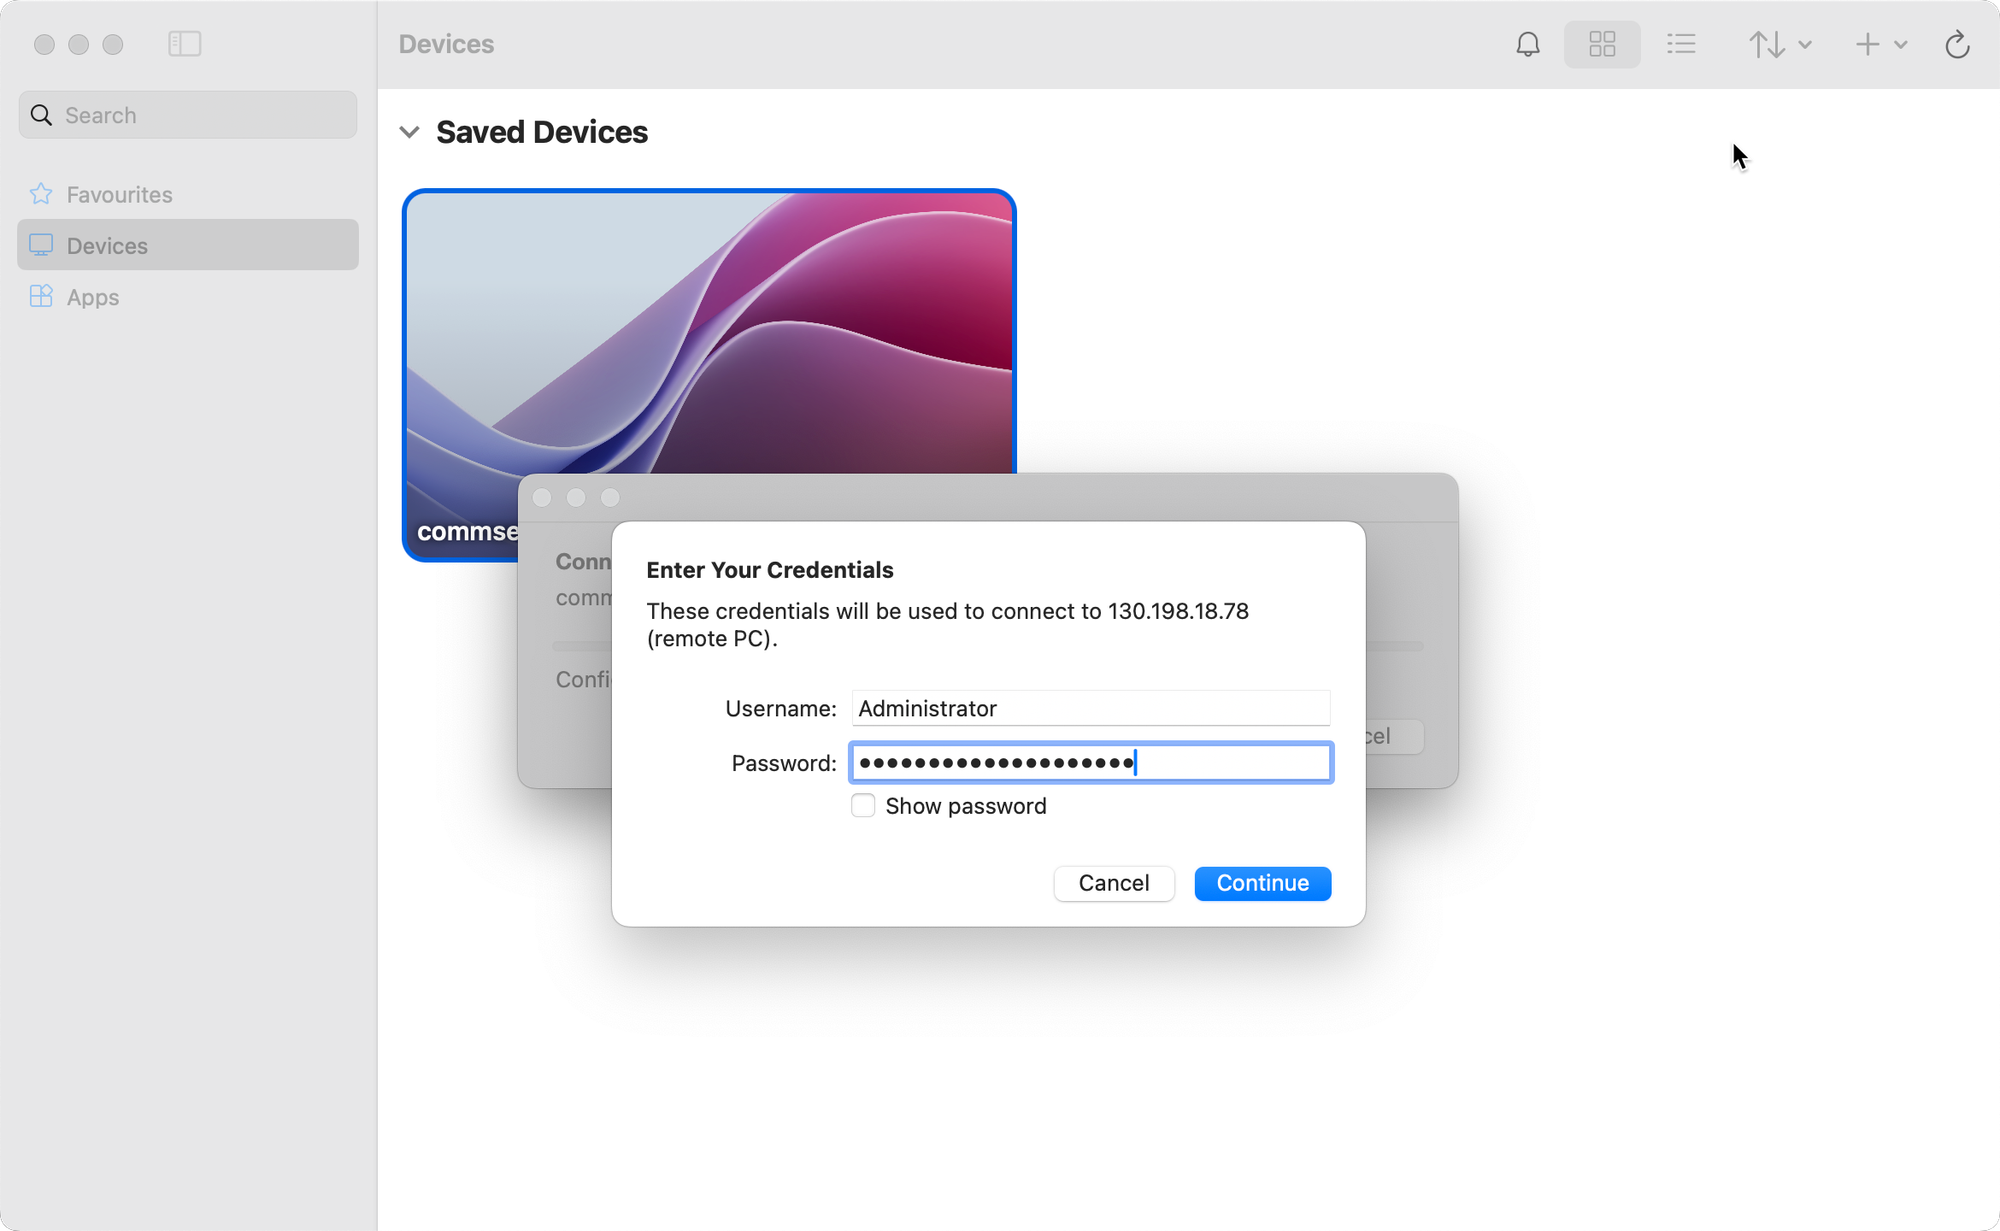
Double-click on the server. Enter the Administrator password.
Click Continue on the certificate prompt.
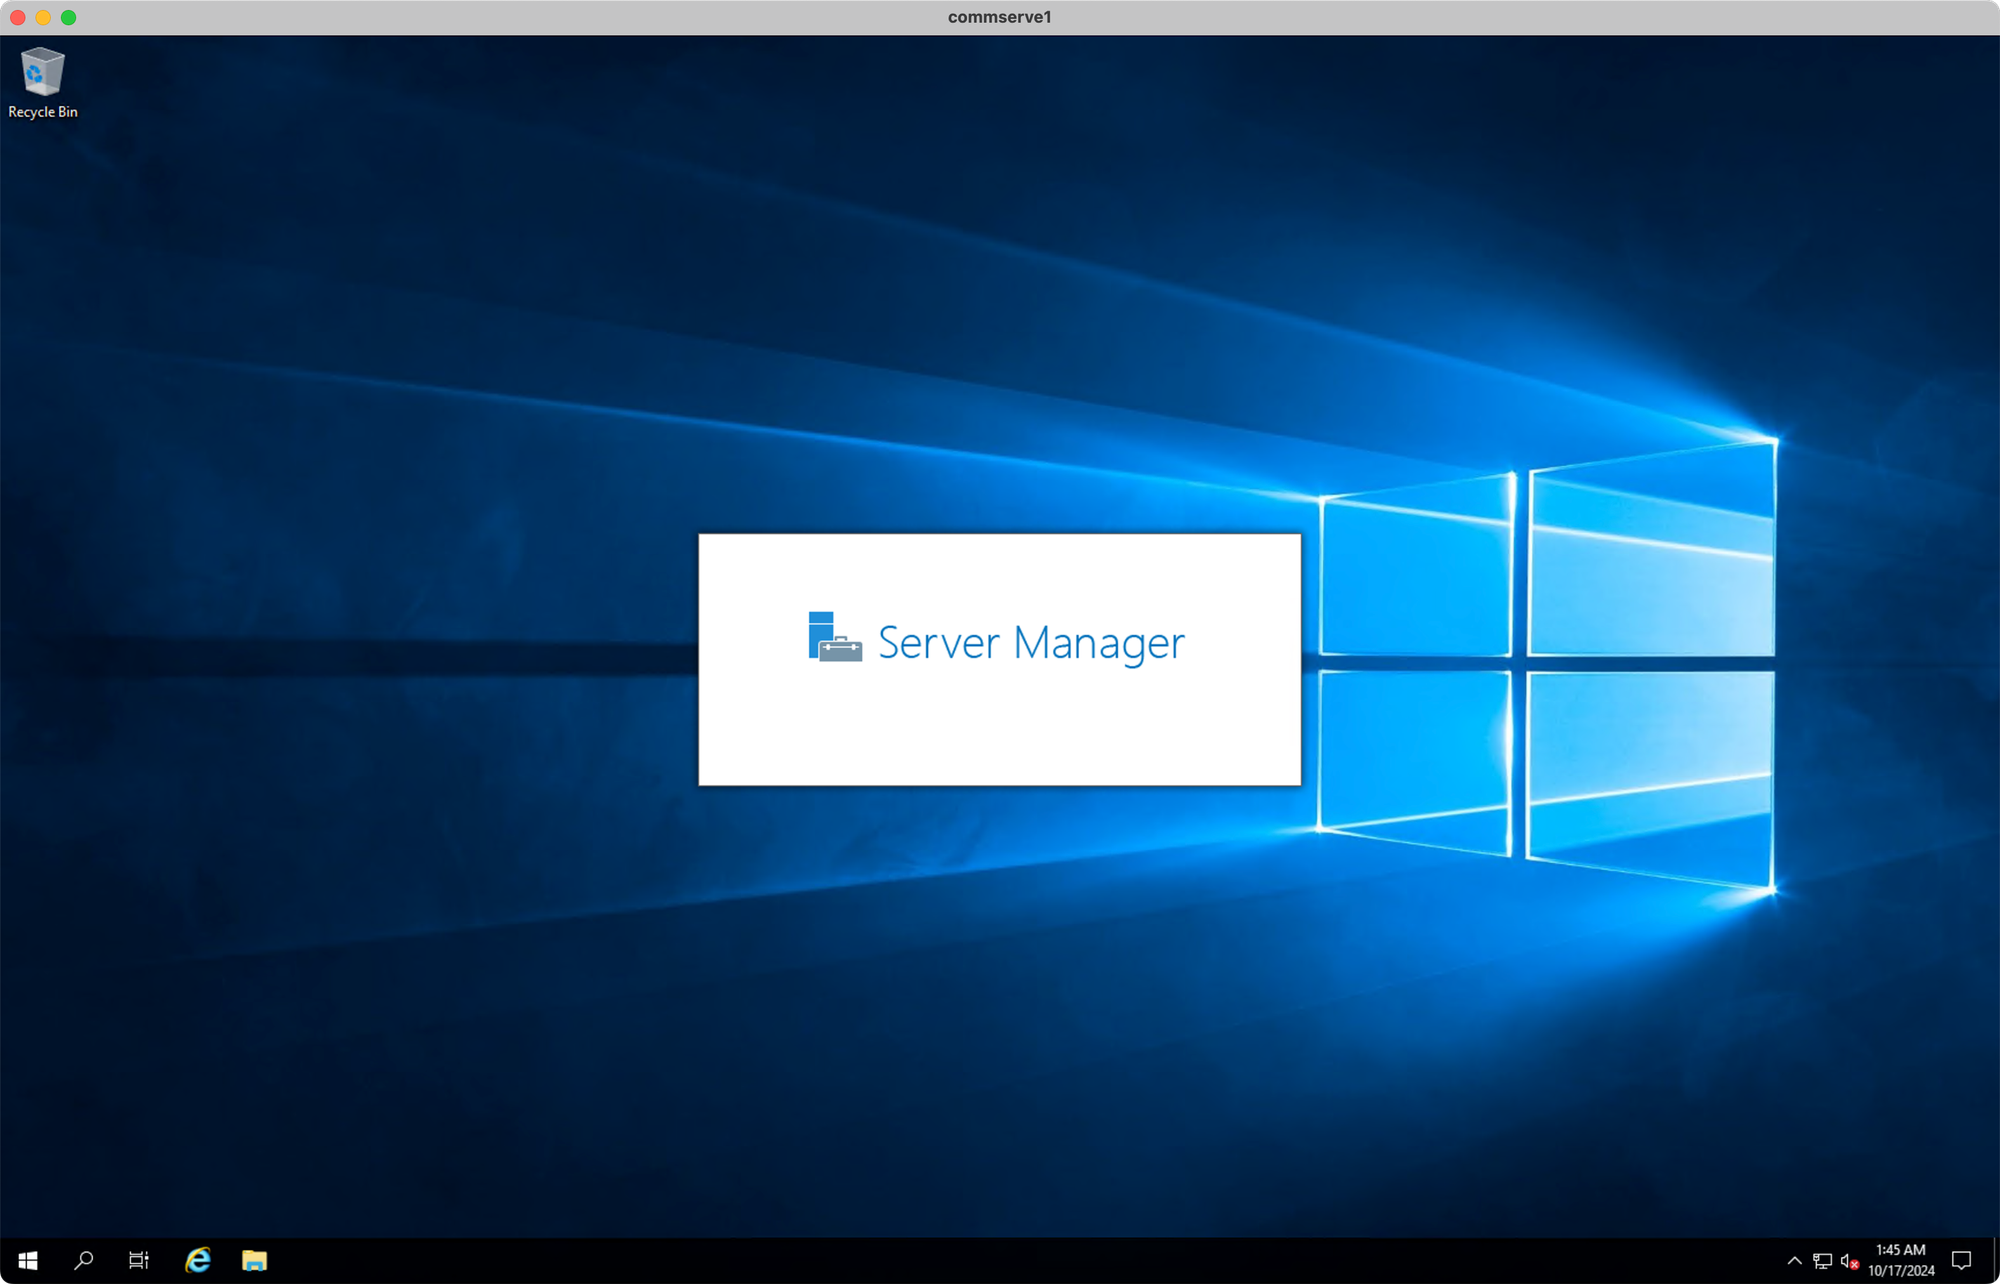
Step 14
You have successfully logged on the IBM Cloud Windows instance!