Setting up multiple Ghost blogs on 1 server using podman pods

As part of my job, I have had to build up my knowledge of kubernetes. I also wanted to find a way of documenting and sharing what I learn. I also want to know how much server resources I will end up using in case I decide to run the server instance with a cloud provider.
My research for my use case led me to the Ghost blogging platform https://ghost.org/ and the podman project.
Please note, this is not a supported way of running multiple ghost blogs in a single server. This approach requires some technical background knowledge and experience in using Linux.
If you are looking for a cloud server hosted option, I recommend reading Jayd Lawrence's approach, https://jaydlawrence.dev/setting-up-2-ghost-blogs-on-1-server/.
Why podman?
From what I have been reading on the Red Hat Developer website, podman enables me to run the ghost blog and its associated mysql database docker containers into its own pod as rootless containers. These pods can also be managed independent of each other.
My overall plan is to build the following,
* a site1 blog pod
* a site2 blog pod
* a plausible analytics pod
* and a Caddy reverse proxy server
All of these running on a single Linux server.
First step,
The first step assumes you have already built your Linux server. In my case, I built a RHEL 9 server. I installed podman and podman-compose packages. I created a non-privileged user called podmantest. I also configured and connected VS Code on my Windows laptop to help with editing the different configuration files.
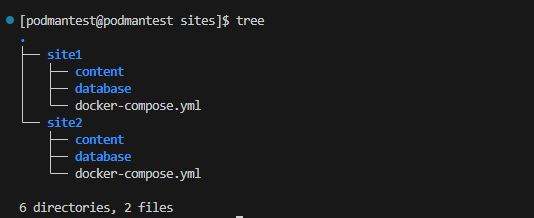
I created a directory structure as shown in this screenshot.
Building the first site,
Change directory to site1 and create the docker-compose.yml file.
This is a very simplified build. I suggest looking up the different environment options to suite your specific needs.
https://hub.docker.com/_/ghost/
https://ghost.org/docs/config/#running-ghost-with-config-env-variables
version: '3.3'
services:
blog:
image: ghost:5
restart: always
ports:
- 8080:2368
volumes:
- ~/sites/site1/content:/var/lib/ghost/content:Z
environment:
database__client: mysql
database__connection__host: database
database__connection__user: ghostuser
database__connection__password: 'somesecurepassword{replace me}'
database__connection__database: ghostdb
url: http://blog.site1.com
NODE_ENV: test
depends_on:
- database
database:
image: mysql:8.0
restart: always
volumes:
- ~/sites/site1/database:/var/lib/mysql:Z
ports:
- "13928:3306"
environment:
MYSQL_ROOT_PASSWORD: 'somesecurepassword{replace me}'
MYSQL_DATABASE: ghostdb
MYSQL_USER: ghostuser
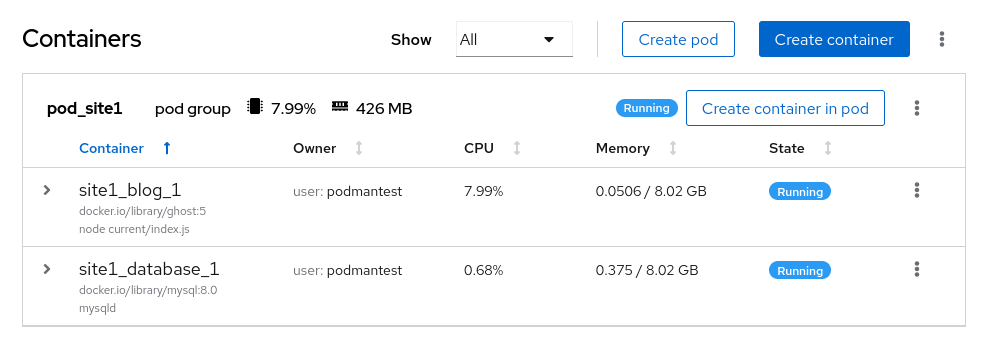
MYSQL_PASSWORD: 'somesecurepassword{replace me}'podman-compose --in-pod true up -dThis will create a pod using the directory name as shown on the screen.

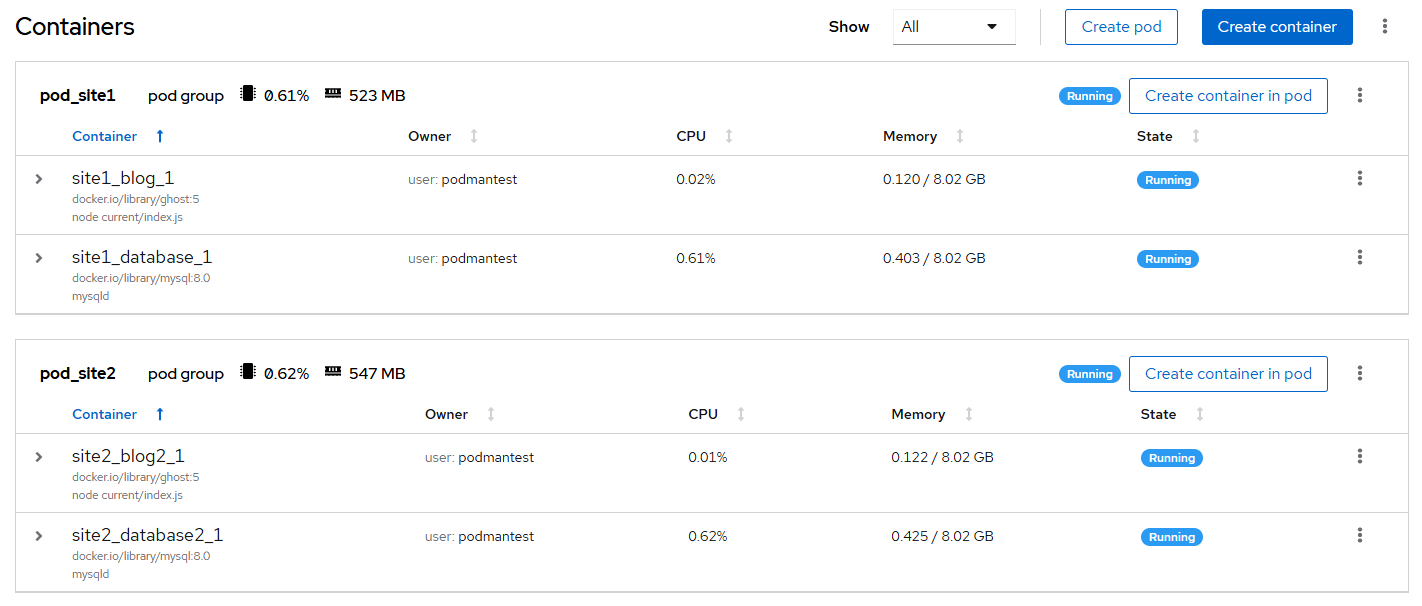
Here is the screenshot from the cockpit interface.
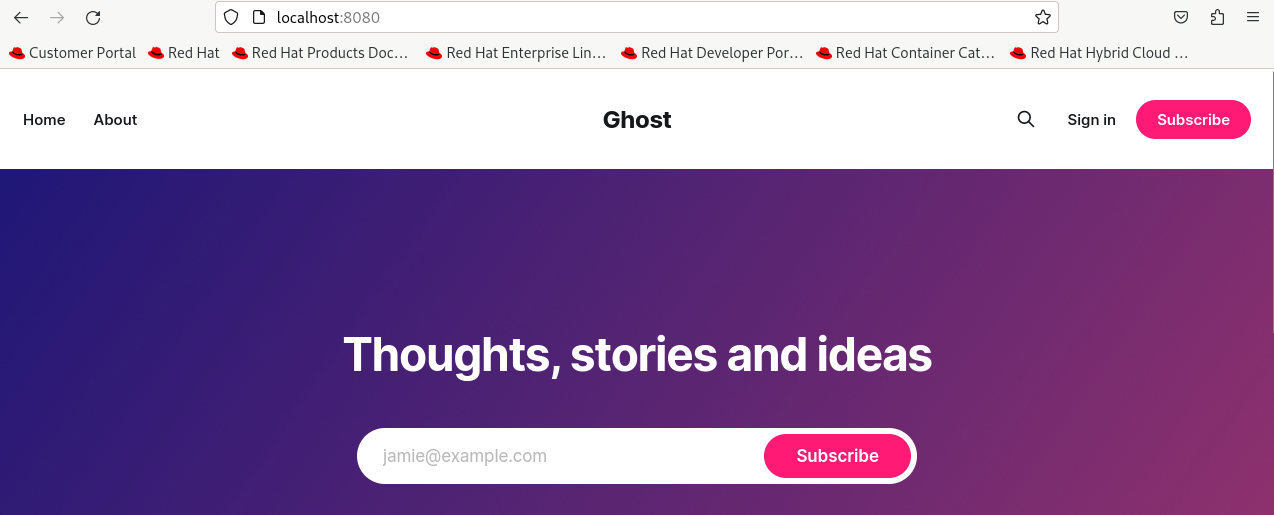
Tip #1 - Before looking up the url link, make sure you modified the server firewall to allow the associated port.
firewall-cmd --permanent --add-port=8080/tcp
firewall-cmd --reload
Lookup url link http:<YOUR IP ADDRESS>:8080
Building the second site,
Change directory to site2 and create the docker-compose.yml file.
version: '3.3'

services:
  blog2:
    image: ghost:5
    restart: always
    ports:
      - 8081:2368
    volumes:
      - ~/sites/site2/content:/var/lib/ghost/content:Z
    environment:
      database__client: mysql
      database__connection__host: database2
      database__connection__user: ghostuser2
      database__connection__password: somesecurepassword-replaceme
      database__connection__database: ghostdb2
      url: http://blog.site2.com
      NODE_ENV: production
    depends_on:
      - database2

  database2:
    image: mysql:8.0
    restart: always
    volumes:
      - ~/sites/site2/database:/var/lib/mysql:Z
    ports:
      - "13929:3306"
    environment:
      MYSQL_ROOT_PASSWORD: somesecurepassword-replaceme
      MYSQL_DATABASE: ghostdb2
      MYSQL_USER: ghostuser2
      MYSQL_PASSWORD: somesecurepassword-replaceme
Reminder - please make sure to replace the passwords.
Continue by following the same steps for site1.
You should now see the second pod.

For more information, here are my other blog recommendations,